

Sometimes you can delete a post on your Facebook account and no longer see it. What are the ways to recover deleted posts on Facebook and how can we recover deleted posts?
Facebook is the largest social network in the world with more than 25.5 active users. This multi-platform social network sends millions of posts daily, each with its image or video, or just plain text. Sometimes you post on Facebook and it suddenly deletes you for whatever reason. You can bring it back to your page. But how to recover deleted posts on Facebook is how and in general you can do it.
How to recover deleted Facebook post
Facebook manages activity
The first way to recover deleted posts on Facebook is to use the activity message in the Facebook app. By doing this, I will never allow any post to be saved on your phone within 30 days, even if it is completely deleted, and do the recovery whenever you need it. To do this, follow these steps:


- Launch the Facebook app on your phone and go to your profile page and tap the three dots
- Select the Login activity option and then tap Activity Manager
- Go to your posts section and delete any posts you can and then click Trash
- From this section, by selecting the option to transfer to the trash, you can move the deleted post to the trash.
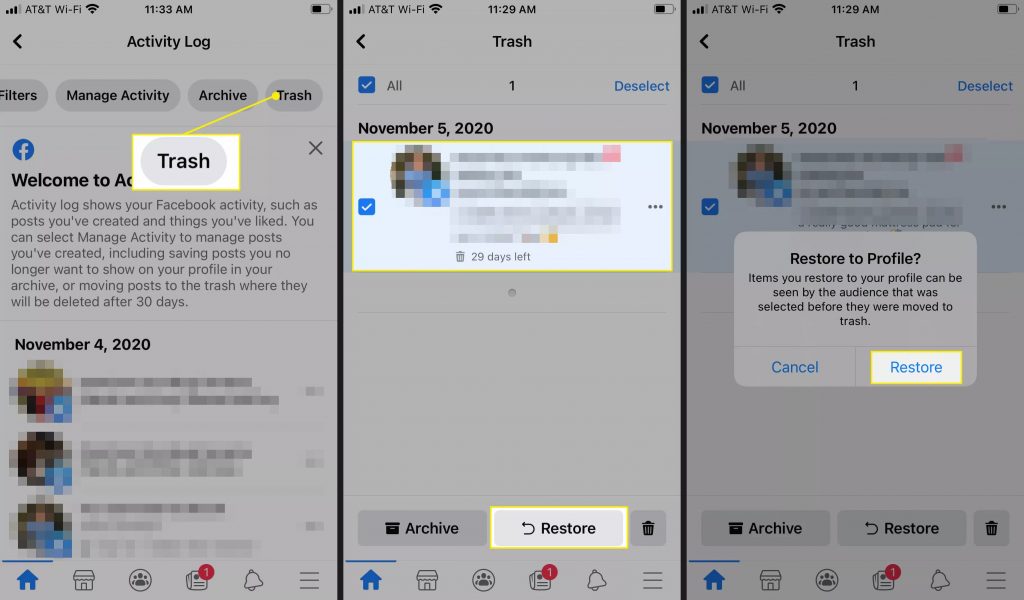
- Now to recover deleted posts can be deleted as more profile option and select the login activity section and then delete. You can use this method to restore or restore it up to 30 days after deleting the post.
Find deleted posts on Facebook
If you do not know how the Facebook post was deleted, there are other ways to do it. For example:
You can start by finding the original post on which the razor was made and use the same original post on Facebook. Because this method is possible if you are distributed from another post in the subscription.
The second method is to check the email. This way you can find the main link of the post that was posted on Facebook and send it again.
Other ways to recover deleted posts on Facebook
There are other ways to retrieve Facebook posts. In this way, you can request the original post to be sent to you through your friends who have saved the post. Be sure to send a message to each of your friends who have seen this post to see who has already saved your post for you to play the game post this way.
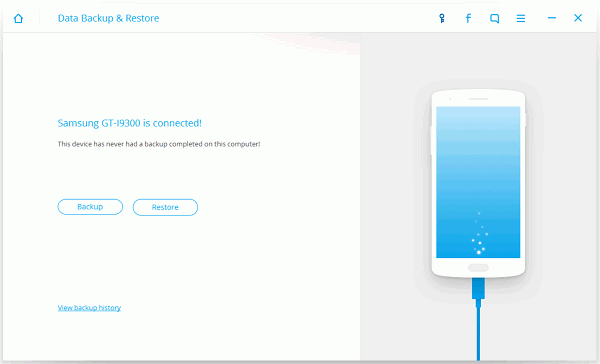
Make a backup of your Facebook account

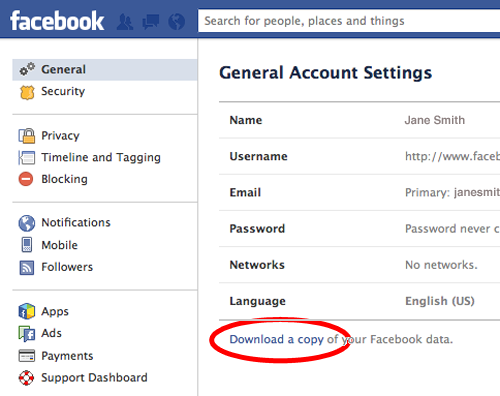
You can also use your Facebook account to directly make a full backup to recover if the post or image is deleted. For this purpose, log in to your account through the Facebook browser version and click on your account at the top.
Then select the account settings option and select a copy of the Facebook account Download
Finally, start the My Archive option.
Now you will be asked for your Facebook password and you will be sent full information from your account and all posts if you restore this backup whenever you want to delete your post.
Conclusion
In general, the Facebook method does not provide you with text to retrieve deleted posts. Unlike Instagram, where you can easily play your post in 30 days, you can make the procedure a little harder on Facebook, but through this article, you can easily play your post.


