Are you trying to get your computer to work better? Putting in an M.2 SSD is one of the best ways to get faster speeds and better general performance. Following this detailed guide, we will show you how to install M.2 on PC. After reading this piece, you’ll know how to improve your system and be ready to enjoy the benefits of lightning-fast storage.
How to Install M.2 on PC?
The speed of your PC can be greatly improved by adding an M.2 SSD. Faster storage speeds are great for everyone, whether you’re a gamer, a content maker, or just a power user. Please read this guide carefully as it contains detailed directions on how to install an M.2 SSD. This will make sure that your upgrade goes smoothly.
Learning About M.2 SSDs
It’s important to know what an M.2 SSD is and how it’s different from other storage choices before you start the installation process. The M.2 slot on your motherboard lets you add an M.2 SSD, which is a small and thin solid-state drive. The read and write speeds of these drives are faster than those of regular hard drives and even SATA SSDs.
There are different shapes for M.2 SSDs, such as M.2 2242, M.2 2260, and M.2 2280. The numbers show the size of the drive. The width is 22 mm and the length is 42 mm. M.2 2280 is the most popular form factor, and most modern motherboards can handle it.
Make Sure It Is Compatible
Before buying an M.2 SSD, you need to make sure that your PC can handle this type of storage. Some processors, especially older ones, don’t work with M.2 SSDs. You’ll need to find the M.2 hole on your motherboard to see if it works. In most motherboards, the M.2 slot is next to the CPU or PCIe spaces.
It is a thin, horizontal slot. Check the instructions that came with your motherboard to find out exactly where the M.2 slot is and what its requirements are. Also, check to see if your motherboard supports either the PCIe or SATA link for M.2 SSDs. This will affect the drive you choose.
How to Pick the Best M.2 SSD
It’s time to pick the right M.2 SSD for your machine once you know it will work. M.2 SSDs come in both PCIe and SATA versions, with PCIe having faster speeds. When choosing an SSD, you should think about your wants and your budget.
You should pick a capacity that fits your storing needs, but keep in mind that bigger capacities usually cost more. Lastly, choose the right port (SATA or PCIe) based on the specs of your motherboard.
Getting ready for installation
Before you begin the installation process, gather all the necessary tools and materials. You’ll need a compatible M.2 SSD, a screwdriver, and an anti-static wrist strap (optional but recommended). It’s also a good idea to back up your data to ensure it’s safe during the installation process.
Opening Your Computer Case
To access the internal components of your PC, you’ll need to open the PC case. Before doing so, power off your computer and unplug the power cord. If you’re using a laptop, remove the battery as well. This step is crucial to prevent any electrical damage or accidents during the installation process.
How to Find the M.2 Slot
With the PC case open, it’s time to locate the M.2 slot on your motherboard. The location of the M.2 slot may vary depending on the motherboard model, but it’s typically found near the CPU or PCIe slots. Consult your motherboard’s manual or documentation to find the exact location of the M.2 slot.
Look for a horizontal slot with a keying notch on one end. The M.2 slot may be labeled as “PCIe” or “SATA,” or both. Take note of the label, as it will determine the type of M.2 SSD you can install. For example, if the slot is labeled “PCIe,” you’ll need to purchase a PCIe M.2 SSD.
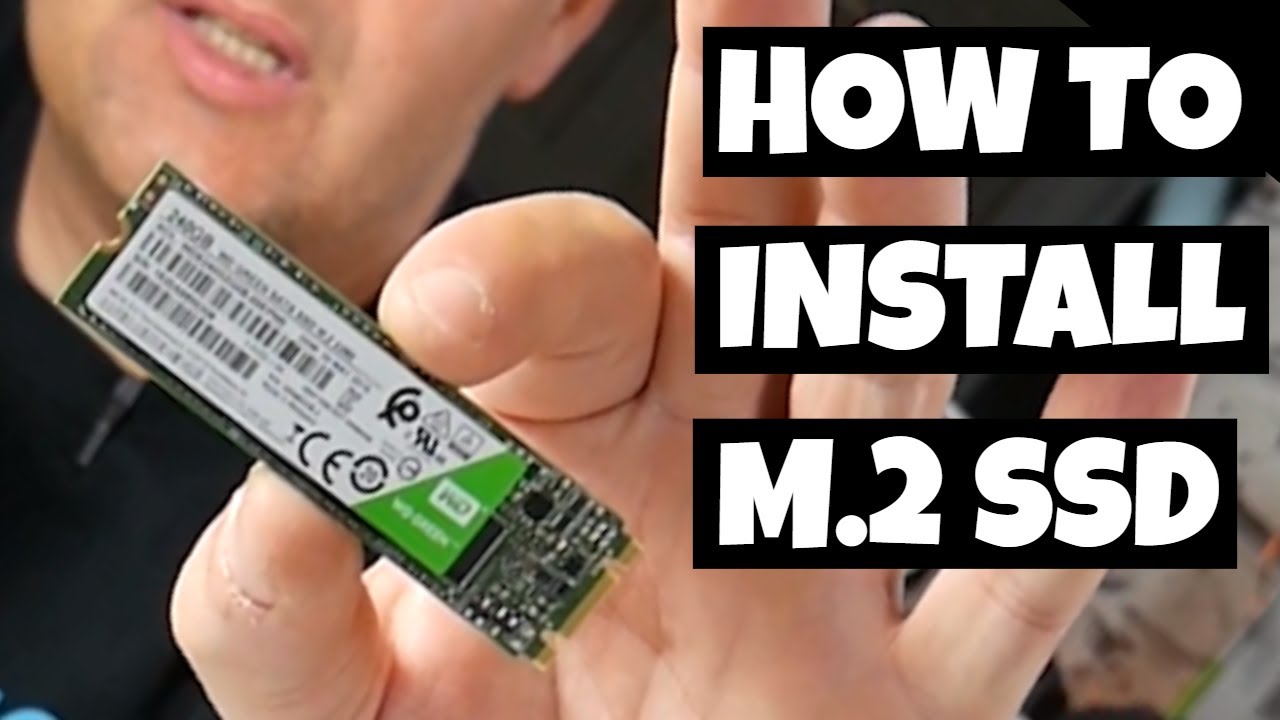
Installing the M.2 SSD
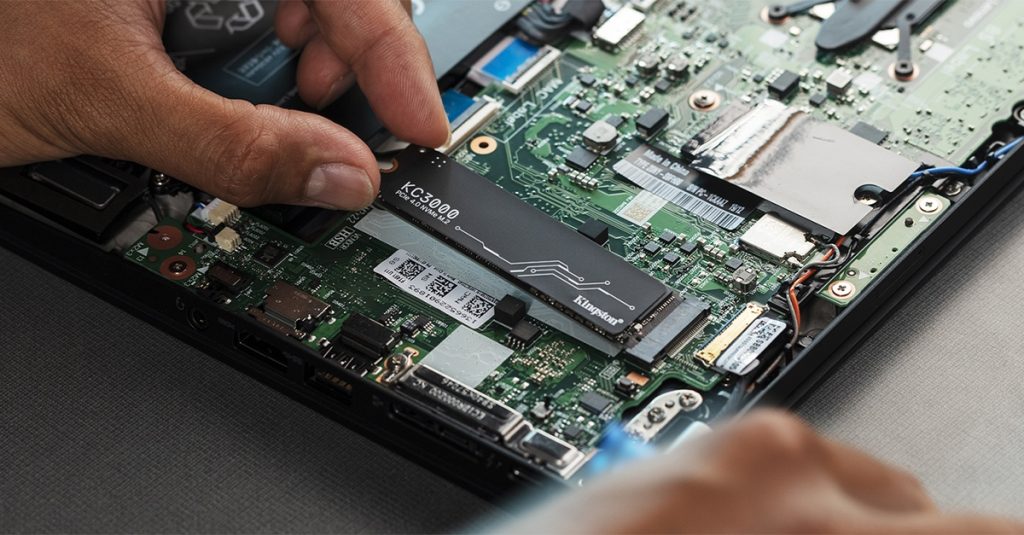
Now that you’ve located the M.2 slot, it’s time to install the M.2 SSD. Begin by removing any protective covers or shields from the M.2 slot. Place the SSD at a 30-degree angle and align the notches on the SSD with the keying notch on the M.2 slot. Gently insert the SSD into the slot, applying firm but gentle pressure until it is fully seated.
Putting the SSD in its place
To secure the M.2 SSD in place, locate the mounting screw that came with your motherboard or SSD. Insert the screw into the designated mounting hole near the SSD and tighten it until it is snug. Be careful not to overtighten the screw, as it may damage the SSD or the motherboard.
If your motherboard includes a heatsink for the M.2 slot, follow the manufacturer’s instructions to install it over the SSD. The heatsink helps dissipate heat generated by the SSD, ensuring optimal performance and longevity.
Closing the PC Case
Now that the M.2 SSD is safely in place, the PC case can be closed. Put the side panel back on and lock it with the screws or latches you took off earlier. Make sure that all of the connections are tight and that no cords are blocking the panel. Connect the power cord again and, if necessary, put the battery back into your laptop once the side panel is safely in place. Turn on your computer and move on to the next step to make sure your system can see the M.2 SSD.
Configuring BIOS Settings
After powering on your computer, enter the BIOS or UEFI settings. The key to access the BIOS may vary depending on your motherboard manufacturer, but commonly used keys include Del, F2, or F10. Consult your motherboard’s manual or documentation for the specific key to access the BIOS.
Once in the BIOS settings, navigate to the storage or boot options. Look for an option related to M.2 devices or NVMe drives. Enable the M.2 slot or set the storage mode to recognize the M.2 SSD. Save and exit the BIOS settings to apply the changes.
Checking to See if SSD Works
Once your computer starts up, you should make sure that the M.2 SSD is found by the system. To get to the Disk Drives section, open the Device Manager in your working system. Check to see if your M.2 SSD is mentioned as a valid storage device. Some other ways to check the health and performance of your M.2 SSD are to use disk control tools or benchmarking software. This will help you figure out how well the SSD is working and whether it needs any more tweaks or changes.
In Closing
Feel good about yourself now that you know how to install M.2 on PC. You should back up your data and change the settings on your SSD often to keep it running well and your data safe. M.2 SSDs will continue to be a big part of making computers better as technology gets better. Have fun with your new M.2 SSD, and learn more about how faster and better storage can help you.