Making YouTube videos is a fun hobby that is growing in popularity. There are all kinds of videos made by people from all walks of life – from intricately edited to raw phone footage. So, if you want to try YouTubing and put at least some editing into your work, a voice-over video would be a good place to start. This is a popular and relatively easy format, and, thanks to high demand, there’s a great supply of apps that can help you with it.
Make a Voice-Over Video for a YouTube
An abundance of options turns picking one into a chore. But that’s what we can help you with! Keep reading and discover 4 apps for different platforms that will let you make a voice-over video in no time.
For iOS – iMovie

Every iOS-powered device has a built-in video editor – iMovie. Although it is a vendor-supplied app, iMovie offers a very decent tool kit to make quite intricate montages. In addition to this, it allows you to record voice-overs with no third-party software. Here’s how:
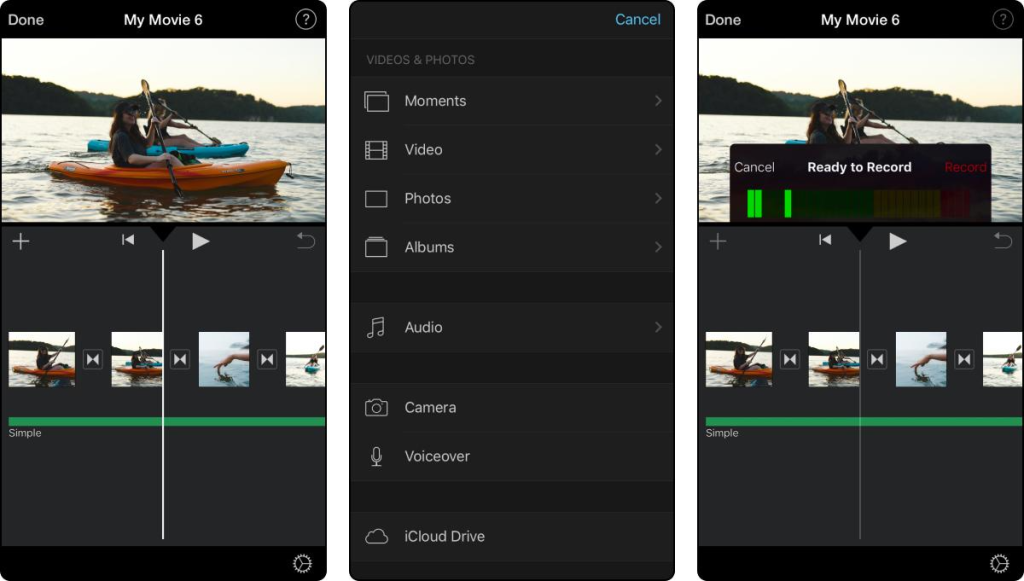
Step 1. Run the app and create a new project.
Step 2. Tap “+” and pick a video you want to edit. Then tap the part of the clip on the timeline where the voice-over will start.
Step 3. Tap “+” above the timeline, then pick the Voiceover tool from the pop-up menu.
Step 4. Tap the Record button and start talking. When you’re done, tap Stop.
Step 5. Listen to the recording. If everything is fine, tap Accept and then Done to save your work.
For Android – KineMaster

KineMaster is a well-known and well-crafted app for video editing on hand-held devices powered by Android. Easy, quick, and free for the most part, KineMaster offers enough features to make eye-catching YouTube content. Recording a voice-over is as easy as it gets. Here’s how it is done:
Step 1. Install and run the app on your device.
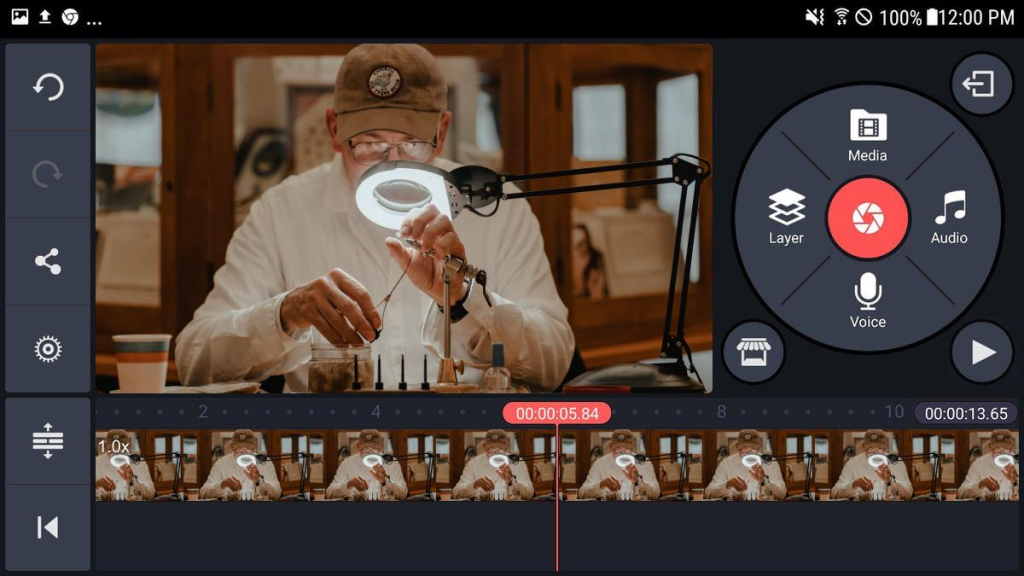
Step 2. Tap the “+” icon to create a new project. Then select an aspect ratio.
Step 3. Tap the Media button and select clips, images, and audio that you want in your youtube video.
Step 4. To record a voice-over, tap the Voice button. Then tap Start to begin recording and Stop to end it.
Step 5. Cut and trim the recording as you see fit, then export your work.
For PC – Clipify

Clipify is a video editor designed for a wide audience with varying skills and backgrounds. It features fundamental tools as well as more advanced features, like color correction, chroma-key, and more. A handy voice-over tool is also part of the package. And it’s free! Here’s how to use it:
Step 1. Download and install Clipify, then run the program and create a new blank project.
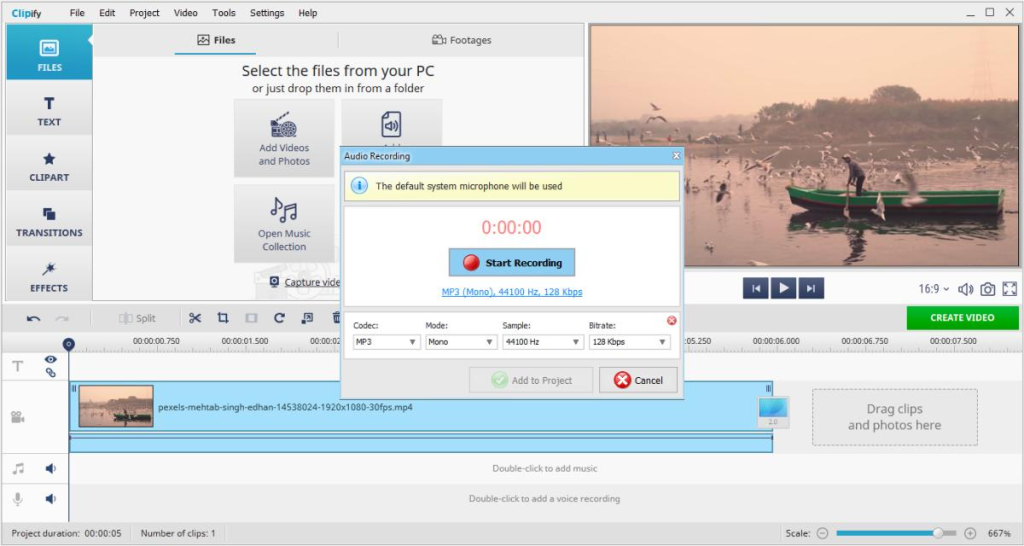
Step 2. Click the Add Videos and Photos button and open your clip. Then double-click the voice track on the bottom part of the timeline to run the Audio Recording tool.
Step 3. Adjust codec, mode, sample, and bitrate if you need and click Star recording to choose a folder to store the audio and begin. Use the Pause and Stop buttons to control the recording. Click Add to Project to add audio to the timeline.
Step 4. Right-click the audio on the timeline to access various editing tools and adjust the recording’s duration, volume, and other parameters as you see fit.
Step 5. To export your work, click Create Video, choose a preset for YouTube, then click the export button.
For Online Editing – Kapwing

If your phone or computer has no storage space to install extra software, you can try using online tools. One such tool, Kapwing, offers enough features to stand on par with installable apps. The only major drawback is that you must have a stable and fast Internet connection to work. In terms of audio recording, Kapwing is as easy as any other app on our list. Here’s how it works:
Step 1. Go to the official website and click the Start Editing button. Then upload your clips.
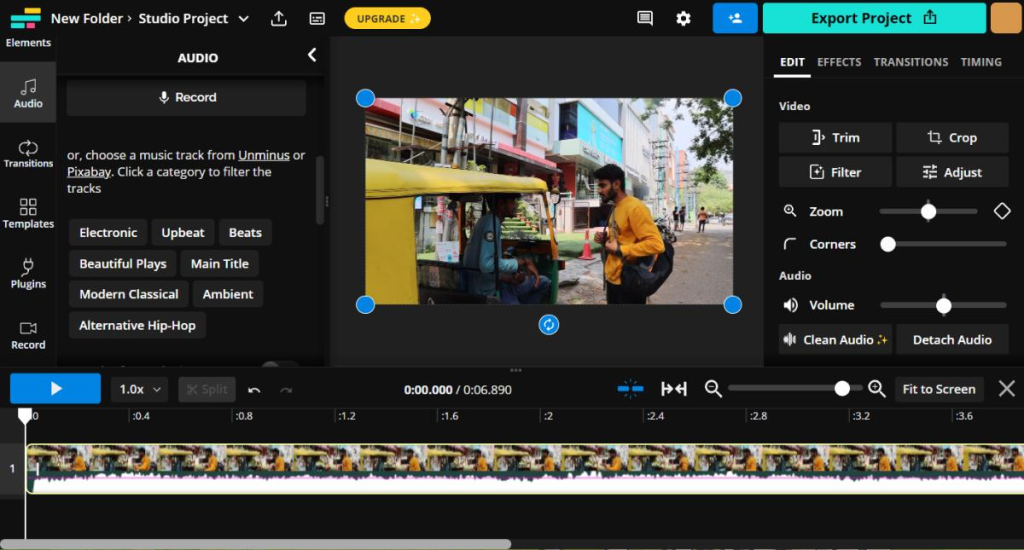
Step 2. Go to the Audio tab. Then click Record, select your mic, and click the REC button. Click the button again to stop.
Step 3. Select recorded audio on the timeline to adjust its speed, volume, and other parameters. Then drag the audio to the needed point on the timeline.
Step 4. Click the Export Video button to save your clip as an MP4 file.
Final Words
So, if you want to create a montage with a voice-over, you are now equipped with tools and basic knowledge. Just pick a program that fits your needs and go for it. And should you want to take your editing one step further, you can read a more in-depth guide on how to make a voice-over video. There you’ll find more useful tools and editing tricks that will help you create eye-catching videos.
