SSD is becoming more and more common because it works faster and is more reliable than regular hard drives. But one problem that a lot of people have is that the SSD doesn’t show up in Windows 11. This can be annoying because it keeps people from getting to their files and making the most of their SSD. This guide will look at the best ways to fix SSD not showing up in Windows 11 and give you great instructions on how to fix the problem.
How to Fix “SSD Not Showing Up” Error?
Before we talk about how to fix the problem, it’s important to know why the SSD might not be showing up in Windows 11. By finding the problem’s root cause, you can successfully deal with it and put in place the right solution. Here are a few common reasons:
- Bad links between hardware: It is possible that the SSD is not properly connected to the motherboard or power source of your computer. The SSD might not be found if the wires are too loose or the connectors are broken.
- Free disk space: The SSD might not show up in Windows 11 if it hasn’t been set up or divided up. Before the operating system can see unallocated drive space, it has to be formatted and given a name.
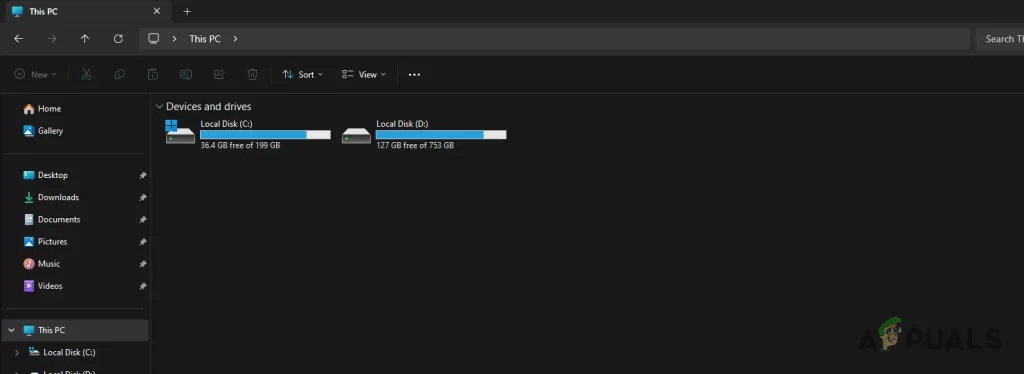
- Assigning drive letters: Windows gives storage devices drive letters so that they can talk to each other. If the SSD doesn’t have a drive letter or has drive letters that don’t match, it might not show up in File Explorer or Disk Management.
- Misconfigured BIOS settings: The SSD might not be recognized because the BIOS settings are not set up properly. This might happen if the SATA mode is set to IDE instead of AHCI, which might make the drive not work with other devices.
- Out of date SSD drivers: Windows 11 might not be able to find an SSD if the drivers are out of date or don’t work with the SSD. It is very important to keep your SSD drivers up to date for the best speed and compatibility.
Now that we know what might be causing the SSD not showing up problem in Windows 11, let’s look at how to fix it.
Solution 1: Check Hardware Connections
The first step in troubleshooting the SSD not showing up issue is to ensure that the hardware connections are secure. Follow these steps to check the hardware connections:
- Power off your computer and unplug the power cord
- Find the SSD when you open the case of your computer.
- Check the SATA data cable and power cable connections. Make sure they are securely connected to the SSD and the motherboard.
- If possible, try using a different SATA cable and power cable to rule out any cable-related issues.
- Close the computer case, plug in the power cord, and power on your computer.
- Check if the SSD is now detected in Windows 11.
By verifying the hardware connections, you can eliminate any potential issues caused by loose cables or faulty connectors.
Solution 2: Initialize the SSD
If the SSD is new or has not been initialized, Windows 11 may not recognize it. Initializing the SSD will prepare it for use and allow Windows to detect it. Follow these steps to initialize the SSD:
- Press the Windows key + R to open the Run dialog box.
- Type “diskmgmt.msc” and press Enter to open the Disk Management utility.
- In Disk Management, locate the SSD that is not showing up.
- If the SSD appears as unallocated space, right-click on it and select “Initialize Disk.”
- Select the appropriate disk initialization style (MBR or GPT) and click OK.
- Right-click on the unallocated space and select “New Simple Volume.”
- Follow the on-screen instructions to create a new partition on the SSD.
Once the initialization and partitioning process is complete, check if the SSD is now detected in Windows 11.
Initializing the SSD will prepare it for use by creating a partition and formatting it with a file system. This allows Windows to recognize and assign a drive letter to the SSD.
Solution 3: Assign or Change Drive Letter
If the SSD is not assigned a drive letter or has conflicting drive letters, it may not show up in File Explorer or Disk Management. Follow these steps to assign or change the drive letter:
- Open Disk Management by pressing the Windows key + R, typing “diskmgmt.msc”, and pressing Enter.
- Locate the SSD that is not showing up.
- Right-click on the SSD’s partition and select “Change Drive Letter and Paths.”
- If no drive letter is assigned, click “Add” and select a drive letter from the dropdown menu.
- If a drive letter is already assigned but there is a conflict, click “Change” and select a different drive letter.
- Click OK and check if the SSD is now visible in File Explorer.
Assigning or changing the drive letter ensures that Windows recognizes and communicates with the SSD properly.
Solution 4: Check BIOS Settings
Misconfigured BIOS settings can prevent Windows 11 from detecting the SSD. By adjusting the SATA mode, you can resolve compatibility issues and allow the SSD to be recognized. Here’s how to check the BIOS settings:
- Restart your computer and enter the BIOS setup by pressing the designated key (e.g., Del, F2, or F10) during startup.
- Navigate to the Storage or SATA Configuration section in the BIOS settings.
- Locate the SATA Mode or SATA Configuration option and change it to AHCI.
- Save the changes and exit the BIOS setup.
- Once your computer restarts, check if the SSD is now detected in Windows 11.
Changing the SATA mode to AHCI ensures proper communication between the SSD and the operating system.
Solution 5: Update SSD Drivers
Outdated or incompatible SSD drivers can prevent Windows 11 from detecting the SSD. It’s important to keep your SSD drivers up to date to ensure optimal performance and compatibility. Here are the steps to update the SSD drivers:
- Press the Windows key + X and select “Device Manager” from the menu.
- Expand the “Disk drives” category to view the SSD.
- Right-click on the SSD and select “Update driver.”
- Choose the option to search automatically for updated driver software.
- Windows will search for the latest driver for your SSD and install it if available.
- Once the driver update is complete, restart your computer and check if the SSD is now recognized in Windows 11.
Updating the SSD drivers ensures that you have the latest software to support optimal performance and compatibility with Windows 11.
Solution 6: Seek Professional Help
If none of these work to fix the problem where the SSD doesn’t show up in Windows 11, it could mean there is a bigger issue. In this situation, it is best to get help from computer techs or people who specialize in data recovery. They know how to figure out what’s wrong and have the right tools to fix any hardware or software problems that might be stopping the SSD from being seen.
Professional data recovery services can also help get data back from SSDs that can’t be accessed or are destroyed. If your info is important and can’t be lost, you might want to get help from a professional.
In Summary
Having trouble with your SSD not showing up in Windows 11 can be annoying, but if you follow the right steps to fix the issue, you can get back to using your SSD. You can fix this problem and make sure your SSD works properly by checking the hardware connections, initializing the SSD, giving or changing the drive letter, checking the BIOS settings, updating the SSD drivers, or getting help from a professional.
To keep your SSD drivers and operating system from becoming incompatible, make sure to keep them both up to date. By following these steps, you can easily fix the problem where the SSD is not showing up in Windows 11.


