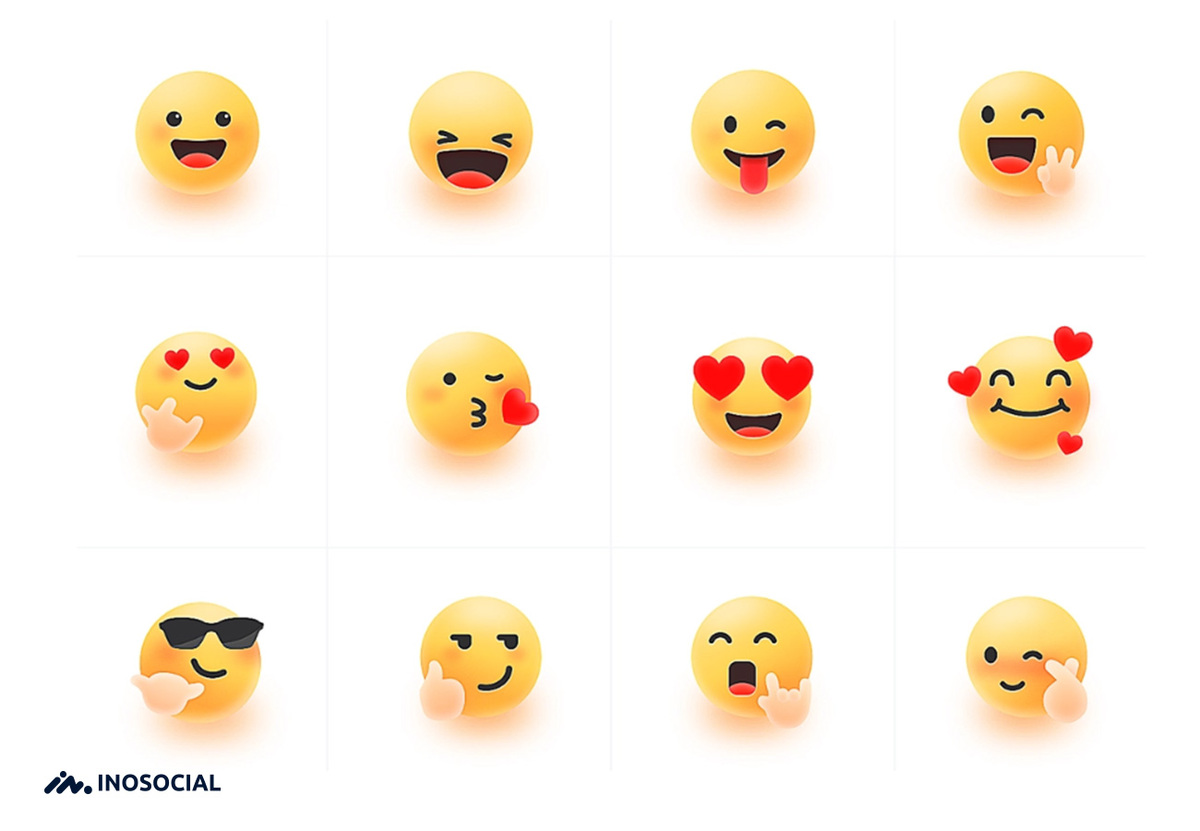
Have you ever wanted to change the emojis for BFFs, Best Friends, or friends but you don’t know how to change the emojis on snapchat? It’s very easy! All you need to do is follow these few simple steps. Once you’ve completed these steps, you can change your emojis on Snapchat without any hassle! Read on to learn how to change the emojis on snapchat!


- First, you need to open your Snapchat app and go to the Settings menu.
- Tap the Bitmoji icon.
- From there, tap the settings gear icon and go to the Customize Emojis option.
- Choose the category of your friends and select the emoji you want to use.
- Once you’ve made your selection, hit the back button to save your settings.
- Now, you’re ready to customize your emojis.
- Next, open the Snapchat application and tap your profile picture.
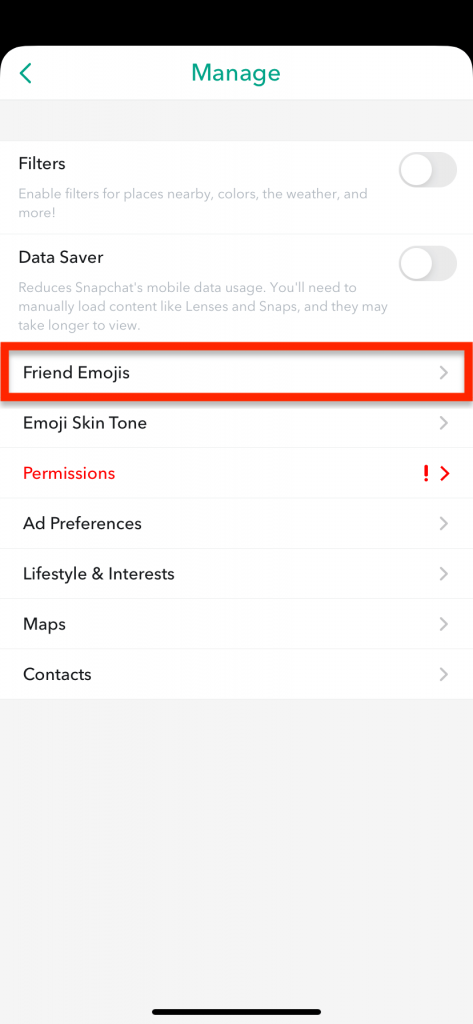
- Then, tap the Settings icon and tap Manage under the “Additional Services” section. You’ll be able to choose your own emojis here.
- Then, just tap the custom emojis button on the left side. These steps will allow you to customize your emojis in Snapstreaks.
Now you see how to change the emojis on snapchat is easy. If you want to know how to change streak emoji keep on reading.
Can we change snapchat emojis?
There’s an option to change the Snapchat emojis that appear next to friends’ names. It’s called the “Friend Emoji” and it allows you to choose the emoji that’s displayed next to your friends. This is how to change snapchat emojis is possible. This option is available to all Snapchat users. All you have to do is
- open your profile and tap the settings icon.
- On the emojis page, select Manage under the “Additional Services” section.
- There, you’ll be able to choose the emoji you’d like to use.
In the “Custom” section, choose the emoji that’s most appropriate for your friends. This will display a list of the most popular emojis. From here, you can choose which one you want to use. Once you’ve made a selection, you can go back to the main screen and repeat steps five through seven for as many emojis as you’d like. To change the emoji skin tone, follow these steps.
Do you wonder how to change snapchat emojis on iphone? To change the Friend Emojis on the iOS app, follow these steps.
- You’ll need to open Snapchat and tap the Bitmoji icon in the top-left corner of the screen.
- Now, select the “Customise emojis” option.
- The next step is to click the “Manage” option in the additional settings.
- Once you’ve made your selection, choose the new emoji to replace the old one.
You can also choose the emojis that appear next to your friends. The best thing to do is search for the one that matches the person you’re talking to. The Snapchat emojis that appear on your profile are usually the same as the ones in your friends list. By changing the emojis, you’ll also be able to customize your own emojis.
The emojis on your profiles depend on the frequency of sending and receiving snaps between two users. The emojis on your friends’ profile depend on the frequency and duration of your interactions with your friends.
I wish by now you know how to change emojis on snap.
How to change the emojis on snapchat?
Changing the emojis in your Snapchat chats is easy.
This is how to change your emojis on snapchat:
- First, open the app and tap on the Bitmoji icon.
- Next, tap on the gear icon, then select Settings.
- Scroll to the “Customize Emojis” section.
You will now see all of your friends’ emojis, including the ones for your friends. If you would like to change the emojis for all of your friends, you can do this in the same way you changed your profile’s background color.

To change an emoji for a friend, tap on the person’s name. If the person has a “Friend” emoji, tap it and select it. If the user has “Zany Face” emoji, tap it. Then, select the emoji from the preview screen. Finally, tap on the gear icon to change your emojis for your friends.
To wrap up how to change snapchat emojis:
To change the emoji for your profile, you can go into the settings of your Snapchat account and change them for your contact list. You can also set emojis for your snapstreakstreak levels. If you have other accounts, you can change their emojis for those accounts. However, there are no settings to disable the streaks on a snapstreak! You need to open the settings menu to access your Friend list.
If you still don’t know how to change the emojis on snapchat, Read the article again as we have explained everything in details.
How to change the best friend emojis on snapchat?
If you want to show your friends that you’re the best, Snapchat allows you to change the emojis next to their name. The emojis are different on Android and iPhone(more on how to change your emojis on snapchat on iOS and Android in the article). After you’ve selected the emojis you want, tap the back arrow to confirm the changes. The mutual BF emoji will now be replaced by a pizza slice.

You can reset the emojis to their defaults. After clicking on the Reset button, you’ll need to launch Snapchat and tap on the speech bubble icon, which is located on the bottom-left part of the screen. Then, tap the “Additional Services” tab. Choose a custom emoji and confirm the change. Your new custom emoji will appear next to your friend’s avatar or username.
After selecting your preferred emoji, you’ll need to change the emojis for all of your friends. First, open the Snapchat app and go to the profile screen. Then, tap the gear icon at the top-right corner. Scroll down and tap Friend Emojis. Once you’ve chosen the emojis, tap ‘Edit’ to edit the settings. Once you’ve created a new emoji, you’ll have to edit it. If you have an iPhone, you can modify the skin tone of your best friend by tapping the emojis’ skin tone and then pressing ‘Reset’. This will reset the emojis to their default settings.
How to change streak emoji on android?
If you’d like to change your Streak emoji read this section carefully.
how to change streak emoji:
- the first step is to open Snapchat on your phone.
- Then press the profile picture of the person you want to edit.
- Tap the Settings icon on the right hand side of the screen.
- Scroll to the bottom of the list and click the Manage option.
- Then tap the emoji you want to change.
- Select the Friend Emoji button.

The Friend Emojis section lets you change the emojis for different conversations. For example, if you want to change your emojis for a long period of time, you can select a different emoji. It’s possible to change the emoji for every day or just the emoji for every week. You can also change the emoji for your emoji preferences.
After choosing your emojis, tap the settings icon. You’ll be able to change the colors of the emojis for your friends and groups. However, the emojis that are associated with your Snapstreak levels will remain unchanged. This is a good way to customize emojis for both a group and a single individual. The best way to do this is by adjusting the settings for your emojis.
Still have questions on how to change streak emoji? Leave a comment.
How to change streak emoji on iphone?
If you’re wondering how to change streak emoji on iPhone, you’re not the only one. There are other people who’ve done the same thing. However, these users have found that there is a way to remove the emoji.
how to change your emojis on snapchat:
- go into the Settings icon and tap on ‘Emoji’. There, you’ll find a section for changing emoji. Once you’ve done this, click the “Emoji” option.

- After you’ve enabled the emoji, tap the “edit” button.
- You’ll be prompted to confirm the change.
- To prevent a new streak from forming, tap the back arrow after confirming the change.
- Once you’ve selected the emoji you’d like, tap it and hit ‘Edit’.
After completing the change, you’ll be able to view and send your new emoji. Now you can easily send new emojis to your friends with this feature. It’s the same process for the Android and iPhone user interface. Make sure to follow the instructions carefully and follow all steps to make the change. You’ll be able to use the emoji for sending and receiving messages.
When you’re using the Snapchat app, you can change the Streak emoji to any other type. By changing the default number emoji, you can create a new one that indicates a different mood. Moreover, you can choose a different emoji for your Snapstreak. This can be a good way to personalize your profile. It will also make it more unique.
As we said how to change your emojis on snapchat is fairly easy.
How to change your snapchat bitmoji?
Changing your Bitmoji is a relatively easy process, as the app offers several options for the character. You can change the color of its eyes and skin tone and even make it sexy, so that your Snaps appear more appealing. Once you have selected a new Bitmoji, you can customize its look and expression by clicking the “Change Selfie” or “Change Pose” options.

How to change Bitmoji:
- Simply log in to your Snapchat account and click on the “Bitmoji” icon at the top left of the screen.
- Once you are on the Bitmoji page, you can adjust the look and feel of your avatar. For instance, you can change your Bitmoji to show that you’re tired. But if you’d like to switch from tired to excited, all you have to do is send a message to the person who has chosen the new avatar. Or, you can search for stories featuring your new Bitmoji partner and choose their story.
If you’re looking for a new Bitmoji, you can change it right away in Snapchat. There’s a special setting in the upper-left corner for changing your Bitmoji. You can’t find it in your Snapchat library. You have to download the latest version of the app to find your Bitmoji. If you want to change the Bitmoji on your profile, you can change the picture in My Profile.
If you want to make your Snapchat bitmoji more expressive and unique, you’ll need to make some changes. You can change the Bitmoji’s background and pose. In addition, you can add an image to the app to change it’s appearance.
How to reset emojis on Snapchat?
After discussing how to change snapchat emojis it’s time to know how to reset emojis on snapchat. If you are looking for an easy way to change the default emojis on Snapchat, you should know how to reset Snapchat’s algorithm. While the reset process isn’t immediate, it is usually much faster than the process of changing other settings on your phone. The emojis on Snapchat live next to your best friends’ avatars and usernames.

- The first step is to confirm that you want to change your emojis.
- Once you have done this, you can choose to change your friends’ default emojis to those of your friends.
- After that you will be able to use them with all of your contacts. However, it’s important to do this gradually and carefully. Otherwise, your friend will feel left out and frustrated.
So far we’ve learned how to change emojis on snap and how to change streak emoji. Since emojis are very cool, many snapchat users often ask how to change snapchat emojis. That’s why we’ve written this article.