Why Is My Xbox Controller Blinking? (8 Ways to Fix It)

It’s probably no secret to people who like to play video games that starting a new Xbox game is very exciting. On the other hand, what if, when you start Forza Horizon or Call of Duty, you see a glowing Xbox controller instead of the exciting race or battle? A lot of gamers have been in this stressful situation before. This guide will look at the eight best answers to the question “Why is my Xbox controller blinking?”

What Does It Mean When Your Xbox Controller is Blinking?

A blinking Xbox controller is usually an indication that the controller is not paired with your Xbox console. This could occur due to various reasons, such as interference, low battery, or a firmware issue. When your Xbox controller blinks and fails to connect, it’s usually a pairing issue.

This happens when the controller is paired to a different console, out of range, or trying to connect to a console with the maximum number of paired controllers already connected.

What Causes Xbox Controller to Blink?

It could be because the controller is too far away, linked to another system, or having trouble with a system that already has too many controls paired with it. However these are some other reasons to take a look at:

How Far and How to Pair the Controller

The wireless range of an Xbox controller is between 19 to 28 feet. If your controller is out of this range, it may start blinking. Moreover, if your Xbox console already has eight paired controllers (the maximum limit), it won’t be able to connect to an additional controller.

Interference and Obstructions

Interference from other wireless devices or obstructions between the controller and the console may lead to blinking issues. If your gaming setup is around walls, facing away from you, or in a cabinet, consider decreasing your range or removing any obstructions.

Best Ways to Fix Xbox Controller Blinking

If your Xbox controller is blinking and then turning off, it could be due to many reasons like low battery. Let’s see what’s the possible reactions on this issue

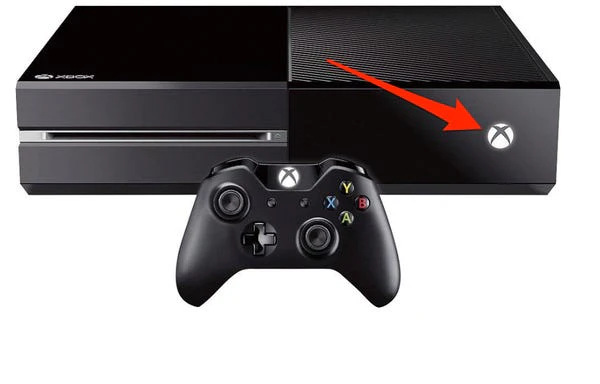
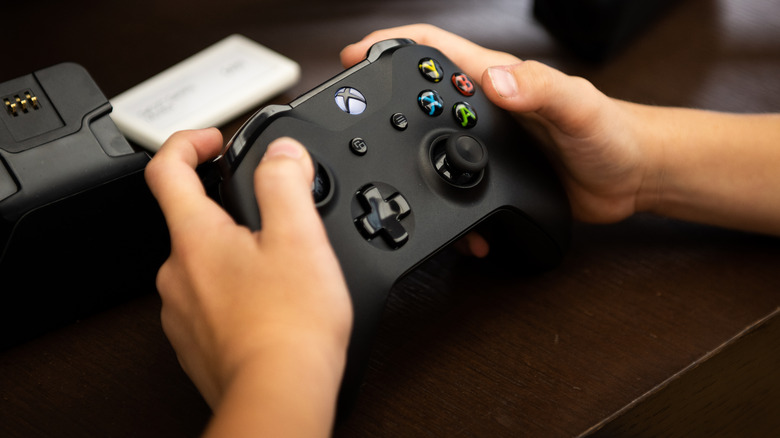
Re-Pair Your Controller (First of All)

One of the most straightforward solutions to stop your Xbox controller from blinking is to re-pair it with your console. Press the Pair button on your Xbox console and then press the Pair button on your controller within 20 seconds. If your controller is successfully paired, it should flash for a moment and then display a continuous light.

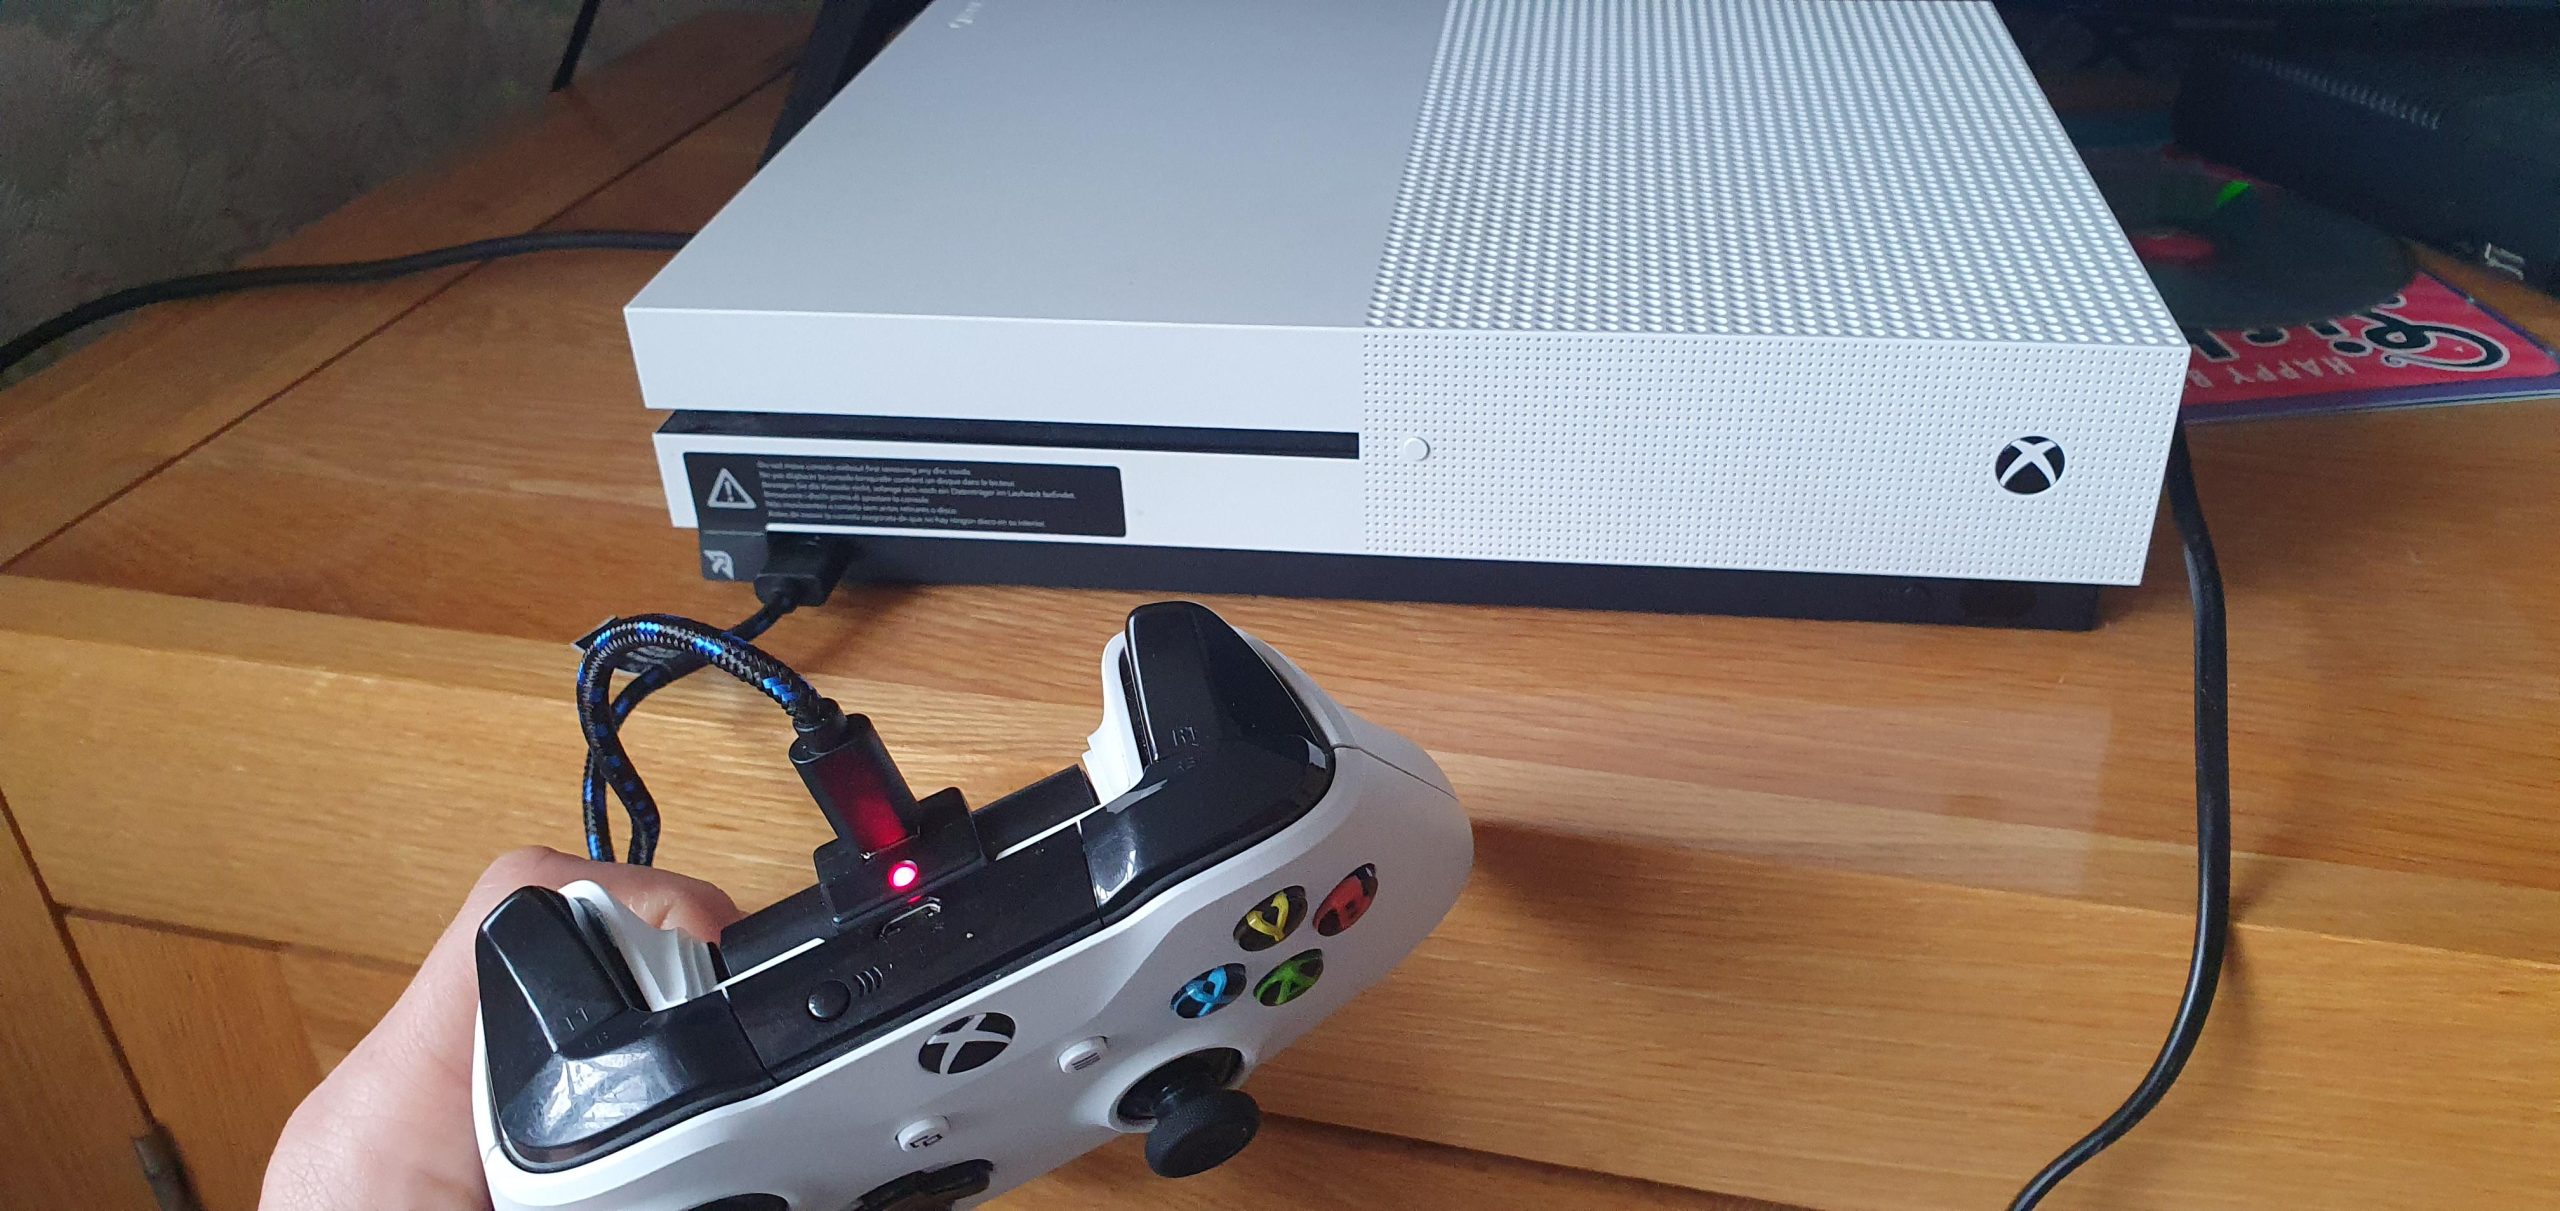
Use a Micro USB Cable

If your controller keeps blinking even after trying to pair it again, you might want to use a micro USB cable to connect it to the machine. This method not only charges the Xbox One controller, but it also gives you another way to make a stable connection, which might fix the problem with the controller blinking all the time. By using a straight wired connection, you can make sure that the link between the controller and the console is stable, which will stop any blinking problems for good.

Restart Your Console

Sometimes, restarting the device is all it takes to fix a computer problem. To do this on your system, press and hold the power button for 10 seconds to turn it off completely. Then, turn it back on. Once both your system and controller are turned back on, it should be easier to pair them without any blinking problems. This simple reset can often fix issues with connectivity and get your gadgets working normally again.

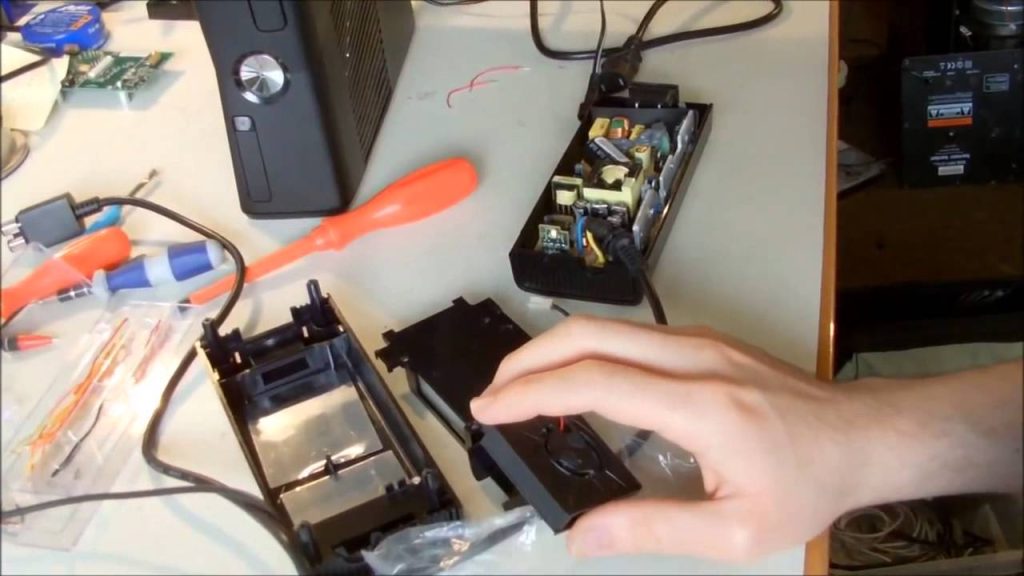
Check Your Controller’s Batteries

Low battery can also cause your controller to blink. You can charge your controller’s batteries with a Play & Charge Kit, a micro USB cable, or a rechargeable battery pack. If these are not available, you can use standard AA batteries.

Update Your Controller’s Firmware

If your Xbox controller blinks, it might be because the software is out of date or broken. If you bought a controller after June 2015, you can update it wirelessly. To update any Xbox One controller, though, you can use a USB cord to connect it to your system or a computer.

This process makes sure that the software on your controller is always up-to-date. This fixes any problems that might arise with firmware compatibility and improves speed overall.

Disconnect Other Accessories

Sometimes, accessories that are linked to your Xbox controller can cause it to lose its connection. To figure out what’s wrong, unplug any laptops, external hard drives, or other accessories that are connected to your Xbox.

By taking out these extra devices, you can narrow down the problem and see if the controller connects correctly without any problems caused by other tools. This easy step can help you figure out why your Xbox controller isn’t connecting properly and make it work better.

Use a Different Controller

To figure out what’s wrong even more, connect a second controller to your game and test it. As long as the second controller works fine, the issue is probably with the first controller. If, on the other hand, both controllers are broken, the problem may be with the device itself.

Taking this step helps you figure out if the problem is with the controller or the computer, which lets you fix the connection problem more precisely.

Use the Controller as a Wired Device

If connecting your Xbox controller via a USB connection works perfectly, you may choose to use it as a wired device to avoid problems in the future. If you buy a longer cable, you can sit farther away from your console and still have a stable link. Not only does this setup get rid of the chance of wireless interference, but it also makes games easy and reliable, so you don’t have to worry about battery life or connection problems.

Reach Out to Xbox Support

If all else fails, you might need to contact Xbox Support or a professional repair service.

FAQs

  • Why is my Xbox Controller Blinking and then Turning Off?

If your Xbox controller starts blinking and then turns off, it could indicate a low battery. Replace or recharge the batteries to see if this resolves the issue.

  • What do I do if my Xbox Controller Starts Blinking When Connected to a PC?

When your Xbox controller starts blinking when connected to a PC, it might not be properly paired. You can try re-pairing it with your PC or use a micro USB cable to connect it.

In Closing

That’s all there is to it! Remember the tips and tricks in this guide the next time you wonder, “Why is my Xbox controller blinking?” There are a lot of different ways to fix this problem, such as re-pairing your controller, using a mini USB cable, or even calling Xbox Support.

How to Install OptiFine in Minecraft (The Ultimate Guide in 2024)

Minecraft is a popular sandbox game that allows players to create and explore virtual worlds. However, some players may experience lag or want to enhance the graphics and performance of the game. That’s where OptiFine comes in. OptiFine is a Minecraft mod that allows you to customize settings, increase performance, use shaders packs, and improve the graphics of Minecraft. In this ultimate guide, we will walk you through the process of how to install optiFine in Minecraft.

How to Install OptiFine in Minecraft

OptiFine is a popular optimization mod that enhances the game’s graphics, adds new features, and improves overall performance. Follow this step-by-step guide to install OptiFine in Minecraft and increase your gaming experience.

Downloading OptiFine

Before installing OptiFine, it’s important to ensure that your system meets the minimum requirements. OptiFine is compatible with Java-based Minecraft versions. You will need to have Java installed on your computer. If you don’t have Java, you can easily download and install it from the official Java website.

To download OptiFine, you can visit the official OptiFine website (URL). On the website, you will find a list of available versions of OptiFine. Choose the version that is compatible with your Minecraft version. If you can’t find the version you need, there is an option to view all versions. Once you have selected the desired version, click on the download button.

Installing OptiFine

Once you have downloaded the OptiFine file, it’s time to install it. The installation process may vary depending on your operating system. Follow the steps below for your specific operating system:

Windows

  • Locate the downloaded OptiFine file on your computer.
  • Right-click on the file and select “Open with” and then “Java (TM) Platform SE Binary”.
  • A window will appear displaying the path to the Minecraft folder. Make sure Minecraft is installed before proceeding.
  • Click on the “Install” button to begin the installation process.
  • Once the installation is complete, you will see a confirmation message. Click “OK” to close the window.

Mac

  • Find the downloaded OptiFine file on your computer.
  • Control-click on the file and select “Open with” and then “Java (TM) Platform SE Binary”.
  • A popup window will appear displaying the path to the Minecraft folder. Ensure that Minecraft is installed before proceeding.
  • Click on the “Install” button to start the installation process.
  • After the installation is finished, you will see a confirmation message. Click “OK” to close the window.

Launching OptiFine in Minecraft

Now that OptiFine is installed, you can launch it in Minecraft. Follow the steps below to launch OptiFine:

  • Open the Minecraft Launcher on your desktop.
  • To the left of the “PLAY” button, you will see the latest version available. If the OptiFine version is listed, click on it to run the installation.
  • If the downloaded version is not listed, click on “Installations” at the top of the launcher.
  • In the installations menu, you will see your OptiFine installer listed. Select it and click “Play” to launch OptiFine.
  • Minecraft will open with OptiFine, and you can now enjoy the enhanced graphics and performance.

Enhancing Gameplay with OptiFine

OptiFine offers a range of features that can enhance your gameplay experience. Here are some of the key features and how to access them:

  • Increasing FPS: To increase the frame rate per second, navigate to Options > Video Settings. Adjust the settings according to your preferences, such as reducing render distance or disabling fancy graphics.
  • Shader Packs: OptiFine allows you to use shader packs to enhance the lighting and visual effects in Minecraft. To install a shader pack, download it from a trusted source and place it in the Shaders folder within the Minecraft directory. Then, in Minecraft, go to Options > Video Settings > Shaders and select the desired shader pack.
  • Customizing Textures and Animation Effects: OptiFine allows you to customize textures and animation effects in Minecraft. Navigate to Options > Video Settings to access the customization options. You can change details such as water animation, flame animation, rain animation, and more.
  • Zoom Feature: OptiFine includes a zoom feature that allows you to zoom in on objects. Press the default key “C” to activate the zoom feature. You can also customize the zoom key by going to Options > Controls.

Updating OptiFine

To update OptiFine to the latest version, you can simply download the latest version from the official OptiFine website and install it following the same steps outlined in the installation section. It is not necessary to uninstall the previous version before installing the latest one.

In Closing

OptiFine is a powerful mod that can make your Minecraft experience much better by making graphics and speed better. It’s easy to install OptiFine and use its features if you follow the steps in this guide. OptiFine gives you many ways to improve your games, such as increasing frames per second (FPS), using shader packs, or changing textures and animation effects. Install OptiFine and take your Minecraft experience to the next level.

Netflix Error Code NW-2-5: Fix It on Any Device

It can be very annoying to have problems while trying to relax with your favorite Netflix show. The “Netflix Error Code NW-2-5” is one of these issues that could stop you from binge-watching. This error code can show up on a number of different devices. It usually means that your device is having trouble connecting to the internet, which is stopping it from reaching Netflix’s servers. You can use the steps in this article to successfully troubleshoot and fix this problem.

What Is Netflix Error Code NW-2-5?

A common error that people may run into when they try to stream Netflix material is the Netflix Error Code NW-2-5. Usually, this error code comes with a message that says “Netflix has encountered an error.” Trying again in X seconds. “NW-2-5 is the code.”

This error makes it clear that there is a problem connecting to the network. The main problem is that your computer can’t connect to the Netflix servers. This could be because of a broken WiFi or Ethernet link, an outage at the ISP, DNS servers that aren’t working right, or even problems with Netflix’s own servers.

How to Fix Netflix Error Code NW-2-5:

To fix the Netflix Error Code NW-2-5, you need to follow a set of steps to make sure that all possible reasons are taken care of. You can fix this error by following these steps:

Attempt to Retry

In order to fix an error message while using a service like Netflix, the first and most obvious thing to do is click the “Try Again” button that appears on the error screen. By doing this, users can try to reconnect with Netflix’s servers again, which might fix the problem and let them watch the video without any problems.

This easy step can be used as a quick fix for short-term internet problems and other small problems that could have caused the error message. If hitting “Try Again” works, users can keep watching without having to do anything else or go through a lot of complicated steps to fix the problem.

Restart Your Device

Sometimes, errors that happen while using a device are caused by short-term problems that can be easily fixed by restarting the device. When you restart your device, it turns off fully and then on again after a short time. This helps to restart the device’s system and can often fix short-term problems that are causing mistakes.

For the restart process to work, the device must be completely turned off. This is especially important if the device has a sleep mode. By turning off the device completely and then turning it back on, you give it a chance to reset and fix any short-term problems that might have been stopping it from working.

This simple step in troubleshooting can be a quick and effective way to fix mistakes caused by short-term problems with how the device works.

Check Your Network and Internet Connection

If you see the Netflix Error Code NW-2-5, which is often caused by a problem with your connection, you need to check the state of your network connection to find and fix the problem. First, make sure that your device is safely connected to the router through a stable WiFi connection or a wired Ethernet cable. Check to see if there are any sources of interference or broken cables that could affect the connection.

If the problem keeps happening, you might want to run a network diagnostic test on your device to get a full picture of the link. You can use this diagnostic test to find out more about any network problems that might be stopping your device from connecting to Netflix’s servers. This will help you troubleshoot and find a good answer for this error.

Verify Your DNS Settings

The Domain Name System (DNS) plays a crucial role in establishing a connection between your device and Netflix’s servers. If there is an issue with your ISP’s DNS servers, you might face connectivity issues. In such cases, consider switching to a public DNS server like Google’s 8.8.8.8 and 8.8.4.4.

Check If Your Network Allows Streaming

In some cases, networks may put limits on streaming services like Netflix in order to better control how much bandwidth is used. If you are using a public internet link in a place like a hotel or college, you should check to see if streaming services are blocked or limited on the web connection.

This safety measure is often taken to keep networks from getting too crowded and to make sure that all users can access internet resources equally. To solve this problem, it’s best to check with the location’s network administrator or other appropriate authority to see if there are any possible limits on streaming services.

By asking the network administrator for help and explanation, you can learn a lot about the network’s rules and maybe even look into other ways to access streaming services like Netflix that don’t break the rules of the network.

Improve Your Internet Connection

If you keep getting an error even after trying to fix it, it could be because your internet connection isn’t strong enough to stream Netflix properly. To fix this, you might want to improve the strength of your WiFi signal to make your network link work better. Moving closer to your router is a useful step that can help you stream better by reducing physical obstacles and possible interferences that could weaken the WiFi signal.

If you want a more stable and reliable link, you could also try using a wired Ethernet connection. If you connect your device directly to the router with an Ethernet cable, signal fluctuations will have less of an effect and you’ll have a stable network link for Netflix streaming.

If your WiFi signal is weak, using a wired link might help you get around those problems and make sure you have a smoother streaming experience with no breaks.

Update Your Netflix App

But if you are still getting the Netflix Error Code NW-2-5, you should think about the chance that an old or broken Netflix app is making the problem worse. If you want to fix this possible issue, you should make sure that your Netflix app is on the most recent version. Updating the app to the latest version can fix bugs, improve speed, and make it more compatible with other apps. This may help fix the error and make the app work better.

In situations where updating the app doesn’t fix the problem, restarting the Netflix app might work. If you remove the app and then reinstall it from the official app store, you can make sure that the installation is clean and that there are no problems or issues with the app.

Using this method can fix problems caused by old or broken app versions, giving you a fresh start for smooth Netflix watching without getting the NW-2-5 error code.

Reach Out to Your ISP or Netflix

There are a few things you can try before calling your Internet Service Provider (ISP) or Netflix’s customer service. To help find and fix the problem, they can give you more information.

Final Words

Sometimes the Netflix Error Code NW-2-5 can really get in the way of your fun. But it’s not impossible to fix if you follow the right steps. Remember that the key is to solve the problem in a planned way, by dealing with each possible cause one at a time. Just be patient, and you’ll be able to watch your favorite Netflix shows and movies again in no time.

iPhone Says SIM Failure? 8 Ways to Fix This

There’s nothing worse than having your trusty iPhone break down for no reason, especially when it says “SIM Failure.” It can be pretty bad when you can’t make calls, send texts, or connect to mobile data because of this. However, do not give up just yet; this problem can be fixed at home by following a few steps. There are 8 possible ways to fix the SIM failure message on your iPhone. We’ll go over each one in detail below.

What is SIM Failure Issue?

We need to talk about what a “SIM Failure” is before we talk about how to fix it. A “SIM” is a small card that holds information about the user and lets your phone connect to the network. If your iPhone shows SIM failure issue, it means that it can’t connect to the network of your wireless provider. This could be because of a number of things, from problems with the network to broken hardware.

Possible Reasons for SIM Failure

Understanding the potential reasons for the ‘SIM Failure’ can help you better diagnose and fix the problem. Here are some common reasons why your iPhone may be displaying the ‘SIM Failure’ message:

  • SIM Card Misplacement: If the SIM card is not inserted correctly or is dislodged, the iPhone may not be able to read it, resulting in a ‘SIM Failure’ message.
  • Damaged SIM Card: A physically damaged SIM card can cause this issue.
  • Outdated Carrier Settings: Outdated carrier settings can disrupt the communication between the iPhone and the carrier, causing the ‘SIM Failure’ message.
  • Software Glitches: Sometimes, software bugs or glitches can interfere with the iPhone’s ability to detect the SIM card.
  • Hardware Damage: Physical damage to the iPhone, particularly to the SIM card tray or the internal parts that connect to the SIM card, can cause ‘SIM Failure’.
  • Inactive Cellular Plan: If you don’t have an active cellular plan, the carrier may block the SIM card, resulting in a ‘SIM Failure’ message.

Ways to Fix SIM Failure with Top 8 Fixes

Now that we understand the possible reasons for the ‘SIM Failure’ message, let’s move on to the various solutions to fix this issue.

1. Reinsert the SIM Card

The simplest solution is to reinsert the SIM card. This can fix the issue if the card was not inserted correctly or became dislodged. Here is how you can do it:

  • Turn off your iPhone.
  • Use a SIM ejector tool to remove the SIM card tray from your iPhone.
  • Take out the SIM card, check for any visible damage, and clean it gently with a dry cloth.
  • Reinsert the SIM card into the tray, ensuring it is placed correctly.
  • Insert the tray back into your iPhone and switch it on.

2. Check your Cellular Plan

Make sure that your cell phone plan is still current. If not, call your service to get it working again. Don’t forget that you can’t use the carrier’s services without a plan, which is why you see the “SIM Failure” message.

3. Try a Different SIM Card

If you have an extra SIM card or can borrow one from a friend, try inserting it into your iPhone. If your iPhone works with the other SIM card, your SIM card could be the problem. In this case, you may need to replace it.

4. Force Restart your iPhone

A force restart can sometimes fix minor software glitches that could be causing the ‘SIM Failure’ message.

  • For iPhone 8 and later models: Press and quickly release the Volume Up button, then the Volume Down button. Hold the Side button until the Apple logo appears.
  • For iPhone 7 and 7 Plus: Press and hold the Volume Down and Side buttons together until you see the Apple logo.
  • For iPhone 6 and older models: Press and hold the Home and Side/Top buttons together until the Apple logo appears.

5. Turn Airplane Mode On and Off

Switching Airplane Mode on and off can refresh your iPhone’s network settings, potentially fixing the ‘SIM Failure’ issue.

  • Go to Settings and tap on the Airplane Mode switch to turn it on.
  • Wait for a few seconds and then tap the switch again to turn off Airplane Mode.

6. Reset Network Settings

Resetting network settings can fix network-related issues, potentially resolving the ‘SIM Failure’ problem. But remember, this action will erase all your saved Wi-Fi networks and passwords, cellular settings, and VPN settings.

  • Go to Settings, then General.
  • Tap on Reset, then on Reset Network Settings.
  • Enter your passcode and confirm the operation by tapping on Reset Network Settings.

7. Update Carrier Settings

Updating your carrier settings can improve your iPhone’s network connectivity, potentially fixing the ‘SIM Failure’ issue.

  • Go to Settings, then General.
  • Tap on About. If an update is available, you’ll see an option to update your carrier settings.

8. Update iOS

While iOS updates are generally meant to improve your iPhone’s performance, they can sometimes introduce bugs. If you’re experiencing the ‘SIM Failure’ issue after updating iOS, you may need to install the latest iOS update to fix the problem.

  • Go to Settings, then General.
  • Tap on Software Update. If an update is available, tap on Download and Install.

In Closing

Experiencing SIM failure on your iPhone might be irritating, but keep in mind that it’s usually a simple problem with an easy solution. Try the suggestions provided in Inosocial’s blog post, and you should be able to solve the issue. If the problem continues to exist take your iPhone to an Apple Store or an authorized service provider for an in-depth checkup.

Ways to Fix the “Mobile Network State Disconnected” Error in 2024

When we have problems with our smartphones that make it hard to call, send texts, or connect to the internet, it can be annoying. The “Mobile Network State Disconnected” error is one of these problems that a lot of Android/iOS users have had.

This error message means that the device can’t connect to the mobile network, which means that network services are being lost. Don’t worry if you see this error! If you get the mobile network state disconnected error, this blog post will focus on what causes it and give you 8 good ways to fix it.

What Causes the “Mobile Network State Disconnected” Error?

You could get this error on your devices for a number of different reasons. Knowing these reasons can help you figure out what’s wrong more quickly. This issue often happens because of these things:

  • SIM card issues: Bad insertion of the SIM card or a malfunctioning SIM card can cause the device to fail to register with the network, resulting in the error message.
  • Outdated mobile phone: An outdated phone with outdated hardware and software may struggle to maintain a stable network connection, leading to the error.
  • Poor reception: If you are in an area with low reception or physical obstacles that obstruct the signal, you may experience a lack of network connectivity and encounter the error.
  • Expired data plan: If your data plan has expired, your device won’t be able to connect to the network, resulting in this error.
  • APN or network configuration issues: Incorrectly configured APN settings or network settings can prevent your device from connecting to the network, causing the error, so be careful about it.
  • Technical issues: Software glitches or technical problems within your device can also lead to the mobile network state disconnected error. Physical damage to the device can also be a contributing factor.

How to Fix the “Mobile Network State Disconnected” Issue? (Top 8 Fixes)

It’s time to look at effective ways to fix the mobile network state disconnected error now that we know what causes it. By doing these steps to fix the problem, you can get your device back on the network and get rid of the error message.

Insert SIM Card Properly and Activate It

Before you begin troubleshooting, make sure that your SIM card is inserted or activated. If you just bought the SIM card, you’ll need to wait a few hours for it to activate. Network operators typically send a confirmation message upon successful activation. So, check your SMS inbox to ensure that the SIM has been enabled successfully.

If the SIM is new and there is no activation message or call, you must wait a few hours before contacting the network operator using a different phone number. You can phone them and ask for the activation status; they may ask you a few authentication questions, but they will explain why the ‘Mobile Network State Disconnected’ error appears.

Replace Your SIM Card

If the SIM card is inserted correctly and the error persists, it’s possible that the SIM card itself is malfunctioning. Consider replacing your SIM card with a new one to eliminate any potential issues with the card.

Check Network Settings

Make sure that your device’s network settings are properly configured. Go to the Settings menu and select Mobile Networks. If you have multiple SIM cards, choose the one that is causing the error. Check the network mode and ensure that it is set to the appropriate option (e.g., 3G, 4G).

Reset APN Settings

The closest thing that you can do to fix the error is to reset your APN settings. Incorrect APN settings may prevent you from using the internet or MMS functions. So, if you see an error notice while browsing the internet or sending MMS, you should reset your smartphone’s APN settings.

  • First, open the Settings app and select Mobile Network.
  • On the mobile network, choose the SIM card displaying the issue.
  • Next, touch on Access Point Names.
  • In the Access Point Names, tap the three dots in the top-left corner and select Reset access points.

Check Signal Strength

Poor signal strength can contribute to the “Mobile Network State Disconnected” error. If you are in an area with low reception, try moving to a location with better signal coverage. Additionally, check if there are any physical obstacles that may be blocking the signal, such as buildings or trees.

Restart Your Device

Sometimes, a simple restart can resolve network connectivity issues. Turn off your device, wait for a few seconds, and then turn it back on. This can refresh the network settings and potentially resolve the error.

Update Software

Outdated software can cause compatibility issues and lead to network connectivity problems. Check for any available software updates for your device and install them if necessary. Updating your device’s software can often resolve network-related errors.

Disable the Security Apps, Firewall, and VPN

Firewall applications for devices were designed to prevent both incoming and outgoing traffic. Sometimes the incorrect configuration or a few security apps can prevent network settings and signal reception. So, if you’ve just installed a firewall or VPN, you’ll need to turn it off before connecting to the mobile network. You may also try deleting them and seeing whether the error shows.

If none of the above fixes work, it’s recommended to contact your network service provider for further assistance. They can troubleshoot the issue on their end and provide specific guidance tailored to your network provider.

FAQs

  • Calls are not working when WiFi Calling is enabled. What should I do?

If you are experiencing issues with calls while using WiFi Calling, try disabling WiFi Calling and see if the issue persists. You can usually find the WiFi Calling option in the Settings menu of your device.

  • Is it necessary to upgrade to a 5G SIM to fix the mobile network state issue?

No, upgrading to a 5G SIM is not necessary to resolve the “Mobile Network State Disconnected” error. In most cases, the error can be fixed by following the troubleshooting steps mentioned above.

In Closing

It can be annoying to get the mobile network state disconnected error, but if you follow the right steps to fix it, you can get your device back online. Making sure the SIM card is properly inserted, checking the network settings, and using the other fixes in this article will get rid of the error and let you use calls, texts, and the internet without any problems.

iMessage Signed Out? (10 Working Fixes)

If you have an iPhone or iPad, you’ve probably used iMessage, Apple’s texting service that makes sending messages easy and full of useful features. There are times, though, when you may see the annoying “iMessage Signed Out” message.

You might not be able to send or receive texts because of this error, which could mean you miss out on important conversations. Don’t worry, though! This article will look at 10 working ways to fix the iMessage signed out error and get you back to using iMessage without any problems.

Why Is My iMessage Signed Out?

If you never meant to log out, you might be confused about why your iMessage account suddenly stopped working. Several things can make this problem worse:

  • Problems with the Wi-Fi link: iMessage needs a stable Wi-Fi link to work. This error can happen if your Wi-Fi connection is weak or drops out sometimes.
  • Problems with Cellular Data Connections: iMessage can also be used with cellular data. If your cellular data link or network goes down, you might not be able to use iMessage.
  • Other Causes: It also can be caused by software bugs, wrong iPhone settings, wrong iMessage settings, or problems with Apple servers, among other things.

How to Fix the “iMessage Signed Out” Error (10 Working Fixes)

If you’re having trouble connecting or with something else, you can fix the mistake by following these steps:

Restart Your iPhone or iPad

The first and simplest solution to try is restarting your device. This can often resolve minor glitches causing the “iMessage Signed Out” error. Here’s how you can restart your device:

  • For iPhone with Face ID: Press and hold either of the volume buttons and the side button simultaneously until the power-off slider appears. Drag the slider to turn off your iPhone. Wait for 30 seconds or 1 minute, then turn on your device again.
  • For iPhone with Touch ID: Hold down the side button until you see the power-off slider. You can power off your iPhone by using the slider. Wait for 30 seconds or 1 minute, then turn on your device again. If the restart doesn’t fix the issue, let’s move on to the next solution.

Disable and Re-enable iMessage

Before trying any other measures, ensure that iMessage is enabled on your iPhone or iPad. Sometimes, simply disabling and re-enabling iMessage can reset any settings errors. Here’s how you can do it:

  • Open the Settings app on your device.
  • Scroll down and tap on “Messages”.
  • Make sure the toggle next to iMessage is turned on. If it’s already enabled, disable it and then enable it again.
  • If you don’t see the Messages app on your phone, you can find out how to bring it back through Apple’s support.

Check Your Apple ID or Phone Number

If you’re still experiencing the iMessage signed out error, it’s important to ensure that you’re using the correct Apple ID or phone number for iMessage. Follow these steps to check:

  • When the pop-up message appears stating that iMessage is signed out, tap on “Settings” to go directly to the settings page. Alternatively, you can go to “Settings” and then navigate to “Messages”.
  • Tap on “Send & Receive” and make sure the correct Apple ID email address or phone number is selected. If not, select or add the correct Apple ID or phone number.

Verifying your Apple ID or phone number is crucial in resolving the “iMessage Signed Out” error.

Check Your Network Connection

Since iMessage relies on an internet connection, it’s essential to check your Wi-Fi or mobile data connection. Verify whether the internet is working on your device by opening a browser and loading a webpage. If you’re experiencing issues with Wi-Fi, you can follow various methods to fix iPhone not connecting to Wi-Fi or troubleshoot mobile data not working on iPhone. If the internet is working fine, let’s move on to the next solution.

Verify iMessage Server Status

If all your settings appear to be correct, the issue may be on Apple’s end. To check the status of the iMessage server, you can visit Apple’s system status website and look for iMessage’s status. If the status is green and marked as “Available,” you can move on to the next section. However, if there’s a service disruption, you’ll need to wait for Apple to fix the issue.

Update Your Device’s Software

Updating your iPhone or iPad to the latest software version can often resolve bugs and glitches, which may be causing the “iMessage Signed Out” error. Installing software updates is as easy as following these instructions:

  • Launch your device’s Settings app.
  • Scroll down and tap on “General”.
  • Tap on “Software Update”.
  • If an update is available, tap on “Download & Update” to install it.
  • Keeping your device’s software up to date is crucial for optimal performance and to prevent potential errors.

Change the iMessage Region

Sometimes, changing the region settings for iMessage can help resolve issues related to the “iMessage Signed Out” error. To change the iMessage region, follow these steps:

  • Launch your device’s Settings app.
  • Scroll down and tap on “Messages”.
  • Tap on “Send & Receive”.
  • Tap on the email ID next to the Apple ID.
  • Select “Change Location” and choose your current region.
  • Tap on “Save” to apply the changes.

Changing the iMessage region may help resolve any regional conflicts or settings discrepancies.

Adjust the Date and Time

Adjusting the date and time settings on your iPhone or iPad can also help resolve the “iMessage Signed Out” error. Follow these steps:

  • Open the Settings app on your device.
  • Scroll down and tap on “General”.
  • Tap on “Date & Time”.
  • Set the time zone manually or enable the toggle next to “Set Automatically” for accurate time settings.
  • Aligning the date and time settings with your correct location can often resolve synchronization issues with iMessage.

Sign Out and Sign In to Your Apple ID

In addition to checking the Messages app settings, it’s important to review your Apple ID settings on your device. Make sure that your Apple ID settings are updated by following these steps:

  • Open the Settings app on your device.
  • If you receive an update alert, tap on it and enter your Apple ID password again.
  • If there’s no update notification, you can try signing out and signing back in to your Apple ID. To do this, tap on your profile picture, scroll down, and tap on “Sign Out”. Enter your Apple ID password and turn off the sign out feature. Then, log in with your Apple ID again.
  • Refreshing your Apple ID settings can resolve any configuration issues that may be causing the iMessage signed out error.

Reset Network Settings

If all else fails, resetting the network settings on your iPhone or iPad can be a last resort solution. However, keep in mind that this will clear out all network-related settings, including Wi-Fi passwords and VPN configurations. Be careful and do as instructed:

  • Launch the Settings app on your device.
  • Scroll down and tap on “General”.
  • Tap on “Transfer or Reset iPhone” and select “Reset”.
  • Next, tap on “Reset All Settings” and enter your password to confirm.

Resetting network settings can help resolve any underlying network configuration issues that may be causing the iMessage signed out error.

Contact Apple Support

If none of the above solutions were able to fix the error, it’s time to seek assistance from Apple Support. Apple’s technical support team can help diagnose and resolve any hardware-related problems or persistent bugs that may be causing the error.

FAQs

  • Is the iMessage and Apple ID the same account?

No, iMessage and Apple ID are not the same. iMessage is a messaging service while Apple ID is your unique identification for accessing various Apple services.

  • Why won’t my phone number connect to iMessage?

There can be various reasons why your phone number won’t connect to iMessage. It could be due to carrier restrictions or server problems. Contact your carrier provider to resolve this issue.

In Closing

If you get the “iMessage Signed Out” error on your iPhone or iPad, it can be annoying. But these 10 fixes should help you fix the problem and get back to using iMessage normally. It’s important to follow the steps carefully and get in touch with Apple Support if you need to. Stay in touch and enjoy iMessage’s perks without any problems.

Why Is My Car Making a Clicking Noise When Driving? (Solved)

We all love driving and it’s obvious the experience of driving a car should be smooth and fun. However, when you hear strange clicking sounds, it can be scary and even annoying and if you’re one of those wondering “Why Is my car making a clicking noise when driving” your car is trying to tell you that something is wrong, and you need to fix it right away to stop the damage from getting worse. This article will talk about the different reasons your car might be clicking while you’re drivinh, how to figure out what’s wrong, and possible ways to fix it.

What Are Possible Reasons for Clicking Noises in Cars?

Most of the time, clicking sounds are not normal in cars because they are very complicated tools. Any clicking sound in your car should be looked into, no matter what brand, model, or age it is. There are different kinds of clicking sounds, such as dry, high-pitched clicks and deep, hollow sounds.

These different kinds of clicking sounds can mean different things are wrong with your car’s systems. A clicking sound while moving could be caused by a number of different things. Getting to the bottom of the noise problem is important for figuring out what to do next. Here are a few popular ones:

Loose Brake Pads

Loose brake pads could be the cause of noises that click. When your brake pads aren’t properly attached, you might hear ticking sounds when you slow down or press on the brakes. At slower speeds, this problem may not be as clear, but at faster speeds, it is. To make sure safe stopping, it’s important to fix any loose brake pads right away.

Low Engine Oil (Must-Check)

If your engine oil level is too low, your car may make clicking sounds. Several parts of an engine use engine oil to keep them from rubbing against each other, which reduces friction. If the oil level is too low, the moving parts might not get enough oil, which could cause clicking or ticking sounds. For the best engine performance and life, you need to check and add more oil to your engine on a regular basis.

Faulty Spark Plugs

Spark plugs are an important part of how your engine burns fuel. They can wear out or have problems over time, which can cause clicking sounds. If your spark plugs are broken, the combustion may not happen properly, which can lead to misfires and popping sounds. This problem can be avoided by doing regular upkeep, such as replacing the spark plugs when they need to be replaced.

Damaged Lifters in Engine Cylinder Head

The valves in your engine are opened and closed by lifters in the cylinder head. If these lifts get worn out or broken, they might make a low-pitched clanking sound that sounds like clicking. This sound might keep going even when the car is moving quickly or not at all. To keep the engine running smoothly, broken lifters must be checked and replaced as needed.

Damage to Your Constant Velocity (CV) Axle

If you hear clicking sounds when you turn, it could mean that there is a problem with the CV axle. The CV axle lets the transmission send power to the wheels and lets the vehicle move in different ways. If there is damage to the CV axle’s shaft boot, the dry parts may rub against each other and make popping sounds. The CV axle needs to be inspected and fixed as soon as possible to stop further damage and make sure driving is safe.

Fix a Car that Makes Clicking Noise When Driving

Once you have identified the cause of the clicking noise, it’s time to take appropriate action to resolve the issue. Here are some steps you can take to fix a car that’s making a clicking noise when driving:

Top-Up Your Engine Oil

The clicking sound might be caused by low engine oil. You can fix the problem by adding more oil. Check the oil dipstick in your car to see how much oil is in it right now. If it’s below the level that’s suggested, add the right kind and amount of oil based on the instructions that came with your car. For your engine to run smoothly, you need to check and keep the oil level on a regular basis.

Replace Faulty Spark Plugs

If the clicking sounds are coming from broken spark plugs, you might need to replace them. Check your car’s manual or get help from a professional to find out what kind of spark plugs you need and how to install them. Take out the old spark plugs and put in the new ones, making sure they fit properly and are tight. Replacing spark plugs at the intervals suggested by the maker will help keep the engine running at its best.

Replace Damaged Lifters

If damaged lifters are the source of the clicking noise, consider replacing them. Damaged lifters can negatively affect engine performance and potentially lead to further damage if left unaddressed. Consult a professional mechanic to inspect the lifters and recommend the appropriate replacement procedure. Regular engine oil changes can help prolong the lifespan of lifters and prevent damage.

Fix Loose Brake Pads

If your brake pads are making clicking sounds, you need to get them fixed right away. When brake pads are too loose, they can make stopping less effective and less safe. A skilled mechanic can check the brake pads’ condition and tell you if they need to be adjusted or replaced. If you properly attach the brake pads, you will be able to stop safely and smoothly.

Repair or Replace CV Axle

If the clicking sound is coming from a broken CV axle, it’s important to fix the problem right away. If your CV axles are damaged, it may be hard to drive your car and could cause more harm. Get a skilled mechanic to look at the CV axle and figure out how bad the damage is. The CV axle may need to be fixed or replaced, depending on how bad the damage is. If you act quickly, you can help keep your car’s engine in good shape.

Can You Drive a Car with a Clicking Noise?

Driving a car that’s making a clicking noise can be concerning, but whether or not it’s safe to continue driving depends on the exact cause of the noise. In general, it’s not recommended to ignore clicking noises and continue driving without addressing the underlying issue. Some clicking noises, such as those caused by loose brake pads or damaged CV axles, can compromise safety and further damage your car if left unattended.

It’s crucial to have a professional mechanic assess the clicking noise and determine if it’s safe to drive the car. In some cases, such as a rapid clicking noise due to a faulty battery or alternator, you may need to jump-start the car to get it to a mechanic for repair. However, it’s important to remember that temporary solutions should not be relied upon, and proper repairs should be carried out as soon as possible.

In Closing

If your car starts buzzing while you’re driving, you need to fix the problem right away to keep you safe on the road and stop any further damage. By learning about the possible reasons for clicking sounds and following the steps in this guide, you can figure out what’s wrong and fix it.

How to Open Bios Windows 11? (In Asus, Dell, Lenovo, HP and Acer Laptops)

Do you want to get to your Windows 11 PC’s BIOS or UEFI firmware? You must enter the BIOS in order to make changes to your motherboard, CPU, or boot devices. We will look at a lot of different ways on how to open BIOS Windows 11. We’ll talk about well-known laptop names like Acer, Dell, HP, Lenovo, and Asus. Okay, let’s begin.

What is BIOS?

Before we get into the steps, let’s understand what BIOS is. BIOS, which stands for “Basic Input/Output System,” is a very simple tool that manages and syncs all the hardware on your PC. It controls things like the CPU, RAM, storage drives, and other tools and is like the firmware for your motherboard. BIOS is sometimes called Unified Extensible Firmware Interface (UEFI) BIOS on new systems.

Why Do You Need to Access the BIOS in Windows 11?

Accessing the BIOS in Windows 11 can be useful for several reasons. Here are some common scenarios where you might need to enter the BIOS:

  • Overclocking: If you want to push your GPU or RAM to their limits for better performance, accessing the BIOS is necessary to enable overclocking features.
  • Virtual Machines: If you plan to run virtual machines on your PC using software like VMware or VirtualBox, you may need to activate Intel Virtualization Technology (VT-x) or AMD-V in the BIOS.
  • Changing Boot Order: When installing a new operating system or booting from a USB or CD/DVD-ROM, you may need to change the boot order in the BIOS to prioritize the desired device.
  • Hardware Configuration: The BIOS provides access to various hardware settings, allowing you to configure parameters such as date and time, fan speed, and power management.
  • Security Settings: If you want to add an extra layer of security to your Windows 11 PC, you can set a master password in the BIOS to restrict unauthorized access.

How to Open BIOS in Asus Laptops Running Windows 11

To access the BIOS on an Asus laptop running Windows 11, follow these steps:

  • Start by shutting down your laptop completely.
  • Press the power button to turn on your laptop.
  • As soon as the Asus logo appears, press the F2 key repeatedly until you enter the BIOS setup utility.

If the F2 key doesn’t work for your specific Asus laptop model, you can try using the Del key instead. Refer to your laptop’s user manual or Asus support website for the exact key to access the BIOS.

How to Open BIOS Windows 11 in Dell Laptops?

If you own a Dell laptop and want to access the BIOS in Windows 11, follow these steps:

  • Shut down your Dell laptop completely.
  • Press the power button to turn on your laptop.
  • When the Dell logo appears, press either the F12 or F2 key repeatedly until you enter the BIOS setup.

If neither of these keys works for your Dell laptop, consult the user manual or Dell’s support website for the correct key combination to enter the BIOS.

How to Open BIOS Windows 11 in HP Laptops?

To access the BIOS on an HP laptop running Windows 11, follow these steps:

  • Power off your HP laptop.
  • Press the power button to turn on your laptop.
  • Immediately start pressing the Esc key repeatedly until the startup menu appears.
  • Press the F10 key to enter the BIOS setup.

If the Esc key doesn’t work for your HP laptop, try using the F10 or F2 key instead. Check the user manual or HP’s support website for the correct key for your specific model.

How to Open BIOS Windows 11 in Lenovo Laptops?

Accessing the BIOS on a Lenovo laptop running Windows 11 can be done using the following steps:

  • Shut down your Lenovo laptop completely.
  • Press the power button to turn on your laptop.
  • When the Lenovo logo appears, press either the Fn + F2 or F2 key repeatedly until you enter the BIOS setup.
  • If the Fn + F2 or F2 key combination doesn’t work, consult the user manual or Lenovo’s support website for the correct key sequence to access the BIOS.

How to Open BIOS Windows 11 in Acer Laptops?

To access the BIOS on an Acer laptop running Windows 11, follow these steps:

  • Power off your Acer laptop.
  • Press the power button to turn on your laptop.
  • As soon as the Acer logo appears, press either the F2 or Delete key repeatedly until you enter the BIOS setup.
  • If neither the F2 nor Delete key works for your Acer laptop, refer to the user manual or Acer’s support website for the correct key combination to access the BIOS.

Now that we have covered the methods for popular laptop brands, let’s explore a general method to access the BIOS in Windows 11.

How to Open BIOS in Windows 11: General Method?

If you are unable to access the BIOS using the methods specific to your laptop brand, you can try the general method outlined below:

  • Shut down your Windows 11 PC completely.
  • Press the power button to turn on your PC.
  • Look for a message or logo displayed during the boot process that indicates the key to press to enter the BIOS (e.g., “Press F2 to enter BIOS”).
  • Press the key several times until the BIOS setup tool shows up.

If you don’t see any indication of the key to enter the BIOS, you can try pressing the F2, F10, Delete, or Esc key repeatedly during the boot process. Keep in mind that the exact key may vary depending on your motherboard or PC manufacturer.

In Closing

You need to be able to get to the BIOS in Windows 11 in order to make significant changes to your PC’s hardware setup and settings. It’s important to know how to get into the BIOS if you have an Asus, Dell, HP, Lenovo, or Acer laptop or a PC that was built just for you. Following the instructions in this guide will make it easy for you to get into the BIOS on your Windows 11 PC and make the changes you need.

Remember to look at the user manual for your laptop or the manufacturer’s support website for specific directions on how to use your device. Now that you know how to get into the BIOS, you can easily go through the firmware settings and make the most of Windows 11.

What are Possible Red Flags or Signs of a Scam When Buying a Car?

It’s really important to know what are possible red flags or signs of a scam when buying a car. Whether you’re a first-time buyer or a seasoned veteran, understanding these warning signs can help you avoid falling victim to unscrupulous practices and make informed decisions when purchasing a vehicle. In this comprehensive guide, we will explore the common red flags to watch out for when buying a car, how to protect yourself from scams, and what to do if you encounter a scam.

What are Possible Red Flags or Signs of a Scam When Buying a Car?

When buying a car, it’s crucial to be vigilant for potential red flags or signs of a scam. Some common indicators include:

Unrealistically Low Prices

An unreasonably low price is one of the most common signs that you shouldn’t buy a car. It’s likely that a deal is fake if it seems too good to be true. Scammers often use low prices to get people to buy things they don’t need. They may advertise a famous car model at a significantly lower price than the market value to attract attention.

To avoid falling for this scam, it’s important to get prices from more than one place and know how much the car you want to buy is worth on the market. Find out how much similar models usually cost to see if the deal you’re thinking about is within a fair range.

Rushed Sale

Another red flag to watch out for is a seller who is overly eager or pushy about closing the deal quickly. Scammers may try to create a sense of urgency to pressure you into making a hasty decision without thoroughly inspecting the car or conducting proper due diligence.

A legitimate seller will understand your need to take your time, think things over, and have the car inspected by a trusted mechanic. If a seller is rushing the sale or trying to push you into a quick decision, it’s a warning sign that something may be amiss.

Not Enough or Missing Paperwork

When you buy a car, you need to have all of the necessary papers with you. The history report and maintenance records of a vehicle are very helpful because they show any accidents, repairs, or big problems that the vehicle has had in the past. It’s a red flag that something might be wrong with the car if the seller can’t give you these papers or if they look missing or sketchy.

Always make sure you look over all the papers before you buy something. You should back out of the deal if the seller can’t or won’t give you the necessary paperwork. This will help you avoid scams or other problems.

Changed Odometer

Odometer theft is a common scam in the used car market. Scammers change the odometer to make the car look younger or better maintained than it really is by lowering the recorded mileage. This dishonest practice is meant to raise the price of the car and keep buyers from finding out the truth about its past.

To spot possible odometer scam, be wary of cars whose mileage seems incredibly low for their age. If the odometer number doesn’t seem right, it could mean that someone has tampered with it. A full vehicle history record can also show how many miles the car has been driven over time.

Reluctance to Meet or Show the Car

If a seller is reluctant to meet in person or hesitant to show you the car, it’s a significant red flag. Legitimate sellers should be willing to arrange a meeting and allow you to inspect the car thoroughly. Scammers may try to avoid personal interactions or prevent you from examining the vehicle to hide potential issues or misrepresent the car’s condition.

Always insist on seeing the car in person and conducting a thorough inspection. If a seller refuses or provides excuses for not showing the car, it’s best to walk away from the deal to avoid potential scams.

Pressure to Pay Upfront

One of the most common tricks scams use is to get people to pay for the car before they even see it or fill out the paperwork. They might demand payment right away or ask for a big deposit to hold the deal. This method is meant to get your money without giving you the car they said they would or protecting you legally.

You should never pay for a car before seeing it and making sure it’s in good shape. Use safe ways to pay, like trust services or bank transfers, that protect the buyer. If you fall for a scam, don’t use cash or wire payments because they are hard to track down and get back.

Vague Maintenance Claims

If the seller of a used car says that it only needs minor repairs or an easy tune-up, you should be wary. “Just needs a tune” is a term that is often used to play down or hide bigger problems. Before selling a car, honest sellers would usually take care of any maintenance or fixes that need to be done.

If the seller doesn’t give you clear information about the car’s repair needs or tries to convince you that small problems are easy to fix, it’s a sign that the car may have bigger issues.

Frequent Ownership Changes

Frequent changes in ownership can indicate potential problems with a car. If the vehicle has had multiple owners in a short period, it may suggest that previous owners encountered issues or were dissatisfied with the car’s performance. A comprehensive vehicle history report can provide information about the car’s ownership history and reveal any potential red flags.

Review the ownership records and pay attention to any patterns of quick turnovers. If a car has had numerous owners in a short span, it’s advisable to investigate further and consider the reasons behind the frequent ownership changes.

Lack of Maintenance Records

Maintenance records are essential for assessing a car’s history and understanding how well it has been maintained over time. If a seller cannot provide proper maintenance records or if there is a lack of documentation, it raises concerns about the car’s condition and whether it has received regular servicing.

This red flag is particularly pertinent for sports cars, luxury vehicles, and convertibles that require meticulous maintenance. A lack of maintenance records could indicate neglect or improper care, potentially leading to expensive repairs or hidden issues down the line.

Suspicious Vehicle History

A comprehensive vehicle history report is an invaluable tool when buying a used car. It provides insights into the car’s past, including any accidents, flood damage, title issues, or previous repairs. Reviewing the vehicle history report can help identify potential red flags and make an informed decision.

Pay attention to any significant incidents or recurring problems in the vehicle history report. Look for discrepancies between the seller’s claims and the information provided in the report. Additionally, consider obtaining additional reports from reputable sources to cross-reference and validate the information.

Online Car Buying Scams

Since there are more online classified ads and car lots, online scams are becoming more common. It’s very important to be careful and alert when doing business online. Watch out for these usual scams when you buy a car online:

  • Phantom Cars: Scammers may advertise cars they don’t actually own, using stolen photos and descriptions to deceive buyers.
  • Fake Escrow Services: Scammers may pose as legitimate escrow services, offering to hold funds until the vehicle is delivered.
  • Title Washing: Title washing involves hiding a car’s history, such as previous accidents or flood damage, by obtaining a new title from another state with more lenient regulations.
  • Odometer Fraud: Scammers may manipulate the odometer reading to decrease the recorded mileage, making the car appear more desirable and valuable.

Protecting Yourself from Car Buying Scams

While being aware of the red flags and common scams is crucial, there are additional measures you can take to protect yourself when buying a car. Here are some important steps to consider:

  • Research and Educate Yourself: Before entering the car buying process, educate yourself about the specific make, model, and year of the car you’re interested in.
  • Get a Pre-Purchase Inspection: Always have a trusted mechanic or professional inspect the car before finalizing the purchase.
  • Use Secure Payment Methods: When making payments, opt for secure methods that offer buyer protection, such as escrow services or secure online payment platforms.
  • Trust Your Instincts: If something feels off or too good to be true, trust your instincts and walk away from the deal.
  • Verify the Seller’s Identity and Reputation: Take the time to research the seller and verify their identity. Look for reviews, ratings, or testimonials about their previous transactions.

In Summary

When buying a car, it’s crucial to be aware of the possible red flags or signs of a scam. By understanding these warning signs and taking necessary precautions, you can protect yourself from unscrupulous practices and ensure a safe and gratifying car purchasing experience. Remember to research, verify, and trust your instincts to make informed decisions and avoid falling victim to scams.

Why Won’t My Xbox Turn On but It Makes the Noises?

If you are wondering, “Why won’t my Xbox turn on?” You’re not alone in facing this frustrating issue. Many Xbox users have faced the problem of their console not powering up despite hearing noises. Luckily, before seeking professional help, there are several tried-and-true fixes you can attempt. In this guide, we’ll explore the most common reasons for this problem and provide instructions on how to resolve it.

Reasons Why Your Xbox Isn’t Turning On

There could be various factors contributing to your Xbox not turning on. Let’s explore some common reasons:

Power Supply and Cable Issues

The power supply and cables play a crucial role in providing a stable power source to your Xbox. If the power cord is damaged or improperly connected, it can prevent the console from turning on. Similarly, a faulty power brick can result in insufficient power delivery to the console, causing it to beep but not fully power up.

Overheating

Like any electronic device, the Xbox is susceptible to overheating. If the console is placed in an environment with poor ventilation or if the vents are blocked by dust, it can lead to overheating. In such cases, the console may shut down as a safety measure and refuse to turn back on until it cools down.

Moisture on Motherboard

Moisture on the motherboard can be a significant issue for Xbox consoles. It can occur due to condensation or internal cooling system problems. When moisture builds up on the motherboard, it can cause various power-related issues, including beeping but not turning on. Moisture can also lead to short circuits and other hardware malfunctions if left unaddressed.

How to Fix an Xbox That Won’t Turn On

Now that we understand the potential causes, let’s explore the step-by-step solutions to fix your Xbox One:

Soft Reset and Power Cycle

Performing a soft reset and power cycle can often resolve minor software glitches and power-related issues.

Soft Reset

  • Unplug the power cord from the console and wait for 15 seconds.
  • Press the power button on the console a few times while it is unplugged to discharge any residual power.
  • Plug the power cord back into the console.
  • Press the power button to turn on the console and see if it powers up correctly.

Power Cycle

  • Ensure the console is turned off.
  • Press and hold the power button on the console for 10 seconds
  • Check the LED indicator on the power brick; it should flicker from orange to white.
  • Once the LED indicator remains steady orange, the console is in standby mode.
  • Press the power button again to turn on the console.

Triple Button Hold

If the soft reset and power cycle didn’t resolve the issue, you can try a triple button hold to reset the internal software.

  • Press and hold the power, eject, and sync buttons simultaneously for ten seconds.
  • Release the eject button after ten seconds.
  • Continue holding the power and sync buttons for an additional fifteen seconds.
  • Release the power and sync buttons.
  • Press and hold the power and sync buttons once again until the console powers up and starts syncing data.

Eject Button Tapping

An unconventional but effective solution is to tap the eject button multiple times. This action can help break any software loops causing the console not to turn on.

  • Tap the eject button on the console at least ten times in a row.
  • You don’t need to have a disc in the tray for this method.
  • The purpose is to redirect the console’s focus and trigger a new task, such as ejecting the disc tray.

Check Power Supply and Cables

Make sure that the power supply and cables are properly connected and not damaged.

  • Check that the power cord is securely plugged into the console and the wall outlet.
  • If the LED indicator on the power brick is not lit or blinking orange, consider replacing the power supply.
  • Inspect the power cord for any tears or other signs of damage. If damaged, replace it with a new one.

Overheating Issues

If your Xbox shuts down due to overheating, proper ventilation is crucial. Take the following steps to address this issue:

  • Remove any objects or obstructions around the console that may block airflow.
  • Place the console in a well-ventilated area.
  • Clean the vents using compressed air or a gentle brush to remove any dust buildup.
  • Consider using a cooling stand or external fan to improve airflow around the console.

Moisture on Motherboard

If you suspect moisture on the motherboard, take the following precautions:

  • Turn off the console and unplug it from the power source.
  • Allow the console to sit at an angle, allowing any moisture to drip out.
  • Use a hairdryer on the coolest setting to gently dry the internal components.
  • Alternatively, let the console sit undisturbed for 2-3 days to naturally dry out.
  • Consider using a dehumidifier in the room to reduce moisture levels.

Faulty Internal Power Supply

If the issue persists and is not related to external factors, the internal power supply may be faulty. In such cases, professional repair or replacement may be necessary. Contact Microsoft support or an authorized technician for further assistance.

Replace the Controller

If you’ve tried all the previous solutions and your Xbox still won’t turn on, consider replacing the controller. A faulty or malfunctioning controller can prevent the console from powering up correctly.

Check Power Strip and Wall Outlet

Ensure that the power strip or wall outlet you’re using is functioning correctly.

  • Verify that the power strip is turned on and has not tripped any fuses or circuit breakers.
  • If the outlet on the power strip is dead, replace it immediately.
  • Try plugging the console directly into a different wall outlet to rule out electrical issues.

Also Read: Can You Use a PS5 Controller on a PS4? (Simple Ways to Do It)

In Closing

When faced with the frustrating situation of ‘Why won’t my Xbox turn on,’ it can indeed be annoying, especially when it has beeps and noises. But there are a few things you can try to fix the problem. You can improve your chances of getting your Xbox working again by following the steps in this guide, such as doing a soft restart, power cycling, checking the power supply and cables, fixing problems with overheating and moisture, and replacing broken parts.

If all else fails, consider seeking professional assistance or exploring replacement choices. Always put safety first, and if you need more help, look to official sources.

Exit mobile version