iPhone Says SIM Failure? 8 Ways to Fix This

There’s nothing worse than having your trusty iPhone break down for no reason, especially when it says “SIM Failure.” It can be pretty bad when you can’t make calls, send texts, or connect to mobile data because of this. However, do not give up just yet; this problem can be fixed at home by following a few steps. There are 8 possible ways to fix the SIM failure message on your iPhone. We’ll go over each one in detail below.

What is SIM Failure Issue?

We need to talk about what a “SIM Failure” is before we talk about how to fix it. A “SIM” is a small card that holds information about the user and lets your phone connect to the network. If your iPhone shows SIM failure issue, it means that it can’t connect to the network of your wireless provider. This could be because of a number of things, from problems with the network to broken hardware.

Possible Reasons for SIM Failure

Understanding the potential reasons for the ‘SIM Failure’ can help you better diagnose and fix the problem. Here are some common reasons why your iPhone may be displaying the ‘SIM Failure’ message:

  • SIM Card Misplacement: If the SIM card is not inserted correctly or is dislodged, the iPhone may not be able to read it, resulting in a ‘SIM Failure’ message.
  • Damaged SIM Card: A physically damaged SIM card can cause this issue.
  • Outdated Carrier Settings: Outdated carrier settings can disrupt the communication between the iPhone and the carrier, causing the ‘SIM Failure’ message.
  • Software Glitches: Sometimes, software bugs or glitches can interfere with the iPhone’s ability to detect the SIM card.
  • Hardware Damage: Physical damage to the iPhone, particularly to the SIM card tray or the internal parts that connect to the SIM card, can cause ‘SIM Failure’.
  • Inactive Cellular Plan: If you don’t have an active cellular plan, the carrier may block the SIM card, resulting in a ‘SIM Failure’ message.

Ways to Fix SIM Failure with Top 8 Fixes

Now that we understand the possible reasons for the ‘SIM Failure’ message, let’s move on to the various solutions to fix this issue.

1. Reinsert the SIM Card

The simplest solution is to reinsert the SIM card. This can fix the issue if the card was not inserted correctly or became dislodged. Here is how you can do it:

  • Turn off your iPhone.
  • Use a SIM ejector tool to remove the SIM card tray from your iPhone.
  • Take out the SIM card, check for any visible damage, and clean it gently with a dry cloth.
  • Reinsert the SIM card into the tray, ensuring it is placed correctly.
  • Insert the tray back into your iPhone and switch it on.

2. Check your Cellular Plan

Make sure that your cell phone plan is still current. If not, call your service to get it working again. Don’t forget that you can’t use the carrier’s services without a plan, which is why you see the “SIM Failure” message.

3. Try a Different SIM Card

If you have an extra SIM card or can borrow one from a friend, try inserting it into your iPhone. If your iPhone works with the other SIM card, your SIM card could be the problem. In this case, you may need to replace it.

4. Force Restart your iPhone

A force restart can sometimes fix minor software glitches that could be causing the ‘SIM Failure’ message.

  • For iPhone 8 and later models: Press and quickly release the Volume Up button, then the Volume Down button. Hold the Side button until the Apple logo appears.
  • For iPhone 7 and 7 Plus: Press and hold the Volume Down and Side buttons together until you see the Apple logo.
  • For iPhone 6 and older models: Press and hold the Home and Side/Top buttons together until the Apple logo appears.

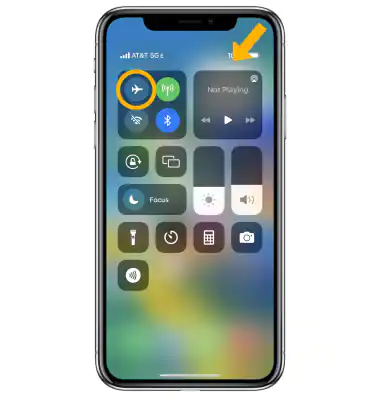
5. Turn Airplane Mode On and Off

Switching Airplane Mode on and off can refresh your iPhone’s network settings, potentially fixing the ‘SIM Failure’ issue.

  • Go to Settings and tap on the Airplane Mode switch to turn it on.
  • Wait for a few seconds and then tap the switch again to turn off Airplane Mode.

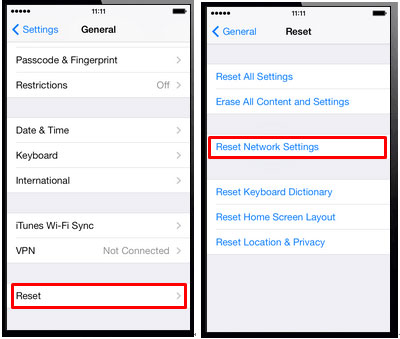
6. Reset Network Settings

Resetting network settings can fix network-related issues, potentially resolving the ‘SIM Failure’ problem. But remember, this action will erase all your saved Wi-Fi networks and passwords, cellular settings, and VPN settings.

  • Go to Settings, then General.
  • Tap on Reset, then on Reset Network Settings.
  • Enter your passcode and confirm the operation by tapping on Reset Network Settings.

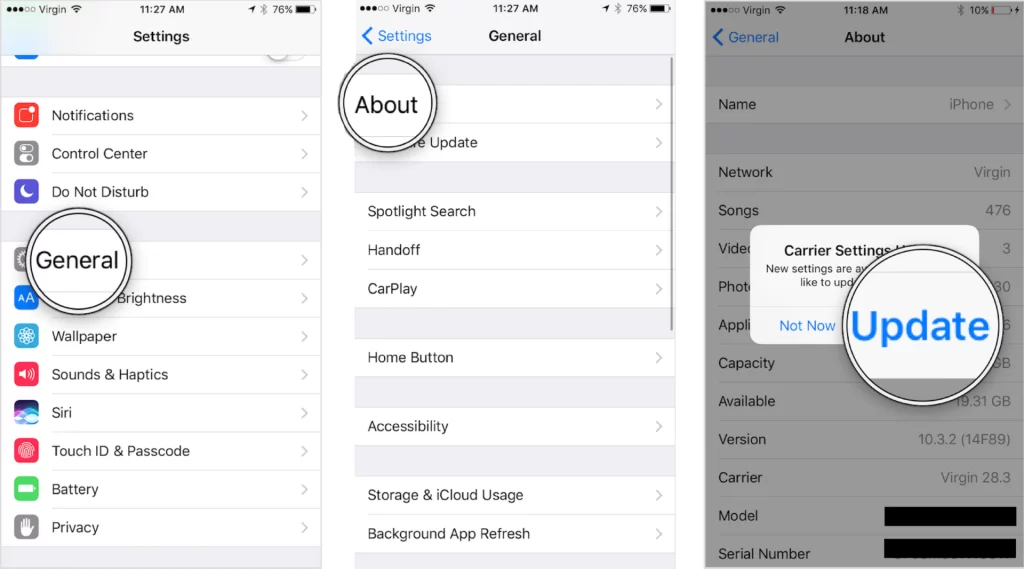
7. Update Carrier Settings

Updating your carrier settings can improve your iPhone’s network connectivity, potentially fixing the ‘SIM Failure’ issue.

  • Go to Settings, then General.
  • Tap on About. If an update is available, you’ll see an option to update your carrier settings.

8. Update iOS

While iOS updates are generally meant to improve your iPhone’s performance, they can sometimes introduce bugs. If you’re experiencing the ‘SIM Failure’ issue after updating iOS, you may need to install the latest iOS update to fix the problem.

  • Go to Settings, then General.
  • Tap on Software Update. If an update is available, tap on Download and Install.

In Closing

Experiencing SIM failure on your iPhone might be irritating, but keep in mind that it’s usually a simple problem with an easy solution. Try the suggestions provided in Inosocial’s blog post, and you should be able to solve the issue. If the problem continues to exist take your iPhone to an Apple Store or an authorized service provider for an in-depth checkup.

Why Is Shared Album Not Showing Up? (8 Fixes to try)

Shared albums on the iPhone are a convenient way to collaborate and share photos and videos with friends and family. However, it can be frustrating when the shared album doesn’t show up on your device. If you’re facing this issue, don’t worry! In this article, we will show 8 effective fixes to resolve the problem of shared album not showing up on your iPhone.

What Is iCloud Shared Albums?

Before we get into the fixes for shared albums not showing up, let’s first understand what iCloud Shared Albums are. iCloud Shared Albums are online spaces where multiple people can collaborate by adding, viewing, and interacting with photos and videos. These albums are commonly used for events or projects, allowing contributors to share memories in one central location. The shared album feature is available on iPhone, iPad, and Mac devices.

Why Is a Shared Album Not Showing Up?

There can be several reasons why a shared album is not showing up on your iPhone. Let’s see some of the common causes:

Incorrect Settings

One possible reason for a shared album not showing up is incorrect settings on your iPhone. Ensure that both iCloud Photos and Shared Albums are enabled in your iPhone’s settings. To check this, follow these steps:

  • Open the Settings app on your iPhone.
  • Scroll down and tap on “Photos”.
  • Make sure the toggle for “Shared Albums” is enabled.
  • If it’s already enabled, try turning it off and then back on again.

Problems with Apple Services

Sometimes, the shared album not showing up issue can be attributed to problems with Apple services. Check the Apple System Status page to see if there are any reported issues with iCloud Photos. If there are, you may need to wait for Apple to resolve the problem.

Poor Network Connection

A stable network connection is essential for iCloud to function properly. If you’re experiencing a poor network connection or no internet connection at all, it can hinder the synchronization of shared albums. Ensure that you have a stable internet connection and try again.

Software Glitch

Software glitches can also cause shared albums not to show up on your iPhone. A minor glitch or a deeper software issue can prevent the proper functioning of shared albums. Restarting your iPhone or force quitting the Photos app may resolve these glitches.

How to Fix Shared Album Not Showing Up? (8 Best Fixes)

Here are 8 fixes to help you resolve the issue of not getting a shared album invite on your iPhone:

Fix 1: Log Out of iCloud & Log Back In Again

Sometimes, signing out of iCloud and signing back in can resolve shared album issues on your iPhone. Here’s how you can do it:

  • Access the iPhone “Settings” and tap on your Apple ID name or banner.
  • Choose the “Sign Out” option and provide your Apple ID password.
  • Deactivate the “Find My iPhone” feature if prompted.
  • If desired, back up your data before signing out of iCloud.
  • Wait for some time, then sign back into your iCloud account.

Fix 2: Re-enable Shared Albums

In order to make sure that shared albums are properly enabled on your iPhone, follow these steps:

  • Open the “Settings” app and select your name.
  • Go to “iCloud” and tap on “Photos”.
  • Toggle on the “Shared Albums” option.
  • Confirm that “iCloud Photos” is also enabled.

Fix 3: Check Your Internet Connection

Because shared albums rely on iCloud, they require a stable internet connection to function properly. If shared albums aren’t showing up, check your internet connection and, if necessary, switch to a solid Wi-Fi network. If Wi-Fi is unreliable, consider using mobile data as an alternative.

Fix 4: Reset Network Settings

If your internet connection is stable but shared albums are still not showing up, you can try resetting your network settings. Here’s how:

  • Open the “Settings” app on your iPhone.
  • Go to “General” and scroll down to tap on “Reset”.
  • Select “Reset Network Settings” (Note: This is different from “Reset All Settings”).
  • Confirm the reset in the pop-up message and wait for your iPhone to reset the network settings.

Fix 5: Check Apple System Status

At times, shared album issues may not be due to any fault on your part but rather service disruptions from Apple’s end. To check if there are any ongoing issues, you can visit the Apple System Status page and verify the status of the Photos service. If there is a problem, you will need to wait for Apple to resolve it.

Fix 6: Verify iCloud Photo Link Expiration

iCloud photo links have an expiration period of 30 days. If you accept a shared album invitation through an expired link, you won’t be able to access the shared album on your iPhone. To resolve this issue, make sure you have access through a new link or alternative methods.

Fix 7: Disable Low Power Mode

Enabling Low Power Mode on your iPhone can affect the visibility of shared albums. If you’re experiencing this issue, try disabling Low Power Mode by following these steps:

  • Unlock your iPhone and access the “Settings” app.
  • Tap on “Battery”.
  • Disable the “Low Power Mode” by toggling off the button next to it.

Fix 8: Update iOS to the Latest Version

Keeping your iOS up to date is crucial for the smooth functioning of various features, including shared albums. If you haven’t updated to the latest iOS version, it might be causing issues with shared albums not showing up. To check for updates:

  • Go to “Settings” > “General” > “Software Update”.
  • If an update is available, select “Download and Install” to initiate the update process.

How to Accept Shared an Album Invite on iPhone

Are you ready to accept an invitation to join a shared photo album on iPhone? Simply follow these steps.

  • When the owner of the album sends you the invitation, you should see a notification on your screen or in Notification Center. Once it does, tap it.
  • If the notification does not appear, launch the Photos application.
  • If you’re not immediately drawn to it, tap for You.
  • The shared album invitation is described here. Tap Accept to join the album.
  • The shared album is displayed at the top of the screen. Tap the album’s name to view its photographs.
  • All of the photographs in the album are shown here. Depending on the album’s settings, you may be able to upload your own photos by hitting the +.

FAQs

  • Do you need iCloud storage for shared albums?

No, you don’t need iCloud storage specifically for shared albums. Shared albums utilize the storage available in your iCloud account, which is separate from the free 5GB of iCloud storage that comes with every Apple ID. If you need additional storage for your shared albums, you can upgrade your iCloud storage plan.

  • How to create a shared album on my iPhone?

Creating a shared album IPhone is straightforward. Follow these steps:

  • Open the Photos app on your iPhone.
  • Tap on the “Albums” tab at the bottom.
  • Scroll down and tap on “New Shared Album”.
  • Give your shared album a name, and optionally, add subscribers.
  • Tap on “Next” and select the photos you want to add to the shared album.
  • Tap on “Done” to create the shared album.

You can then invite people to join the shared album by tapping on the “People” tab within the album and sending them an invitation.

In Closing

shared albums are a fantastic way to collaborate and share memories with others. If you’re facing the issue of shared albums not showing up on your iPhone, try these eight fixes to resolve the problem. From checking settings to updating iOS, these solutions can help you enjoy the seamless sharing experience offered by iCloud Shared Albums.

How to Turn Off Location on iPhone (Latest Updated)

In the modern age, smartphones have become an indispensable part of our daily lives. Our iPhones rely on location services to improve our user experience, from accessing maps to sharing our whereabouts on social media. However, you may wish to disable location services to safeguard your privacy or conserve battery life. In this article, we will walk you through the steps required on how to turn off location on iPhone.

How to Use iPhone Location Services

Before we get into the process of disabling location services, let’s first understand what location services entail. When you enable location services on your iPhone, it allows apps and services to access your device’s GPS, cellular, and Wi-Fi network data to determine your precise location.

While this can be beneficial for apps like Google Maps or Find My iPhone, it also means that your location data is being collected and shared. Disabling location services completely may have implications for certain apps and features that rely on your location.

For instance, your photos won’t have location tags, map apps won’t provide accurate directions, and ride-sharing services like Uber or Lyft won’t be able to pinpoint your location. However, if you prioritize privacy and want to minimize the collection of your location data, turning off location services entirely is an option worth considering.

Also Read: “How to Delete Wallpaper on iPhone?”

How to Turn Off Location on iPhone (Step-by-Step Guide)

To completely disable location services on your iPhone, follow these simple steps:

  • Open the Settings app on your iPhone.
  • Scroll down and tap on Privacy.
  • Select Location Services.
  • At the top of the screen, you will find the toggle switch for Location Services. Tap it to turn it off. The switch will turn grey, indicating that location services are now disabled.

How to Disable Location Services on iPhone (Manage Everything)

Aside from individual apps, iOS also utilizes various system services that may rely on your location data. To have complete control over your location privacy, it’s important to manage these system services as well. Here’s how you can disable specific system services that use location tracking:

  • Open the Settings app on your iPhone.
  • Scroll down and tap on Privacy.
  • Select Location Service.
  • Scroll to the bottom of the list and tap on System Services.

Within the System Services settings, you’ll find a list of features that use location tracking. Here’s a breakdown of some of these services and how they utilize your location data:

  • Apple Pay Merchant Information: This feature uses your current location to provide accurate merchant names when you use Apple Pay.
  • Cell Network Search: Enables your iPhone to track cell tower usage and sends data to Apple.
  • Compass Calibration: Uses location tracking to calibrate your iPhone’s electronic compass.
  • Device Management: Allows you to securely and remotely configure devices and networks.
  • Emergency Calls & SOS: Provides precise location data to first responders during emergencies.
  • Find My iPhone: Helps you locate your lost or stolen iPhone remotely.
  • HomeKit: Enables automation based on your location for smart home devices.
  • Location-Based Alerts: Delivers location-specific alerts and news.
  • Motion Calibration & Distance: Tracks motion and distance for fitness and activity apps.
  • Networking & Wireless: Records Wi-Fi usage and sends data to Apple.
  • Setting Time Zone: Automatically adjusts your iPhone’s time zone when traveling.
  • Share My Location: Allows you to share your live location with specific contacts.
  • System Customization: Adjusts system appearance and settings based on your location.
  • Significant Locations: Keeps track of places you frequently visit and provides relevant information.
  • iPhone Analytics: Provides Apple with usage information about your iPhone.
  • Routing & Traffic: Shares current traffic patterns and speed with Apple to improve Maps.

To manage these services, simply toggle them on or off based on your preferences. Disabling unnecessary services can help protect your privacy by minimizing the collection of your location data.

How to Disable Location Services in Find My iPhone

Find My iPhone is a handy feature for tracking down a lost or stolen iPhone, and it may also be used to keep critical data out of the wrong hands. If you’re certain you don’t need those precautions and want to stop Find My iPhone by turning off Location Services, follow these steps in the Find My iPhone app:

  • Open Find My iPhone, tap Me in the bottom right, slide the screen up, and turn off (grey) Share My Location.
  • Using the Find My iPhone app, disable Location Services.
  • If you’ve configured Find My iPhone so that specific contacts may see your location, you can disable Location Services for them by pressing People in the bottom left, choosing a person from the list, then tapping Stop Sharing My Location.

How to Turn Off Location Services in iMessage

Sharing your location in iMessage is a useful method to keep friends and family updated on your estimated arrival time or to offer them peace of mind that you arrived safely. But you probably don’t want them watching your every move around the clock. Here’s how to disable iPhone location by disabling Share My Location for particular contacts in iMessage:

  • Select a discussion thread with the individual you wish to disable location sharing within iMessage.
  • Tap the person’s name at the top, then the Info symbol (the letter “i” with a circle around it), and then Stop Sharing Location.

In Closing

We looked at a number on how to turn off location on iPhone, change app settings, and take care of your iPhone’s system services in this guide. You can keep control of your location data and protect your privacy by turning off location services or changing the rights that certain apps need. Do what you need to do to keep your position private and have a safer iPhone experience.

Guided Access Not Working: Why and How to Fix it NOW?

Guided Access is a feature that doesn’t work for everyone. If you’re running into problems with Guided Access on your iPhone, iPad or iPod touch, don’t worry! You’re not alone. In this article, you’ll find out what guided access is and why it’s important for iOS devices. We’ll also cover some common problems that can cause a guided access not working situation, so you know how to fix it!

What is Guided Access?

iOS has a great feature called Guided Access, which allows people with certain disabilities to use only one app at a time, or to limit the amount of time they spend on an app. This can be really helpful for people who have trouble staying focused, or who need to stay on task.

However, sometimes Guided Access doesn’t work the way it’s supposed to. If you’re having trouble such as guided access not working, there are a few things you can do to try to fix it.

Why is guided access not working?

Recently, some users have reported that they are facing guided access not working issues on their devices. In this article, we’ll discuss why Guided Access might not be working and how to fix it.

There are several reasons why Guided Access might not be working on your device:

1. The feature may be turned off in Settings.

2. You may not have set up an iphone passcode for Guided Access.

3. The app you want to use with Guided Access may not be compatible with the feature.

4. There may be an issue with the hardware button that starts and stops Guided Access.

5. There could be a problem with the software on your device.

6. You may have reached the maximum time limit for Guided Access sessions.

If you’re having trouble with Guided Access, follow the steps below to fix the problem:

How to fix guided access not working?

If you are using an iPhone or iPad and have difficulties with Guided Access not working, there are a few things you can do to fix the problem.

First, check to see if Guided Access is turned on in the Settings app. To do this, go to Settings > General > Accessibility > Guided Access. If the switch next to Guided Access is not green, tap it to turn on the feature.

If Guided Access is already turned on but you’re still having trouble, try restarting your device. This can often fix minor software glitches that may be causing the problem.

If neither of these solutions works, try resetting your device’s settings. This will not delete any of your data, but it will restore all of your settings to their defaults. To reset your settings, go to Settings > General > Reset and tap “Reset All Settings.”

If you’re still having trouble with Guided Access not working after trying all of these solutions, contact Apple Support for further assistance.

Why is Guided Access grayed out?

If you find that the Guided Access option is grayed out on your device, there are a few potential reasons why this may be happening. 

First, it’s important to make sure that you’re running the latest version of iOS – if you’re not, updating your software may fix the problem. 

Additionally, check to see if Guided Access is turned on in your device’s Accessibility settings; if it’s off, you won’t be able to use the feature. 

Finally, restarting your device can often resolve any lingering issues and fix guided access not working. If you’re still having trouble after taking these steps, reach out to Apple Support for further assistance.

Source: Robot Powered Home

How to enable guided access?

If you have an iPhone 6s or later, you can use Guided Access to temporarily disable features on your device. This can be helpful if you have an autistic spectrum disorder or other condition that makes it difficult to stay on task.

To enable Guided Access:

1. Open the Settings app and tap General > Accessibility > Guided Access.

2. Turn on Guided Access and set a passcode that only you will know.

3. Open the app that you want to use with Guided Access and triple-click the Home button.

4. Adjust the options for what you want to disable on your device, then click Start in the top right corner of the screen.

5. To end a session, triple-click the Home button again and enter your passcode.

By the way, as an iPhone user you can read: “Text Scheduler iPhone” to know how to schedule your iPhone posts to be sent whenever you want.

FQA

How to disabled guided access?

Assuming you have already set up Guided Access on your device, to disable it, follow these steps:

1. Triple-click the Home button. This will bring up the Guided Access options.

2. Enter your passcode (if you have one set).

3. Tap the End button in the upper left corner.

If you don’t have a passcode set, triple-clicking the Home button will take you straight to Step 3.

Does Guided Access work with Facetime?

If you have an iPhone 6s or later, you can use Guided Access with FaceTime. To do this, open the FaceTime app and start a video call. Then, triple-click the Home button and select Guided Access from the menu. You can then use the controls to turn off FaceTime’s audio and video features.

Invert Colors iPhone: How to do it on iPhone and iPad

iPhones are one of the most well-known brands around the world. Its products come in a range of shapes and sizes as of the beginning in 2007. From that time on, iOS has become an advanced operating system that is gradually growing to include many features and innovations in each new iteration. One of these features is the ability to invert colors iPhone. However, finding an option can be a little difficult. Reversing the iPhone’s colors can be helpful for a variety of reasons, although its main function is to reduce eyestrain due to staring at the screen and to help reduce glare when going out in the sun. This is not a feature that many are aware of, which is where many find it. Of course, the color of the iPhone may also be accidentally reversed, so some may just be trying to turn it off. If you want to know how to invert colors on iPhone stay with us on this article so you will find your answer to these questions:

·  How to invert colors on iPhone?

·     How to invert colors on a picture on iPhone?

·      How to invert colors on a picture?

·      How to turn on invert colors?

·      How to invert colors on iPad?

·      How to invert a picture only used in head?

What are inverted colors?

Since many people are sensitive to light levels, companies like Apple have often establish some features in devices such as mobile phones to reduce the brightness of the screen. A popular method to do this is through the “inverted colors” feature, which returns the constituent bits of the page pixels, and you end up with a page where all the colors are inverted – white turns black and light colors. iPhone x colors are a bit different but the process is the same. iPhone x colors are sharper.

How to invert a picture?

You can try two inverting a picture in iPhone by two methods, both with some major differences. To find the related options, should follow this path:

Settings > Accessibility > Display & Text Size, then scroll down about halfway through the menu. You can find the options to invert the iPhone’s colors right below the “differentiate without color” menu.

  • Smart Invert

Brilliant Invert is the main choice, which turns around the shades of the presentation in most circumstances, the exemptions being for pictures, media, and certain applications that utilization dark mode. This is the choice that most iPhone clients will need to use, as there are circumstances, explicitly with pictures, where rearranged colors are a disservice as opposed to an advantage.

  • Classic Invert

The second option is Classic Invert, which completely reverses the colors of the iPhone’s display. This option does not have any exceptions for images or apps, so once it is turned on everything will be switched. Reverse colors can also be attached to the side button, allowing users to quickly enable and disable this feature. To do this, go to the Access Shortcuts menu under the Access Settings menu. Turn it on and then the three-click key will be activated. All options can be easily found in SEO and make them easy to find. That is all it takes to reverse colors on iPhone’s iOS. This feature can be useful when going out in the sun or reducing eye fatigue, which in turn contributes to migraines and blurred vision.

How to invert colors on a picture?

Why does someone invert colors on a photo? Basically, this color reversal function is for people who have visual impairments and have difficulty distinguishing between image and text content with the background color of the iPhone screen. This process changes the existing color to the exact opposite color. For example, if the fill is black, it turns white, and so on. Therefore, visually impaired people or color blind users can find it useful.

Here is how to invert colors on a picture, so open the Photos app and tap the photo you want to edit then:

1.      tap the Edit button in the upper right corner of the screen.

2.      Then tap the Adjustments button in the lower right corner of the screen.

3.      Tap the Invert Colors button to invert the colors of your photo.

4.      Tap the Done button in the upper right corner of the screen to save the changes.

5.      There are several ways to invert colors in iPhone photos.

6.      One way is to use an app like Invert Colors that is available for free in the App Store.

7.      Another way is to use the Photos built-in app and go to Edit> Adjust Color> Invert Colors.

How to turn on invert colors?

The right answer for this question is “it depends”. Invert colors iPhone photo is different from android systems so the first thing you should consider is to choose which operating system you need to inverted colors to be applied.

How to invert colors iPhone?

As mentioned above inverting colors makes the iPhone or iPad screen easier to watch for people who are sensitive to brightness. To make this option work on Apple products (iPhone 14 colors and options are may be different, as it is not released yet) you mainly go through the followings options:

1.     Launch Settings from your Home screen.

2.     Tap Accessibility.

3.     Tap Display & Text Size.

4.     Tap the switch next to Smart Invert or Classic Invert. Smart Invert reverses the colors of the display except for images, media, and some apps that use dark colors.

Repeat the above steps to undo the reverse color settings on your iPhone or iPad and return the colors to their original settings. Tap the invert option again to turn off the feature and the device colors will return to normal. Now you have figured out how to invert colors iPhone (based on iphone x colors but applicable on other models) so let’s go to the next question.

How to invert colors on iPad?

With the Accessibility option, you can easily invert the colors of the iPhone or iPad screen. This can be very useful for many users for a variety of purposes, whether examining screen items in low ambient light, due to color blindness or other vision problems, or perhaps just a general preference. There are actually two ways to invert the colors of the screen, one is called “smart invert” which inverts everything on the screen except media and images, and the other is the “classic inverted” setting that puts everything on the screen iPad display reverses.  The answer to the question of “how to invert colors on iPad?” is that as the operating system is the same with iPhone, the steps are the same as well.

How to set up an inverted colors shortcut?

If you need to create an inverted colors shortcut you should triple-press on the Home button (or the side button to do this for iPhone x colors and newer) and choose the invert colors option you need to apply.

How to invert a picture only used in head?

Knowing how to invert a picture only used in head is the last part of this article.  In order to invert a picture only used in head you should use the flip option through these steps:

1. Open the Photos app.

2. Find the photo that you want to flip, and tap it to enlarge it.

3. In the top-right of the screen, tap Edit.

4. The picture will zoom out then tap the icon that is like a square with arrows circling it.

5. This will bring up new options so tap the icon in the very top-left, which looks like a pyramid that’s been split in half. Now select the head and tap done.

In conclusion

Invert colors iPhone photo is important because without that it is become irritating while using our smartphones. Therefore knowing how to invert colors on iPhone or other devices is important. In this article, we learned how to turn on invert colors. You can apply and enjoy this feature.

No Sound on Your iPhone Calls, Videos, Text? (Fix Now)

Apple devices had always been the main rivals of Android phones not only in market share but also in features. Be that as it may, one angle it promptly bests its opponents is its sound innovation. iPhones by and large have better sounds and higher volume range. But, with new elements continually being coordinated to the iPhone, its sound capacity is a significant region these updates may unfavorably influence.

It is not incomprehensible to hear iPhone users grumble about misshaped sounds. By far, the most terrible guilty party is the point at which the iPhone would have no sounds by any means during unfavorable times.

Sound issues cannot be kept away from, yet they can be fixed. For that reason, we have made this article to direct you along to reestablish your iPhone’s sounds. Peruse on to figure out a few strategies on the most proficient method to investigate your iPhone and find your answers to the following questions:

• why no sound on iPhone?

• Why is there no sound on my iPhone videos?

•  Why is there no sound on my iPhone?

•    Why is no sound on iPhone?

Also Read “How to get the App Store back?”

Why there is no sound on iPhone?

As mentioned above iPhones are one of the best-selling mobile devices today, yet it is not flawless. Even the more basic sound functions are not safe. This can be very disappointing because sound plays such an important role in the iPhone especially when calling or listening to music. Depending on the circumstance, the following may cause iPhone sound issues:

  • Sound settings

Sometimes your iPhone’s volume is accidentally lowered due to a bulge in the bag or restlessness. Other software settings such as “Do Not Disturb” mode, “Silent Mode” or even sound enhancement can cause this problem.

  • Connection problems

This refers to the connection of your headphones to your iPhone. Occasionally there are connection problems, such as sudden disconnection and interference, which interferes with the audio signals coming from your iPhone to the headphones.

  • Bugs

These errors in the iPhone operating system cause unwanted results such as no sound. This problem can usually be fixed by restarting the phone or updating to the latest software system. iPhone no sound on text bugs often happen because of malwares.

  • Third-party app settings

Sometimes, the cause is not in the iPhone itself, but in the streaming platform or other apps, you use. Yes, the reason why no sound on iPhone can sometimes this simple. Some apps have their own sound settings that may sometimes interfere with iPhone performance.

  • Hardware problems

If everything fails, the most important thing is that the iPhone hardware is damaged. The best way to do this is to use the Apple Warranty or Apple Support.

Whilst the absence of any sounds is a reason to worry, you do not have to go to an Apple service center yet. That might seem like the consistent thing to do given the circumstance, but it is additionally a cost-effective and successful arrangement.

  • No sound on iPhone videos

There are times when you record something and the phone does not recognize it or does not play audible sound, and even iPhone movies are blurred. iPhone categorizes this issue as the error of not playing sounds. Sometimes the error is related to all files, while in other cases it only occurs when playing video.

To deal with such scenarios, you need to follow different types of troubleshooting to recover the audio part of your iPhone video. Before you get acquainted with the various solutions for iPhone repair, do not play audio in videos. It is better to understand the various reasons that caused it first. In order to get rid of No sound on iPhone videos you can try the following ways:

  1. Clean the Jack: when the dust on the iPhone jack creates the illusion that the headphones are plugged in, the iPhone will display a headphone icon on the top. If you see it, remove the cover of your phone and check it for dust and debris collection.
  2. Reset the Sound Levels: the second solution for no sound on iPhone videos issue is switching it from silent to general and adjusting the sound can solve the problem.
  3. Disconnect External Devices: Head to the Bluetooth and Wi-Fi settings on your iPhone and turn them off.
  4. Turn Off DND Mode: If the iPhone’s audio playback is due to a DND level, turning it off from the settings will fix it immediately.
  5. Soft Reset the iPhone: if no sound on iPhone videos continues to bother just reset you device.

iPhone no sound on calls

Calling is one of the main functions of any mobile phone including the iPhone. However, sometimes during regular calls or FaceTime, you may not hear much or any sound from your speakers. You may notice that the call is cut off or inaudible in the other party’s voice.

iPhone no sound on text

In iPhone no sound on text case, you may not receive new text notifications due to incorrect settings or software bugs. This is usually a temporary problem and can be fixed with some quick and easy fixes. If you do not receive text message voice alerts on your iPhone, or your device does not show new SMS or iMessage notifications you should consider further ways like resetting all settings.

How to fix no sound on iPhone?

Finding an iPhone suddenly without any sound such as can be very troublesome. There is nothing worse than a phone call where you cannot receive calls or even play music properly. According to the root cause we discussed above, instructions will be provided on how to properly recover iPhone’s voice capabilities in this part. The methods described in the next few sections will work on all iPhone models. If the method only works for certain models, the iPhone X and later models, a separate set of instructions are provided for inserting older models. It is also assumed that you have the latest version of iOS. However, most steps work well with older versions. Here you can find your answer to the following questions:

1. Sound settings

Sometimes the most commonly used functions are those that are often overlooked. Therefore, when it comes to troubleshooting noise on your iPhone, it is best to start with the basics: sound settings.

First, check the sound level. You can do this by simply tapping any of the volume buttons. If it is completely to the left, it is off. Simply slide it to the right or tap the volume up button. Either way, the volume of your iPhone will increase.

Do not be surprised if your voice subconsciously decreases. There are several reasons why this might happen. One of them is to put your iPhone in a pocket or bag. Random gestures may push the volume buttons. They may turn the volume up or down unnoticed without you noticing.

In addition, gradual updates to your iOS and iPhone apps can affect the volume level. It is not uncommon for an upgrade to ignore your volume level and lower it. If the sound is good, check if your iPhone is in Do Not Disturb mode. You have tried this way but you do not know why no sound on iPhone problem keeps bothering yet? Go to the second step. 

2. Switch between silent/ring modes

Another reason for the lack of sound on the iPhone is its Ring / Silent key. All versions of the iPhones from the first to the latest have this feature. Unlike Android devices, iPhones can be set to silent immediately. All this is thanks to the Ring/Silent key on the top left of the iPhone. However, you can easily mute your voice with it. Check the side of your iPhone to make sure the ringer key does not show the red bar. In this case, ring the alarm switch to restore all audio functions. Adjust the volume accordingly.

3. third-party application sound checking

Third-party apps can also affect iPhone’s voice settings. Music apps like Spotify have separate volume and equalizer controls. Meanwhile, other apps such as Instagram and Zoom have their own mute controls. It is convenient for these programs to have their own voice settings. However, the same settings can affect other applications and the iPhone in general. In some cases, their settings remain even when the same third party is down or disabled.

4. Turning off the Bluetooth

If you have a Bluetooth device connected to your iPhone, for example. Your AirPods are one of the possible reasons your iPhone is silent. Instead of sounds coming out of your iPhone speakers, the sound is sent to your Bluetooth device.

You can solve this problem by turning off your Bluetooth. Doing so will disconnect all your Bluetooth devices from your iPhone. Unlike disconnecting your Bluetooth device, you will no longer need to pair them.

5. Restart your iPhone

Almost all electronic items are designed to easily fix major errors by performing a reboot. In addition, an iPhone, as a consumer electronics, is no exception. This is not exactly a safe solution. But if the audio problems are caused by a program or iPhone malfunction, it will work most of the time. Remember that, there are slight differences in how to restart with some older iPhone models.

6. Restore factory settings

If you have done all the above and your iPhone sound still is not working there is still two ways. One way is to reset your iPhone to factory settings. This is a long process, so never do it unless there are still other usable options to use. You just have to reset your iPhone factory settings as a last resort. Due to the possibility of data loss, you must first back up your data.

7. Reset all settings

By far your iPhone sound should be ok if not you can reset all its settings. By doing this, your iPhone will return to its previous working state. While resetting all settings does not affect your files and media, keep in mind that it can still affect some critical settings. These settings may include network, Apple Pay cards, location and privacy, keyboard dictionary, and your home layout.

In addition, resetting will not result in the loss of all data on your iPhone. However, it is still recommended that you back up your data anyway before resetting all settings. This way, you can restore the settings you have already saved and avoid any possible problems.

In a nutshell

Most times, having no sound on iPhone videos or iPhone no sound on calls is a minor issue often caused by tweaking the phone settings. In that case, utilize the points we mentioned above. If the problem is not fixed and you do not know why no sound on iphone, you should consider visiting an iPhone service center.

How to track iPhone location by phone number for free? (100% working)

Whether being suspicious about your spouse or just your phone has been stolen by burglars, you may need to know the location of the iPhone smartphone and make decisions. Fortunately, iPhone has a feature that it could declare its location to the network while it is on and working with the user.

In this great tutorial, we are going to see how to track an iPhone by phone number and how we can use the iPhone locator by number application for this purpose.

Is It Possible to track iPhone location by phone number?

The answer is yes. As you know, all smartphone devices have an ID which they can connect to different networks with it while you are speaking on your phone, looking for online maps, or just searching on the internet. By default, the mother network can recognize the exact location of the connected device, and if you have an appropriate tool or app, you can get this information easily.


Read the following sections to learn how to track an iPhone location by phone number very easily.

How to track an iPhone by phone number?

There are several methods to locate iPhone by number, with or without an additional app, and as iPhone users you ned to know them. Most of the applications used to track iPhone with phone number are categorized as “Spy apps.” As you can get from their name, these tools try to track iPhone location by phone number without letting the user of the mentioned iPhone know what is exactly happening. The iPhone spy apps can be used as a thief locater (if your iPhone has been stolen) or as a part of the parental control system for school children.

How to Track an iPhone by Phone Number Free

Three different methods can be used to track iPhone location by phone number, as you see below:

  • Using iCloud

If all your family members use the iPhone series, you can easily add your kids’ iPhones to your Apple ID. With the help of iCloud, you are able to benefit from the “Find my iPhone” tool to track iPhone location by phone number free. To track iPhone with phone number with iCloud, follow these steps;

  1. First, visit www.iCloud.com and log in to your account, if necessary.
  2. Next, find the “Find my iCloud” option on the screen.
  3. Note that you can locate your child on the map. To turn on this feature, you have to make sure that your child’s iPhone is sharing its location. Your children will also need to be carrying the iPhone in a space that has access to the internet.
  • Using Family Orbit

If you want to get rid of installing any additional apps on your phone, you can use family Orbit. With this brilliant tool, you are able to track all calls as well as the date, the phone number, and even the duration of the call. This gives you complete peace of mind, as you need to feel confident knowing that your child is safe. You can also track your son or daughter’s sent messages with iMessage. No matter if they delete their SMS text from their phone, a back of texts will be sent to your device before starting to delete.

Locating an iPhone device with Family orbit is very easy. To enable it, follow these steps;

  1. First, visit familyorbit.com, get your free trial key, and create a personal account.
  2. Next, enter your child’s Apple ID credentials in the secure online panel.
  3. You need to choose your child’s iPhone from the list of devices associated with the given Apple ID.
  4. Now, you can track your child’s iPhone remotely from your phone, using iCloud at a regular interval.
  • Using the iPhone locator by number

The third method is to use an iPhone locator by number. As mentioned earlier, these “spy” applications are used to track iPhone location by phone number without remaining any footprint. Continue reading to get familiar with this mysterious technology.

What is an iPhone locator by number?

New technologies now let the users locate their own or other people’s devices from a distance and make sure they are working true or in the right place (especially for children). The iPhone tracker app is one example of these novice technologies.

While some applications need to be installed on the target device to let the second device know its location, the iPhone tracker only requires a phone number or an Apple ID to work properly for you. This indicates that there is absolutely no way to know if any person is tracking your iPhone with these tools or even with the “Find my iPhone” option.

Track iPhone by number with a phone tracker

There are many phone trackers on the market, both for iPhone and Android phones. One of these applications is Tracker Pro. To use the iPhone locator by number, you need to download Tracker Pro from the App Store and enter the phone number on the app. As a result, it will search the entered phone number on the database and give the location and several details about the iPhone or iPad device very soon.

Do you want to know how to track an iPhone by phone number? Here is the list of iPhone trackers you can find on the internet;

  • Family Locator and GPS Tracker
  • LocalToWeb
  • Map My Run by Under Armour
  • GPS Tracker
  • Find My Friends
  • Glympse

Track iPhone by number from your web browser

You can track a specific iPhone or iPad device from a web browser as an alternative. Two examples of this method were introduced recently: Family orbit and “Find my iPhone” using iCloud. There are also more websites that can locate iPhone by number for you, such as webmatcher.

All you have to do here is make an account on these tracker websites, enter the details of the target device (Apple ID, e.g.), and let the server continue the process for you.

Summary

Thank you for reading, and please share the content with your friends. We have collected all elements you need to track iPhone location by phone number, including web browsers and spy apps designed for this purpose. As a recommendation, it is better to prevent buying a specific smartphone for children under the school-age and use your phone with your child as a common device until 12. If you think a separate phone (iPhone or Android) is required to be bought for your kid, devices with less connection and smart features are preferred.

How to play games on iMessage, Android & iPhone

If you think the trend of your life is a little bit boring and need to bring some excitement to your daily activities, you can play a new collection of mobile-based entertainments, called “iMessage games.”

Whether you have an iPhone or an Android phone, you can enjoy playing these games. In this post, you will learn how to get iMessage games, how to play games on iMessage, how to play iMessage games on iOS 10, and what are the best iMessage games available for the users.

What are iMessage games?

To explain the subject informally, iMessage games are extensions added to your iPhone’s messaging app. This means that you only need to download the patch from App Store, add it to your messaging app, and invite your friends or relatives from contacts to have fun with each other. Note that your friend should also have the same game on his or her phone in order to play with it.

How to get iMessage games?

The answer to “how to get iMessage games?” is too simple. Before starting the process, make sure iMessage is enabled on your phone. Go to “Settings,” open the “Messages” tab, and tap iMessage to enable iMessage. Now you can send and receive messages from the application.

While you are in the iMessages app, you can see a horizontal bar above the keyboard that has a few icons from your downloaded apps. Still can’t see this bar? Click on the “gray App Store” icon next to the text field to enable it. Now click on the blue App Store icon to open the iMessage App Store. Here, you can see all the available games ready for download. To get each game you want to have on your phone, click on the “Get” button next to its title.

Also, read about streaming Netflix on Discord.

How to play iMessage games on Android

If you are one of an Android user, you may ask how to play iMessage games on Android. The fact is that you cannot run iMessage games on an Android, and the most important reason is that there is no iMessage support from Android. However, you can bypass this problem on your phone by using third-party apps.

One of the most fantastic applications which can help you play iMessage games is weMessage. Note that in order to access iMessage games, you need to have a device with macOS or iOS operating system. weMessage can provide a virtual environment in which you can run iMessage games on your Android system. To use weMessage, you need to gather these requirements:

  • An Apple ID that you used on your iMessage App.
  • A Mac with macOS 10.10 or higher because using weMessage on your Android requires running a program on your Mac.
  • Download and install Java 7 or the latest available version.
  • An Android phone with Android OS 5.0 or higher.

To use weMessage on your Android phone, follow these steps:

  • First, you need to install Java on your Mac device. To reach that, go to the “Applications” section, select “utilities,” and open the Terminal app, which is already installed on your device. Then, click on Java and choose the “return” button. Make sure there is no error during the installation.


  • Next, download the weMessage app on your device. After downloading, double-click on the “run. Command” option to launch weMessage.


  • After you click on the “Apple” menu, choose “Security & Privacy.” Then, click on the General tab and select “Open Anyway.”


  • In this case, you need to enable some accessibility features for Mac. To that, you need to go to the “System Preferences” section, click on the “Security & Privacy” option, select “Privacy,” and finally click on the “Accessibility” tab. If you want to unlock settings on your device, you can click on the lock icon on the bottom-left corner and enter your password if required.


  • Now, on your Android device, go to Google Play and download the weMessage app. Open the application on the Continue option, give the application permission to access your messages, and move the slider to Allow “Modify System Settings.” Finally, click on the switch to make it “On.”


  • At this level, you need a Mac IP address. Go to the “System Preferences” section, click on “Network,” and choose Advanced, TCP/IP. Type the details in the blank spaces:


  • IP Address: 192.168.80.128
  • Subnet Mask: 255.255.255.0
  • Router: 192.168.80.2


After filling in the blanks, enter the email and password you have entered on your Mac device, and open the “Sign in” page.


  • Finally, you will be shown a conversation page. Congratulations! Now you can send messages from your Android device to iMessage on Apple devices. Appearing your messages in Blue Bubble indicates that it is done.

How to play iMessage games on iPhone

As we got the idea of how to play iMessage games on Android devices, now we can learn how to play iMessage games on iPhone. Consider that as long as your iPhone is updated to iOS 11 or higher, you are able to download several games on your iMessage. To start playing iMessage games on your iPhone, follow these steps:


  • Open the Messages app on your phone.
  • Now, search for the contact you want to play with. You need to scroll through the options above your keyboard, and if you find the “App Store” icon, click on it.
  • Next, you will see an exclusive version of the App Store which shows extensions for the iMessage app. Click on the “See All” button to view all iMessage games. Browse and find one you might like.
  • If you want to download a specific game, click on the “Get” button next to its icon.
  • Now, click on the “X” icon in the top-right corner of the screen to exit the App Store and return to the iMessage application.
  • Scroll through the icons below the keyword until you find the game app you just downloaded. As a result, a menu will open where you can customize the game you play with your contact. After selecting the game type, it will automatically be loaded to your keyboard. You will see a regular message saying “Delivered,” indicating that correctly finished the process.
  • Now, you can play the game with your friends.

How to play iMessage games on iOS 10 

You can play almost all iMessage games on your device with iOS 10 or higher. In order to play games on your iPhone or iPad, you need to go to one of your text messages in the messaging app. When you access the bar at the bottom of the screen, you can choose the game you downloaded. Once you click on the game, you can play along with the contact you are texting, right in the iMessage app.

Best 10 iMessage Games

Now it is time to get more familiar with iMessage games and what we can play on our phones. If you still don’t know how to get iMessage games on your iPhone, you can install GamePigeon on iMessage. With GamePigeon, you will have access to a collection of great iMessage games ready for players. All of the iMessages games are simple and pretty fun to play, while a few of them are iMessages games for money. Here, I have collected the best 10 iMessage games, as you can see some iMessage games for money among them: 

8 ball Pool

Without a doubt, this is the most popular pool game on iOS. Although 8 ball Pool is too simple, you will never get tired of playing with it. In this game, you are tasked to pocket your own balls before letting your opponent do it faster than you.

Moji Bowling

Are you a member of a bowling club? Then bring your bowling excitement to your phone with Moji Bowling. This iMessage game lets you test your 10-pin skills against your friends, with you swiping your ball at the pins and then texting the result to your rival. In the next turn, your friend should take the process. 

Pictoword

If you are interested in drawing games, you will also like Pictoword, in which you have to guess words based on two-line drawings, with one player drawing the pictures and the others trying to think. The words are ranged from regular household items to films, landmarks, and more concepts, with easy and hard modes providing challenges for all players on any level of skill.

Checkmate

Do you play chess with your family? The good news is you can play chess on iMessage! Checkmate is a correspondence version of chess, meaning that you don’t have to sit down and play together at the same time. Instead, you send your latest move much like you send your latest message. You can find this game on GamePigeon.

Letter Fridge

Many people are solving crosswords in newspapers and magazines, but you can play an iMessage game similar to crossword on your phone. In this game, there are some given numerous virtual fridge magnets that you have to use to spell out words on the crossword-style grid above. Note that your time is limited, and you are tasked with finding as many words as possible before the clock runs down.

Words for iMessage

If you like Scrabble, you will also like Words for iMessage, which works along similar lines. In this game, you are given a random assortment of seven tiles, which you have to use to spell out words on the game’s board. The big difference between Scrabble and Words for iMessage is that bonus tile spaces are positioned randomly in each game, so you may have to shift your strategy each time.

Mr. Putt — Mini Golf

Although players may prefer playing golf on a green ground, Mr. Putt is fun and unrealistic way of having some golf-themed rivalry with friends. With a space-shaped theme, you can play Mr. Putt with your friends in different locations. Note that Putts are controlled by swiping, which can be fiddly for some, but they help make games more open and entertaining.

Simple Trivia

With Simple Trivia, you can compete against friends in quizzes that test your general knowledge. You can start by choosing to compete in one of six categories, including sport, history, geography, entertainment, and science. Each question has a multiple-choice format, and the player with more knowledge will get the points.

Cobi Hoops

Sports games are always beloved by all, and with Cobi Hoops, you can play a basketball game, in which your task is to score as much as you can in 30 seconds. Each player in this game takes turns to see who can outdo the other. The game also offers extra players, locations, trick shots, and a bonus mode as in-app purchases.

Let’s Puck It!

Why not play an air hockey game with your friends on your iPhone? With “Let’s Puck It,” you will play with a turn-based version of air hockey where you will hit the puck toward your opponent’s goal, send your move to them, and take their go afterward. You can also set your own custom bets to make things more interesting. 

Many other iMessage games can be a candidate to play with.

Summary

Thank you for reading. Playing games has always been fun, no matter if the device you are playing on is a smartphone, tablet, desktop, or laptop. To see how to play games on iMessage, you can take the steps explained above to run any game on your phone. How to play iMessage games on Android? You just need to hire a third-party app as an interpreter between your Android phone and the iOS or macOS operating system.

Home » iphone

How to play 8 ball on iPhone? (Guide and Tips)

Smartphones have brought many exciting features to our life; now, we can video chat with our friends, share content on social media, and even play innovative games!!!

One of the greatest games any iOS user can play is 8 ball pool. In this post, I will talk more about 8 ball iMessage; I will explain the aspects of this pool game on iMessage, how to play 8 ball on iPhone, and even how we can play pool with friends.

Let’s play 8 ball

Many people now may murmur about 8 ball iPhone; why is this too popular? 8 ball iMessage is a great, fun two-player game that needs to have accuracy and precision, along with a little bit of being a good strategist to respond to what strictly comes out ahead of your opponent.

As the name of the game indicates, it has 8 balls divided equally between you and your opponent, called stripes and solids. Whoever pockets the first ball must be stacked with that specific group of balls through the game and pocket all of your balls before your opponent does. Note that you are allowed to hit your opponent’s ball with the cue ball directly; this is absolutely a foul, and you will permit your opponent to place the ball on the board anywhere he or she likes. 

Read more about “How to fix among us disconnected?“.

How to Install 8 ball iMessage? 

Installing 8 ball iPhone is too easy. To get this fantastic game on your phone, you have to download the “GamePigeon” app, which contains a collection of games, including the 8 Ball iPhone. To run the process, follow the steps explained in the next section.

How Do You Access 8 Ball Pool?

In order to download the game, you first need to download the GamePigeon app. Follow these apps:

  1. First, click on the “Messages” app from the home screen of your iOS device.
  2. Next, click on any conversion you already have in the application.
  3. Now, you need to press the grey “App Store” icon present in the bottom section of the screen.
  4. Click on the blue “App Store” icon on the app bar to open the “iMessage” app store in an overlay window on your phone.
  5. After that, click on the “Search” option in the top right corner of the screen from the overlay window.
  6. You need to type “game pigeon” in the search box and click on the “Search” button on the bottom right corner of the keyboard.
  7. Next, click on the “Get” button on the “GamePigeon” tile. Here, you should provide credentials for your Apple ID using the preferred way of authentication. Note that if you already have GamePigeon on your phone, you will see a cloud with a downward arrow instead of the “Getting” button.
  8. Congratulations! You can now download iMessage pool on your iPhone.

How Do You Play 8 Ball Pool?

Rules of 8 ball pool on iPhone are the same as playing the game physically when you are at a club or in friendship gatherings. To play 8 ball pool (or 8 ball iPhone, if you want to play it virtually), 8 balls will be dedicated to two players equally, and the first ball pocketed by any player will determine the type of balls that player should pocket through the game. If you want to play iMessage pool on your phone, follow the steps in the next section.

How to play 8 ball on iPhone

You may be asking how to play 8 ball on iMessage or just want to play pool with friends. Take the steps below to play this brilliant game on your device now:

  1. First, open the “Messages” app from the home screen of your iOS device.
  2. Next, click on the conversation of the person you wish to play the iMessage pool with. If there is no conversation, click on the “Compose” button present at the top right corner of the “Messages” app.
  3. In the conversation view, you need to locate the app bar present on the top of your keyboard and scroll it to the sides. After that, select the “GamePigeon” icon to reveal the list of available games.
  4. Now choose “8 Ball iPhone” from the grid present in front of you.
  5. Here, choose the game mode by tapping on one of the options under the “GAME MODE” section. Generally, the “8 Ball” game mode is the standard option, whereas the “8 Ball+” option simply doubles the number of balls in the game in order to provide a more extended playtime.
  6. Now select the difficulty level of the game; the “Normal” option will provide you with aim assistance for the ball you want to hit, whereas the “Hard” option will not have aim assistance. You can also customize your cue ball. To do that, click on the “CUSTOMIZE” tile next to the “GAME MODE” section.
  7. Next, to invite one of your contacts to play 8 ball iPhone, type a message and send it to them by tapping on the “Send” button. Since you sent the invitation, the other person gets to take the first turn. Once your opponent has completed their turn, click on the “YOUR MOVE” tab to take your turn.
  8. To hit a ball in a pool game on iMessage, drag your finger sideways across your screen to align the path of your cue ball toward the target ball. Next, click on the “cue ball” picture on the right side of the pool board to have it overlaid on your screen. Now you can change the hitting position of the cue ball, which is signified by a red dot. This feature enables you to have more control of your cue ball. To dismiss, tap anywhere on the screen.
  9. Locate the “cue stick” icon on the left side of the pool board. After that, tap-hold and drag your finger downwards to adjust the power for the shot, and release the stick once your desired power level is available.
  10. Any player has to pocket their own group of balls. If you accidentally target the opponent’s ball, you will see a cross mark signifying that the pocketed ball was not yours.
  11. You can also turn on/off the music while playing pool with friends.

Can we play the 8 ball iMessage on android?

The answer is positive, but not as easy as you think. Since an Android device does not support iMessage, it seems you can’t play pool games on iMessage with your Android phone. However, you can overcome this issue by using third-party apps like WeMessage and Bluebubble to be able to use iMessage on any Android device.

Can I Chat in 8 Ball Pool? 

While playing the pool game on iMessage, you can interact with your opponent via pre-defined chat messages or emojis by tapping on the message icon at the top of the screen. However, if you want to type your own messages, the feature is available to use while playing against mutually accepted Facebook Friends in your friends list.

How to play pool with friends?

Playing pool games on iMessage is so easy, and in order to play pool with friends, you need to ask one of your contacts to join you to play. Since the contact answers your invitation, he or she will start the game, and you will enjoy it the whole time.

Summary

Thank you for reading this nice post, and please share the content with your iPhone-user friends. Although iMessage pool is an excellent game with lots of fun and excitement, many features of the game will be unlocked by in-app purchases. How to play 8 ball iPhone on your Android phone? Just install a third-party application and enjoy the game. If you have provided all the elements for playing with your friends, never wait for a second; let’s play 8 ball now!!!

Home » iphone

How to fix iPhone shows Blur Photos

 Your iPhone photos might be blurry because of different reasons. It could be as easy as using a dirty lens. Or you might face a more complicated problem like a settings problem and need to repair your phone. 

You might be wondering if there something with your photography , you should go for a professional photography. Here, I will mention some common problems that could be why your photos are blurry.

Why Are My iPhone Photos Blurry?

  • It’s The Hardware

Before checking your phone the software, make sure that the problem is not a simple hardware fix.

  • There Are Magnets Near Your Phone

There is a magnet inside some iPhone devices. This magnetic pull can oppose autofocus and optical vision stabilization.

  • Bad Lighting

If you take a photo in a dark unstable situation, that might cause the blur problem right there.

  • Your iPhone Case Is In The Way

Sometimes, your iPhone case makes your photos seem blurry and dark. Here, take off your phone case and shoot well.

  • Your Camera Lens Is Dirty

A small spot on your lens might damage your camera’s autofocus and make your blurry photos.

  • It’s The Software

If all of these troubleshooting items do not work, it is time to check your software and visit an expert serviceman.

Top Apps to attach artistic blur effects on iPhone photos

There are many blur effects in iOS apps that get their titles from the kinds of blurs expert photographers work them for their photos. For instance, you can use Gaussian blur and an Outer Blur  Vignette to depart your case from the background and so produce a photo with a great atmosphere. Continue reading and learn more about blur photo iPhone and find some of the best apps to support you in this way.

  • After Focus

Adaptability: iOS 8.0 or later

After focus is a smart and easy-to-use app and the best choice for attaching artistic blur effects to images taken with an iPhone. As you might understand from the app’s name, it gives almost all the blur effects you need. It helps you produce photos if you use a DSLR camera.

  • Tadaa SLR

Adaptability: iOS 8.0 or later

 The Tadaa SLR app allows its users to increase the intensity of field in photos they have previously exerted and permits them to adjust the focal position of their images. Also, as a user, you can use this app to make shots use both front and back cameras. Using blur effects with the Tadaa SLR app is a quick method that will enable you to enjoy a lot while you search for the best artistic answers for your photos.

  • Enlight

AdaptabilityiOS 8.1 or later

If you need an app with expert blur effects, the Enlight app will satisfy every need you could have. Radial, linear, or mirror and tilt-shift characteristics allow the users to blur image frameworks and produce dramatic effects to influence their friends and fans on social media. 

More than powerful blur effects, Enlight gives every photo editing tool you need for expert photo editing. You can turn your photos to black and white, make a double display effect, or append text to pictures in just a few simple steps. 

  • Slow Shutter Cam

AdaptabilityiOS 8.0 or later

There is a kind of photography called slow shutter photography that signs more light into the camera. So in this way, passing things leave a trail in photos. Slow Shutter Cam is an app that can support you to make this beautiful effect with your iPhone. The app gives several separate shooting forms like Motion Blur, Light Trail, or Low Light. Motion Blur form is the best for generating photos with blurred backgrounds, while the Low Light form will allow you to apply with light.

  • iColorama

AdaptabilityiOS 9.0 or later

iColorama is the best app that forces you to unleash your internal artist. You can use it to edit photos, paint or draw, and send Photoshop brushes and fonts. Appending text to images, employing blur effects, or working around with shades and colors on your pictures are just the tip of the iceberg. You can use all these named effects offered by iColorama very easily and should not waste a long time editing your images ere sending them to your friends.

  • Snapseed

AdaptabilityiOS 9.0 or later

Snapseed can work much more than a single tool that enables you to blur the backdrop of your images. It is a licensed photo editing app produced by Google and helps you edit all JPEG and RAW formats. Also, you can use the Lens Blur focus to append bokeh to the pictures you have taken, while you can use another feature called Face Enhance to bring awareness to the figures in the forefront. The users can simply crop their pictures, control the total brightness of photos and contrast levels, or use filters and make a drama sense to their photos.

Conclusion:

Blurring a photo can cause more artistic value to your images, but more than that, it will provide your photos cases to stand out. There are many apps that you can use to make a blur effect on your photos. But it is important to know the details and use the app that best fits your goal. Read the above text to understand more about some of the best iPhone blur apps.

Exit mobile version