How to play games on iMessage, Android & iPhone

If you think the trend of your life is a little bit boring and need to bring some excitement to your daily activities, you can play a new collection of mobile-based entertainments, called “iMessage games.”

Whether you have an iPhone or an Android phone, you can enjoy playing these games. In this post, you will learn how to get iMessage games, how to play games on iMessage, how to play iMessage games on iOS 10, and what are the best iMessage games available for the users.

What are iMessage games?

To explain the subject informally, iMessage games are extensions added to your iPhone’s messaging app. This means that you only need to download the patch from App Store, add it to your messaging app, and invite your friends or relatives from contacts to have fun with each other. Note that your friend should also have the same game on his or her phone in order to play with it.

How to get iMessage games?

The answer to “how to get iMessage games?” is too simple. Before starting the process, make sure iMessage is enabled on your phone. Go to “Settings,” open the “Messages” tab, and tap iMessage to enable iMessage. Now you can send and receive messages from the application.

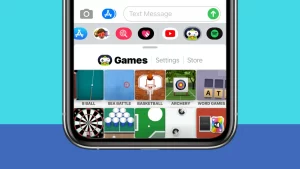
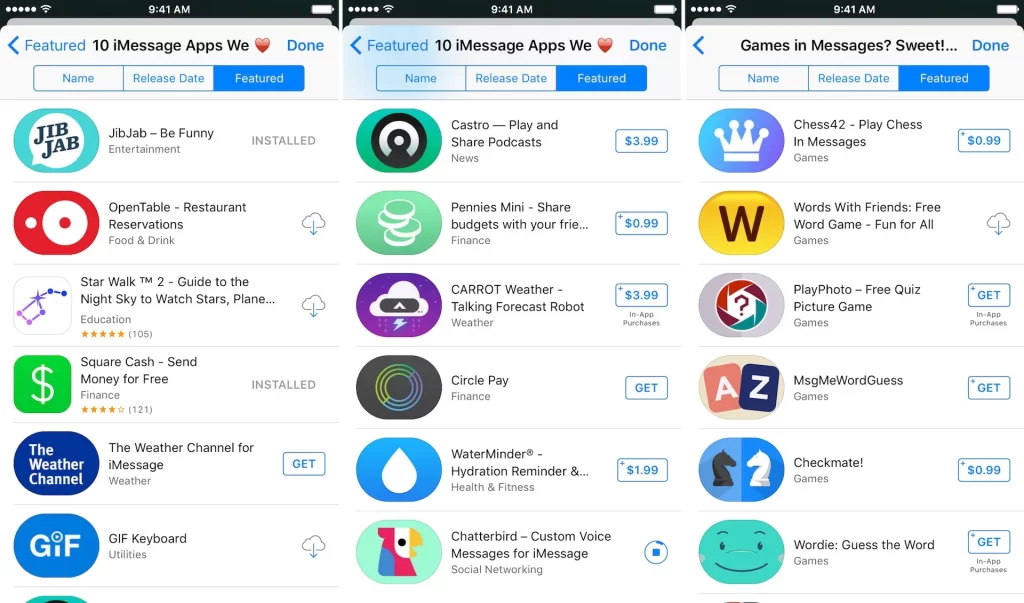
While you are in the iMessages app, you can see a horizontal bar above the keyboard that has a few icons from your downloaded apps. Still can’t see this bar? Click on the “gray App Store” icon next to the text field to enable it. Now click on the blue App Store icon to open the iMessage App Store. Here, you can see all the available games ready for download. To get each game you want to have on your phone, click on the “Get” button next to its title.

Also, read about streaming Netflix on Discord.

How to play iMessage games on Android

If you are one of an Android user, you may ask how to play iMessage games on Android. The fact is that you cannot run iMessage games on an Android, and the most important reason is that there is no iMessage support from Android. However, you can bypass this problem on your phone by using third-party apps.

One of the most fantastic applications which can help you play iMessage games is weMessage. Note that in order to access iMessage games, you need to have a device with macOS or iOS operating system. weMessage can provide a virtual environment in which you can run iMessage games on your Android system. To use weMessage, you need to gather these requirements:

  • An Apple ID that you used on your iMessage App.
  • A Mac with macOS 10.10 or higher because using weMessage on your Android requires running a program on your Mac.
  • Download and install Java 7 or the latest available version.
  • An Android phone with Android OS 5.0 or higher.

To use weMessage on your Android phone, follow these steps:

  • First, you need to install Java on your Mac device. To reach that, go to the “Applications” section, select “utilities,” and open the Terminal app, which is already installed on your device. Then, click on Java and choose the “return” button. Make sure there is no error during the installation.


  • Next, download the weMessage app on your device. After downloading, double-click on the “run. Command” option to launch weMessage.


  • After you click on the “Apple” menu, choose “Security & Privacy.” Then, click on the General tab and select “Open Anyway.”


  • In this case, you need to enable some accessibility features for Mac. To that, you need to go to the “System Preferences” section, click on the “Security & Privacy” option, select “Privacy,” and finally click on the “Accessibility” tab. If you want to unlock settings on your device, you can click on the lock icon on the bottom-left corner and enter your password if required.


  • Now, on your Android device, go to Google Play and download the weMessage app. Open the application on the Continue option, give the application permission to access your messages, and move the slider to Allow “Modify System Settings.” Finally, click on the switch to make it “On.”


  • At this level, you need a Mac IP address. Go to the “System Preferences” section, click on “Network,” and choose Advanced, TCP/IP. Type the details in the blank spaces:


  • IP Address: 192.168.80.128
  • Subnet Mask: 255.255.255.0
  • Router: 192.168.80.2


After filling in the blanks, enter the email and password you have entered on your Mac device, and open the “Sign in” page.


  • Finally, you will be shown a conversation page. Congratulations! Now you can send messages from your Android device to iMessage on Apple devices. Appearing your messages in Blue Bubble indicates that it is done.

How to play iMessage games on iPhone

As we got the idea of how to play iMessage games on Android devices, now we can learn how to play iMessage games on iPhone. Consider that as long as your iPhone is updated to iOS 11 or higher, you are able to download several games on your iMessage. To start playing iMessage games on your iPhone, follow these steps:


  • Open the Messages app on your phone.
  • Now, search for the contact you want to play with. You need to scroll through the options above your keyboard, and if you find the “App Store” icon, click on it.
  • Next, you will see an exclusive version of the App Store which shows extensions for the iMessage app. Click on the “See All” button to view all iMessage games. Browse and find one you might like.
  • If you want to download a specific game, click on the “Get” button next to its icon.
  • Now, click on the “X” icon in the top-right corner of the screen to exit the App Store and return to the iMessage application.
  • Scroll through the icons below the keyword until you find the game app you just downloaded. As a result, a menu will open where you can customize the game you play with your contact. After selecting the game type, it will automatically be loaded to your keyboard. You will see a regular message saying “Delivered,” indicating that correctly finished the process.
  • Now, you can play the game with your friends.

How to play iMessage games on iOS 10 

You can play almost all iMessage games on your device with iOS 10 or higher. In order to play games on your iPhone or iPad, you need to go to one of your text messages in the messaging app. When you access the bar at the bottom of the screen, you can choose the game you downloaded. Once you click on the game, you can play along with the contact you are texting, right in the iMessage app.

Best 10 iMessage Games

Now it is time to get more familiar with iMessage games and what we can play on our phones. If you still don’t know how to get iMessage games on your iPhone, you can install GamePigeon on iMessage. With GamePigeon, you will have access to a collection of great iMessage games ready for players. All of the iMessages games are simple and pretty fun to play, while a few of them are iMessages games for money. Here, I have collected the best 10 iMessage games, as you can see some iMessage games for money among them: 

8 ball Pool

Without a doubt, this is the most popular pool game on iOS. Although 8 ball Pool is too simple, you will never get tired of playing with it. In this game, you are tasked to pocket your own balls before letting your opponent do it faster than you.

Moji Bowling

Are you a member of a bowling club? Then bring your bowling excitement to your phone with Moji Bowling. This iMessage game lets you test your 10-pin skills against your friends, with you swiping your ball at the pins and then texting the result to your rival. In the next turn, your friend should take the process. 

Pictoword

If you are interested in drawing games, you will also like Pictoword, in which you have to guess words based on two-line drawings, with one player drawing the pictures and the others trying to think. The words are ranged from regular household items to films, landmarks, and more concepts, with easy and hard modes providing challenges for all players on any level of skill.

Checkmate

Do you play chess with your family? The good news is you can play chess on iMessage! Checkmate is a correspondence version of chess, meaning that you don’t have to sit down and play together at the same time. Instead, you send your latest move much like you send your latest message. You can find this game on GamePigeon.

Letter Fridge

Many people are solving crosswords in newspapers and magazines, but you can play an iMessage game similar to crossword on your phone. In this game, there are some given numerous virtual fridge magnets that you have to use to spell out words on the crossword-style grid above. Note that your time is limited, and you are tasked with finding as many words as possible before the clock runs down.

Words for iMessage

If you like Scrabble, you will also like Words for iMessage, which works along similar lines. In this game, you are given a random assortment of seven tiles, which you have to use to spell out words on the game’s board. The big difference between Scrabble and Words for iMessage is that bonus tile spaces are positioned randomly in each game, so you may have to shift your strategy each time.

Mr. Putt — Mini Golf

Although players may prefer playing golf on a green ground, Mr. Putt is fun and unrealistic way of having some golf-themed rivalry with friends. With a space-shaped theme, you can play Mr. Putt with your friends in different locations. Note that Putts are controlled by swiping, which can be fiddly for some, but they help make games more open and entertaining.

Simple Trivia

With Simple Trivia, you can compete against friends in quizzes that test your general knowledge. You can start by choosing to compete in one of six categories, including sport, history, geography, entertainment, and science. Each question has a multiple-choice format, and the player with more knowledge will get the points.

Cobi Hoops

Sports games are always beloved by all, and with Cobi Hoops, you can play a basketball game, in which your task is to score as much as you can in 30 seconds. Each player in this game takes turns to see who can outdo the other. The game also offers extra players, locations, trick shots, and a bonus mode as in-app purchases.

Let’s Puck It!

Why not play an air hockey game with your friends on your iPhone? With “Let’s Puck It,” you will play with a turn-based version of air hockey where you will hit the puck toward your opponent’s goal, send your move to them, and take their go afterward. You can also set your own custom bets to make things more interesting. 

Many other iMessage games can be a candidate to play with.

Summary

Thank you for reading. Playing games has always been fun, no matter if the device you are playing on is a smartphone, tablet, desktop, or laptop. To see how to play games on iMessage, you can take the steps explained above to run any game on your phone. How to play iMessage games on Android? You just need to hire a third-party app as an interpreter between your Android phone and the iOS or macOS operating system.

Home » Android

Best Apps to have iPhone Emojis on Android

There are different mobile platforms with various collections of emojis. For instance, if you have iPhone, your emojis are not the same as Android mobile and vice versa. Therefore, you might want to make a conversation with somebody who has an iPhone or iPad, and you will be wonder where your emojis go when you send them because they are not the same in both systems.

What are the best apps to have iPhone emojis on the Android system?

Some applications help you to solve this issue.

Here, I mention some of the most popular apps and tricks to view iPhone emojis on the Android system.

Apps to make iPhone Emojis on Android

As I told you, to get the same view of iPhone emojis, you require to install some apps. Below here I mention some of the best apps.

  1. Gboard

Among the best keyboard apps for Android, I have to mention Gboard. You can download this app both on the Android and iPhone systems. When you install this app, you can see emojis the same as iPhone on your Android cellphone. The best point is that when you want to download it, there is nothing about adaptability, and it means that you can download it on the latest Android mobiles. You can simply download this app from Google Play Store.

Its advanced settings help you to experience better user activity while using this application. It does hold up to 80 languages. Therefore you may face a language unavailable error rarely while applying this keyboard app for Android.

  • Kika Keyboard 2019

Another free emoji keyboard, which you can download from Google Play Store is Kika Keyboard. You can find different emojis, stickers, GIFs on this app. If you are a Whatsapp freak, you must have a version of this app on your phone. This app has the latest options for 2019. The same as Gboard, there are various themes of this app that you can use. Some users want to modify the theme when they change the user app.

You can use Kika Keyboard on Android 4.1 or the following version. While you can download and use it freely, you have to spend some cash to unlock and use all the themes, stickers, emojis, etc. As the price is affordable, you should not get a serious deal applying this emoji keyboard app.

  • Facemoji Emoji Keyboard

Another popular resolution that you need when you need to check iPhone-like emojis on your Android system is Facemoji Emoji Keyboard. You can use this app on Android 4.0.3 or later version. It is the best option for any latest Android mobiles, and you can install it without any issue. There are many free emojis (more than 3000), GIFs, stickers, and more others available on Facemoji. Also, you can use this emoji keyboard app with some other applications like WhatsApp, Messenger, Twitter, etc. There are more emojis options than older Android versions when you work with Android 7.0 or a later version.

  • Emoji Fonts for FlipFont 10

One of the best emoji fonts you can install on your Android phone is Emoji Fonts for FlipFont 10. All the users of Android 4.4 or a later version can use this application. It means you can download and apply this application on all recent Android mobile. A perfect option about this app is that it changes your text into a suitable emoji. And there is no need to find something manually. As it does the job very well, it took more than 100k downloads from the repository. With this application, you can send a message to everybody, such as your friends, family, co-workers, and anyone else. As it is a free download app, you can try it once to see if it is proper for you or not.

  • FancyKey

You can use Twitter emojis with FancyKey as a dedicated keyboard application for Android. Because of its developers, the Twitter emoji are so similar to the iPhone emoji. Among its facilities, I can mention 1600+ emoji and emoticons, 30+ fonts, 30+ themes to customize the interface, 50+ typing sound, and more. This application has a wide variety of themes that is appropriate for people who like to change it frequently. Another extra option of this app is that it allows some great typing notes. You can get everything from the typewriter to the latest mobile sounds in this free app.

To make proper use of this app, you need to phone with Android 4.1 or a later version. It is possible to download this app from Google Play Store for no price. But to unlock all the points, you have to spend some money.

  • Swift Keyboard

Swift Keyboard is another application that is compatible with both Android and iOS. As a user, you can apply the same keyboard app or install it on both systems running a separate OS. Now you can check out all the emojis, and there will be no difficulty. It is a keyboard managed by Microsoft, and you can find an uncluttered user interface without any issue. This free app doesn’t present any advertisements, and you will like it more than ever because of this reason. You can find everything in this keyboard app, from glide typing to voice typing. Another benefit is that you can change the theme as you wish. This app is available for you on Android 5.0 or later version and iOS 11.0 or later version.

Conclusion:

You cannot get the same view of iPhone emojis on your Android mobile for sure. But it is conceivable to make an equivalent model. If you want to do so, you have to try one of the above apps.

How to Recover Deleted Text Messages on Phone?

 We all experience this situation that we deleted a text message, and shortly after, we recognize that we need it.

How to recover deleted text messages on your cell phone?

It is good to know that if you be a little lucky, you might get it back. First, we talk about recovering iPhone messages, and then we go through Android phones.

Recover deleted text messages on iPhone

  1. How to recover deleted texts from an iCloud backup

To use iCloud, you have to get an iCloud backup before you missed the message. If you do so, you might find the lost messages.

To retrieve deleted messages from iCloud.

  1. First, you have to open Settings and click on your name or picture top of the page.
  2. Then choose the iCloud > Manage Storage icon, and click Backups.
  3. Now, you will find a list of available backups. Find the correct device message that you saved before you delete it.
  4. It is good to know that retrieving messages need to reset your iPhone to factory settings. It means you will miss all data you have collected. It is good to make separate copies of any original files you need.
  5. When you did them all, go to Settings > General > Reset > Erase All Content and Settings and start restoring your iPhone to default settings. After a few minutes, your phone guides you through the typical setup. Here, you have to be careful to choose the correct option to recover from a backup.
  • How to recover deleted texts from an iTunes/Finder backup

Do not worry when you can not retrieve your messages from iCloud. There is another option to find them from a backup on iTunes or Finder. It is better to have a backup from your messages, but if you do not that, still try this way.

You have saved anything precious to you. Because in this method, you will lose your data if you did not have a backup.

  1. First, you have to connect your iPhone to the Mac or PC you backed it up. Then try to open iTunes or Finder.
  2. If you open iTunes, you will find an iPhone icon look on the top left-hand side. Then choose it. But if you use Finder, you have to find your device from the left-hand table bar.
  3. After that, select Restore backup that you might find under the General tab.
  4. Finally, you will see that all the data you earlier backed up is on your phone. It might take some minutes.
  • How to recover deleted texts using a third-party app

Sometimes you may find that the past options are not helpful. Now it is time to find a third-party software app and install it. While you have to pay for some of these tools, none of them guarantee that you will find your messages. But sometimes there is no other choice, and you have to try it.

There are a lot of third-party apps to retrieve your lost messages from your iPhone. Here, I want to introduce some famous ones like PhoneRescue by iMobie, Enigma Recovery, WonderShare Dr.Fone for iOS, and Tenorshare iPhone Data Recovery.

Sometimes after you remove messages, they persist on your handset till overwritten, so it might be possible to retrieve deleted messages utilizing these services. But with no guarantee.

I have a piece of advice if you want to use one of these tools. Try to do so as immediately as you can.

By the way in the guide: “Text Scheduler iPhone” learn how to schedule a text on iphone.

Recover Deleted Text Messages on Android

 Put your cell phone in Airplane mode, as the first thing after you realize you have removed an important text. Do not record audio or use the camera anymore. Make sure you do not produce any further data that may overwrite your text information.

  • Ask the Sender/Recipient

As soon as you understand you removed an urgent text message, the easiest way is to ask the sender. Here, you have to ask the person to send you a screenshot if he still has the text. Also, you can ask for another forwarded message. If you were not successful in these ways, it is time to try other possible ways.

  • Use an SMS Recovery App

We recommend this way to all of you, but it might not work for various people. Some of the famous recovery apps are Wondershare Dr Fone, Coolmuster Android SMS Recovery, Yaffs free extractor, and Undeleter app. While today, there are many sites suggesting recovery apps for Android devices, there are many drawbacks to these options. Some recovery apps offer a free trial. But after you want to use them, they require you to pay to retrieve your texts. Some of them ask for a higher price as they make you assume they are trustworthy and the app works.

More than that, an SMS recovery app may reach rooted to your cell phone. In this way, it will access all your files on your device, so it is a risky process. Because the folder containing your messages is hidden from you in a preserved system folder on Android, you can not scan that folder without rooting. It is also true about installing a trustful file browser app.

Unfortunately, text recovery apps may not work without rooting your device. Alternatively, if you decide to give such apps root access to your phone, you may face a blank screen or a security warning.

Also, you may discover software that requires you to use the USB Mass Storage protocol for return, which you can not do.

Conclusion:

We all face a lost or accidentally deleted message at least once? But you could recover them using some simple recovery ways that we introduced in the above text.

Source of iPhone photos:

https://www.macworld.co.uk/how-to/retrieve-deleted-texts-iphone-3636380/

What is the Android system WebView?

Designed for the Android operating system, WebView is a system facilitating web content display in the Android interface.

Designed for the Android operating system, WebView is a system facilitating web content display in the Android interface. Viewing web content on an Android device is possible through two methods: either from a standard web browser or through an application offering the WebView feature. 

To facilitate the display of web content in Android applications, most software developers establish WebView classes by incorporating WebView libraries. The developers set a browser within the app to display web content and implement JavaScript. WebView is usually common with most apps; you have probably noticed before that when using the search bar in some apps, your search history compromising the data in your standard browser is also displayed.

What is the Android system WebView

Including WebView application is not only beneficial for displaying Web Content, but it is also a way for the app to make exchanges with the content published on the web, e.g., Web apps and Web pages. Before the release of Android 5, WebView would have only been upgraded when a recent update for the operating system was provided. With the introduction of Android 5, though, the rules changed; WebView was no longer bound to updates sent by Google to the devices and could be manually updated by installing upgrades from the Google Play Store. 

The best part about the newly achieved independence of WebView from the Android operating system is that users will not have to wait for a recent Android update to fix a bug in the WebView feature of apps, and all of that can be done by installing a separate update from Google Play Store. Although you own a device with Android 4.3 or lower, we must sadly break the news that Google will not release any recent updates for you anymore.

According to Google minimizing the risks related to the use of WebView depends highly on upgrading the Android version of your device and installing WebView updates from Google Play Store. 

All the talk about WebView facilitating the display of Web Content brings the following question to mind:

Q: What is Web Content? 

Web Content is all the writing, audio files, and videos shared on web pages. Speaking of content, it could be anything notional, like the text content you are currently reading, applications you jump by as a result of an internet search, any image on a website, audios, videos, and even archived emails. 

Q: What is content important?

Content is king! You have probably heard this before; it’s the trademark motto of most SEO specialists, and although it might seem they are exaggerating at times, you have to give them a bit of credit on that. The content draws traffic to websites and holds significant importance in that matter. The importance of content relies heavily on classification; a proper categorization can heavily influence visitors’ experience finding what they were looking for. And as you’re classifying content inside your website to make it easier for people to get around, an external categorization regarding Search Engine Optimization could land your website a better ranking in search results. 

Why would you need WebView? 

While regular Android users will not need to download WebView (it is a built-in feature of your operating system), the situation might be different for developers. 

Android 7+

To include the WebView content in their custom-made applications, most software developers designing apps for Android 7+ will need to download it from Google Play Store. 

How to include the WebView feature in an Android app? 

  1. Enabling WebView will result in a WebView class. 
  2. Developers add web permissions (the software should be allowed to interact with web content) and WebView codes to the Android Declaration File. 
  3. Job done! Your app must now smoothly interact with web content and allow you to read and watch content online. 
  4. This enables WebView to permit the software you have developed to recognize Javascript, the primary programming language for HTML and CSS. 

Installing WebView is only recommended for devices with an Android Operating System of 5.0 or above, as downloading this type of software is a standard tool used by hackers to take advantage of your personal information. 

How to disable Android WebView

As Android WebView is embedded in the Operating System, it is impossible to uninstall it as a standard application. However, disabling the feature is possible (Although we must remind you that disabling WebView might not be a good idea for devices with Android 5 and lower). But in case you own a device running on Android 5 or above, disabling WebView should cause no harm as Google Chrome covers almost everything WebView used to do. 

To disable WebView on Android 5 and higher, follow the following steps:

  1. Tap on Google Play Store to open it. 
  2. On the search bar on top of the screen, type the words Android System Webview. 
  3. You will see a disable option after tapping on the app; choose the option to finish the job. 

Note: in many Android 5+ devices, the WebView would be disabled by default. 

Last thoughts

It is essential to know why there even is an Android WebView on your phone; it helps facilitate web content display in the Android interface and, if removed, can cause errors and lags in the functioning of many installed apps on your phone. As we explained earlier, disabling WebView on Android 5 and older is as hazardous as installing upgrades manually; However, Google has separated WebView from Android OS. It seems best to stick to upgrades sent to your Operating System for the least risk. 

How to connect Ps4 controller to Android

If you are an Android games fan, you will be happy to find out that you can now play Clash of Clans using your PS4 controllers.

Although PS4 controllers are initially designed for gaming consoles, some Android games’ utter popularity has pushed many gamers into a search for a way of connecting their controllers to Android devices. The recent increase in Android games’ popularity has led the way for many console-only games into Google Play Store. 

If you are an Android games fan, you will be happy to find out that you can now play Clash of Clans using your PS4 controllers. And while connecting PS4 controllers to your Android phone might seem a bit of trouble, the outcome will please you as you will no longer have to deal with different layouts. 

How to connect Ps4 controller to Android

As PS4 controllers are Bluetooth enabled, we will provide a guide about how to connect your Android device to your PS4 controllers in the following article:

Turning on Bluetooth on both the controller and the smartphone 

Pairing your controllers to your Android phone is as easy as enabling Bluetooth on the controllers. Once turned on, the convenience and joy brought by navigating in the Android environment using PS4 controllers. 

Enabling Bluetooth on PS4 controllers

  1. Unplug the controllers from your PC or game console. 
  2. Press and hold the Share and PS buttons until a blinking white light appears. 
  3. At this stage, your controllers are ready to be connected to your Android phone.
  4. On your smartphone, open the settings app. 
  5. On the new screen, scroll down to find Bluetooth and device connection. 
  6. On the Bluetooth and device connections screen, tap on Pair new device at the top to search for the PS4 controller. 
  7. The search will take a while, resulting in your controller appearing on the list. 
  8. Tap on the gadget to get it connected to your phone. 
  9. As an indication of the result of the process, the blinking white light will disappear.

Job done! You can now enjoy navigating your Android games using PS4 controllers. 

Troubleshooting issues after making the connection 

In some cases, the controller does not perform as expected on an Android device; getting around the environment, some users report lags and interrupted connections. Although such problems should not cause much of an inconvenience if noticed now and then, a frequent interruption of connection or a detectable slowness in interpreting actions can be nerve-wracking. 

Luckily, the problem is solvable through the installation of an application called Bluetooth Auto Connect. Designed for improving Bluetooth connections on wireless devices, the app can significantly decrease the issues related to a poor Bluetooth connection. By enabling the application’s Continuous Connect option, you can be sure that your controllers will not disappoint you in the middle of a game. 

How does the Bluetooth Auto Connect work? Take a look below

  1. Type down the words in the search bar on Google Play Store. 
  2. Once the installation is finished, launch the app and make sure your device is already connected to the controller.
  3. On the new screen, tap on Advanced options. 
  4. On the Advanced Options screen, tap on Continuous Connect to enable the feature. 
  5. To enable the Continuous Connect featurethere will be a need for typing in a number. Just type in any number between one and ten and tap on OK. 

If the number you entered while activating Continuous Connect does not bring in the expected results, you may change it and choose another. 

Resetting game controls to sync with your controllers. 

Some control options on Android games might not work correctly via a PS4 game controller, as these games themselves are not designed for a PS4 controller. As developers of the games release updates, these options are enhanced, and you might even have a seamless experience playing favorite Android games with controllers. Still, the fact is that many Android games do not yet support this option. 

Luckily the problem is solvable through the installation of a third-party app, Octopus. Octopus is designed to enhance the gaming experience with PS4 controllers in the Android interface. It is a remapper app letting you adjust the functions of each key on your device. 

To download Octopus, open Google Play Store, type Octopus in the search bar, and download the app. After the installation, launch the app, and on the new screen, tap on add games to add the games you wish to troubleshoot. Job done! You can now change and adjust key functions as you wish. 

How to disable the PS4 controller from Android

Finished playing and now looking for a way to disconnect the controller from your phone and maybe connect it to your console? That’s easy! Follow the instructions below:

  1. Open the Settings app on your Android device. 
  2. On the new screen, scroll down to find device connectivity. 
  3. Tap on the latter to find Bluetooth right before your eyes. 
  4. On the paired devices list, find the PS4 controller. 
  5. Tap and hold on it so that a small menu pops up. 
  6. On the menu, tap on Disconnect and then forget to unpair and remove the controller from the list. 

The PS4 controller is now disconnected and ready to pair with your console; simply plug it in using a USB cable and press the PS button. 

How to hack an Android phone

Just think about the amount of information a hacker can obtain only by hacking your phone; a vast amount of data, including your most private ones. To prevent such a scenario, it is vital to have sufficient knowledge about hackers’ methods for getting their hands on your phone, how you will tell if someone has access to your phone and how to remove the third party from your phone.

Our smartphones have become quite the 21st-century version of swiss army knives; they allow us to make phone calls, video calls, order food, hire a cab, shop online, make doctor appointments and even pay bills. While the convenience brought by smartphones is one of a kind, the perils of fulfilling all your daily tasks on one single device must not be underestimated.

Just think about the amount of information a hacker can obtain only by hacking your phone; a vast amount of data, including your most private ones. To prevent such a scenario, it is vital to have sufficient knowledge about hackers’ methods for getting their hands on your phone, how you will tell if someone has access to your phone and how to remove the third party from your phone. 

Different ways to hack Android

  1. The culprit SMS

One of the many methods employed by hackers to get through your phone is sending an SMS containing a culprit link. When doing so, they benefit from a bug in SIM cards that has long remained unnoticed. The vulnerability dubbed as SIMJacker comes from a software called S@T Browser utilized by most mobile operators in more than 31 countries worldwide. As the problem lies within the SIMcard, changing your phone will be of no help, and nothing can be done to prevent this from happening.

How does the process work? Take a look below:

  • The first step: the bad guys send you an SMS consisting of a culprit link. 
  • The second step: once the receiver clicks on the link provided in the message, their phone will be hacked. 
  • Third step: hackers now have complete control over the phone and can get whatever they wish done without having physical access to the phone.
  • Fourth step: your phone’s location, screen lock, battery usage, language, theme, clock, and other basic settings will no longer be your property.

What could they make your phone do?

  • Hackers often show interest in the hacked device’s location and IMEI information and tend to claim that information for themselves. 
  • You have probably noticed what happens when a celebrity’s Instagram account gets hacked; they begin sending false information and messages on behalf of the device’s owner. 
  • They might listen to your conversations to spy on you. How do they do this? Well, it’s easy, as they have complete control over your phone, they can prompt your phone into calling their number. 
  • They could instruct your phone’s browser to open malicious links and further attack your phone. 
  • Mobile operators usually stop these kinds of attacks by employing denial of service attacks, but if the malware is further spread on your device, Attackers could block those measures. 

The hacking software

You will not believe it, but there is software designed for and hacking Android phones. And if that is not enough, this software is usually free, so anybody with access to the internet can download them and attempt to hack smartphones. While some software requires a direct installation on the target phones, others function perfectly without direct access to the target device.

Keylogging vs. Trojan

Keylogging is a hacking approach entailing the downloading and installation of the culprit app. In such an approach, the installation occurs before the encryption starts and is bound to physical access to the phone. 

Contrary to keylogging, Trojans do not rely on physical access to the target device and are disguised into devices through phishing or false links. Hackers use Trojans to extract information such as Credit Card data from your phone. 

 Phishing

In phishing, hackers turn up as reliable companies or organizations in an attempt to persuade you to provide them with confidential information. Utilizing a vast range of media, including messages, images, and codes attached to emails or messages, hackers gain access to your Android phone as soon as you click on them. 

The phone number method

Ever thought your phone number could be vulnerable to hacking? Then you must, if you have not already, because hackers utilize this method to gain information from your phone. As with keylogging, where the bad guys require access to the phone, this method relies on access to a system called SS7. SS7 facilitates the connection of various cell phone networks to each other and, as it seems, to specific hackers on some rare occasions. 

Once access to SS7 is provided, hackers can instruct target phones into recording and forwarding calls, reading messages, and locating devices. This particular approach is not commonly used as its reliability on access to SS7 makes it a rather tricky method. 

How to prevent hacking: 4 golden rules

  1. Do not put your phone at someone else’s disposal 

Gaining access to your phone is one of the first steps into the hacking process, so your leaving into strangers’ hands can facilitate the whole process. It is best to check if there are any new apps on your phone once you have left it somewhere public. 

  • Lock your phone

Locking your phone will protect it from malicious software and stranger access. Always define a password, PIN, or pattern to prevent unusual activity on your phone. 

  • Lock your SIM card

To protect your SIM card from hacking, it is best to set a password on it. Go to the Settings app, scroll down to find Lock Screen and Security. Tap on Other security settings and choose to set up a SIM card lock on the new screen. 

4. Turn Wi-Fi and Bluetooth off in public spaces

Hacking a phone through a Wi-Fi or Bluetooth connection can be relatively easy, mostly coming with no warning signs. Turning off your Wi-Fi or Bluetooth connection can be an effective measure in the fight against these bad actors, especially in public spaces. 

How to find Wi-Fi password on Android

Ever felt desperate trying to find the Wi-Fi password on your Android phone? Everyone has been there; Android phones do not display Wi-Fi passwords in the settings application, so it is almost impossible to connect to your modem router on another device if you do not remember the characters.

It gets even more painful if you accidentally hit on the forget network option but do not recall the password, the only way to get back from there is to get your modem router to the nearest service point and have the settings reset. If you have ever been in such a situation, you have probably wondered why Android as an open-source system does not allow users to view passwords. 

How to find Wi-Fi password on Android

Although complicated, viewing Wi-Fi passwords on Android devices is not impossible. Below, we have gathered the necessary information based on your phone’s Android version:

‌Android 10+

 It is, fortunately, possible to find passwords on Android 10+ without any external apps or a root. Head to settings, scroll down to see the system at the bottom of the screen, tap on it to open a new screen on which you will find software update. By tapping on the software update, you will know which Android version your phone is running on. It might be possible to upgrade your phone to Android 10 if it is not already, so better search for updates before proceeding to the second method. 

  • The first step: find Wi-Fi settings

Tap on Settings, then Wi-Fi, and find Wi-Fi settings (Please note that the current location of Wi-Fi settings is based on the Stock Android version, and Wi-Fi settings on your phone might be at another location).

  • The second step: view saved passwords

After tapping on Wi-Fi settings, you will be directedto a new screen displaying available networks; scroll down and find saved networks (these are the networks you have connected to at least once in the past). Tap on the network you wish to view the password to. 

On top of the new screen, tap on share. After doing so, the system will require you to enter your password, PIN or unlock it using face or fingerprint. Once you have unlocked the system, you will see a QR code and a password on the new screen. If you are trying to connect to your Wi-Fi on another device, you might scan the QR code or enter the password displayed beneath the code. 

Android 9 and older

Finding Wi-Fi passwords on Android 9 and older can be challenging; since it requires a system root. To get a better understanding of what rooting is, read the following:

Android developers install limitations on your systems to protect your phones from malware and culprit apps. These same limitations ensure that you do not get out of the lines the original developers have drawn; so, when your Android does not support displaying Wi-Fi passwords, you cannot see that unless you allow developer options. Allowing developer options is literally what rooting is about; it will enable you to go beyond the original design’s boundaries. 

(Note that by rooting, your phone will no longer be supported nor guaranteed by the manufacturer) . 

It has been observed that in some devices with Android 9,after tapping on Wi-Fi settings, a QR code would be granted. If that is the case, you can quickly scan the code using Google View and get your Wi-Fi password. 

  • The first step: installing a Wi-Fi password viewer

There are several options for viewing Wi-Fi passwords on Androids phones, but Wi-Fi Password Viewer covers much more devices and will more likely work on yours as well. Open Play Store and type the words, download the app and install it afterward.

  • The second step: rooting and viewing Wi-Fi password

Tap on the icon to launch the app; it will ask you to allow superuser access on the new screen. By tapping on Grant, your system will be rooted, and you will be redirected to a screen with a list of all Wi-Fi passwords you have ever connected to. Looking carefully at the list, you will notice passwords to each one also displayed underneath them.

  • The third step: searching for a particular Wi-Fi password

This step will only be necessary if you are stuck with a long list of Wi-Fi networks and can’t get your head around the one you’re looking for. On the top right of the screen, look for a search button, tap on it and type in the network’s name. 

  • The fourth step: sharing the password

Choose the network whose password you wish to share by tapping on it. A new menu will appear, giving you the option of either copying the password to later paste it in your preferred texting app and share or just directly sharing it, choosing the platform on which you wish to transfer it through. If you prefer to do it your way, choose the copy password option, but if you consider that a waste of time, select share and send it via one of your texting apps. 

  • Fifth step: generating a QR code (optional) 

On the menu, there is also an option that says QR. Tapping on it will get you a QR code which could be scanned only by an iPhone or a Pixel phone. If you own any of the mentioned devices, you could open the Camera app on your device and scan the code to connect to the router. 

Conclusion

Finding the Wi-Fi password on an Android phone can be demanding, but it does not have to be complicated. As we explained, finding a Wi-Fi password on Android 10+ can be as easy as locating the Wi-Fi settings in your phone or might require installing an app in lower Android versions. The best part about finding your password on your Android phone is that it’s a one-time process, and you will not have to go through it again if you forget the password anytime in the future. 

How do I stop pop up Ads on my android phone

Besides being extremely annoying, pop-up ads can put your privacy at hazard by redirecting you to unsafe websites. Allowing access to strangers or downloading malicious software takes a mere click at times, and pop-up ads are mostly regarded as unreliable just because of that matter. 

How do I stop pop up Ads on my android phone

Blocking pop-ups on a PC or laptop is a lot easier. The risk is also relatively lower with a computer than smartphones, where touching any part of the screen could pose grave danger to the owner. Although not as common as in laptops, blocking pop-up ads in smartphones is also possible. The following article will present relevant information about blocking pop-up ads depending on the browser you are using. 

Blocking pop-up ads in a Chrome browser 

1.start by opening the Chrome app on your phone or tablet. 

2. Afterwards opening the app, look at the top right of the screen to find a sign consisting of three vertical dots beside the address bar and tap on it. 

3. In the opened menu, scroll down to find settings. 

4. After tapping on Settings, you will be redirected to a new screen, scrolling down on which you will find the site settings option. 

5. Tap on-site settings and choose whether to enable or disable pop-up ads on your browser. 

Blocking pop-ups in Mozilla 

Mozilla Firefox browser provides users with a built-in pop-up blocker, but the degrees to which it blocks pop-ups are adjustable. To get more pop-ups blocked by firefox, follow the instructions below:

  1. Open the Mozilla app on your smartphone or tablet. 
  • On the bottom-right of the screen, look for a sign with three vertical dots, touch the sign to enlarge the menu.  On the opened menu, scroll down to find settings.
  • Find ‘Enhanced Tracking Protection.’ 
  • After touching on ‘ Enhanced Tracking Protection,’ you will have three options; standard, strict, and custom, where you choose to block the pop-ups you desire and allow the others. 
  • From the three different options, choose strict; under the strict plan, you will get to block more apps than you normally. 

Why do I keep getting pop-up ads on my android phone? 

The frequency of receiving pop-up ads on your phone depends significantly on the apps you choose to install on your phone. Detecting the source of the problem on itself is not possible.

Since you probably have several apps on your device. Want to know which app is causing the problem? Keep reading. 

Find the problematic application using AirPush Detector:

1.Download the app from Google Play Store. 

2. Launch the app after the installation, allowing it access to the apps on your phone. 

3. Start the scan. After the scan is finished, AirPush Detector will give you a report containing a list of the apps which use notification ad frameworks.

4. From there, you can uninstall the apps mentioned in the list and get rid of the annoying pop-ups. 

How to block full-screen pop-ups in your Android phone

If the pop-ups appear when a specific app is running, that same app is probably causing the problem. Ads are a way for developers to earn money, which is why they mostly appear on free apps. In such cases, you will need to make a decision; to keep the app regardless of the annoying pop-ups or uninstall it and replace it with a similar one. 

If there’s a PRO version of the app, you can purchase and keep it as most PRO versions do not include ads or pop-ups. 

Although the feature sounds pretty reasonable, it is not commonly found in all applications.

As most pop-ups require an internet connection, launching the apps in airplane mode will spare you from the headache of dealing with pop-ups. It is worth noting that the previous method will not prove useful in online apps and games.

What are pop-ups used for? 

Pop-ups are so nerve wreaking, even the founder of the technology has apologized for it. Many people view websites with pop-ups as unreliable and prefer to get out immediately. But these popping messages are surprisingly still in use. With such a bad reputation, why are pop-ups still in use?

  • Pop-ups can turn visitors into subscribers.

Using pop-ups is the most effective way for turning passive visitors into active subscribers, which is why many website admins still prefer the method. How does this work? As soon as you enter the website, a pop-up appears asking you to leave an e-mail for receiving notifications. The former is a relatively cheap and quick method for website owners to increase website subscribers and expand their mailing list.

  • Promoting website Content

Besides attracting subscribers, pop-ups are proper tools for promoting website content and even encouraging visitors to stay on the website and take a glimpse of other pages. Thanks to pop-ups, website admins can recommend other content similar to the one the visitor has searched for.

  • Reducing the bounce rate

The bounce rate relates to the average time a user spends on a website. A high bounce rate will diminish a website’s credibility and decrease its chances of landing a proper place in the search results. As such, many website owners try to reduce this rate by keeping visitors on the site for a longer time. How do they do that? They will send you a pop-up just as you are about to leave the site asking you to subscribe or share your e-mail address.

Conclusion

We all agree that receiving pop-ups are the most annoying part of surfing on the internet. Although many websites have abandoned the use of these pesky messages, they will not be out of fashion anytime soon. All you can do in the meantime is blocking them on your browsers and avoiding software containing a high amount of pop-ups. Disable pop-ups in your browser, and if that is not enough, install AdBlock software, oh and maybe launch some apps in airplane mode.

How do I get Google to stop showing previous searches?

Although having access to your recent searches could be a valuable asset to many, it might not be the most sought after feature if you are using a public laptop. What is more, your search history can be used against you once a spooky colleague gets their hands on them or worse, when a sibling finds out about your most private secrets. Although the scenario sounds terrifying, it is totally avoidable.

Whether you are using an Android, iOS phone, or are searching Google on a PC or laptop, there are multiple ways of getting rid of search results:

How to Stop Google showing search results

The Web and Activity feature in Google does not only record your search history but whatever you do on other Google services such as YouTube, Google Drive, and so on. To avoid an extensive recording of your data, you need to turn this feature off. Follow the instruction below to achieve just that:

  1. On an Android phone or tablet, you will need to head to the ‘Settings app,’ Scroll down and find ‘Google’ and ‘Manage your Google account.’
  2. What you need to look for here is the ‘Data and Personalization’ section.
  3. You will find Web and app activity under the ‘activity controls’ option; turn it off to block Google from tracking your daily online activities.

Turning off Web and Activity on a Computer:

  1. The process might be a bit more online on a computer; first of all, you will need to visit the activity controls page with a signed-in Google account.
  2. Scrolling down, you will find the Web and Activity option; turn it off.

Blocking Google from recording your activities on an iPhone or an iPad:

  1. You will need to visit the Activity controls page on an iPhone or an iPad again to sign in to your Google account.
  2. The rest follows the same as it would in a PC; just scroll the page down to find Web and Activity and turn it off.

With Web and Activity turned off, Google will not show any previous searches from now on, but what about the old ones?

We can feel the frustration in you; you might have turned Web and Activity off, but your previous embarrassing searches are right before your eyes. For that matter, you need to clear the browser history; stick with us to explain to you how you will steer clear of your previous Google search results on different Browsers:

Deleting Chrome Browser history

Android devices:

  1. Open the Chrome app in your device, reach out to the three-dots icon on the top right, and tap on ‘History’ (on some devices, the address bar might be at the bottom, if that is the case, you should swipe up the address bar to find ‘History’ ).
  2. After tapping on History, you will find ‘Clear browsing data.’
  3. Before finalizing the removal, select the period in which you want your data removed (it could be the past 24 hours, past week, or all of your browsing sessions). Note that you can choose which data you want to delete; stored data on a chrome browser includes cookies, cache data, saved passwords, auto fillings, and website settings.
  4. After adjusting the settings, you can tap on ‘clear data’ and get rid of your search history.

PC or a laptop:

  1. To clear browsing history on a desktop device, head to the Chrome app on your PC or laptop, open the app and find the three-dots icon at the top right.
  2. Find History and click on the enlarge icon beside it to view all options.
  3. Click on ‘Clear browsing data.’
  4. On the box that has appeared on your screen, look for a drop-down menu and select the exact period in which you want your search history removed.
  5. Just like with android devices, you can select which exact data you want to be removed before finalizing the deletion.
  6. Tap on ‘Clear data’ to end the process.
  • iPhone or iPad
  1. Open the Chrome app on your iPhone or iPad.
  2. Reach out to the three-dots icon in the bottom right to find ‘History.’
  3. Look for ‘Clear browsing data’ after expanding History by tapping on it.
  4. Check browsing data and any other item you want to delete.
  5. Some items might be checked by default; you might consider unchecking them if you wish to keep them on your device.
  6. Tap on ‘Clear browsing data’ and ‘done’ after the job is finished.

Removing Google search results on Safari

  • iPhone, iPad, or iPod touch
  1. Head to the Settings app on your iPhone or iPad.
  2. After finding the safari append tapping on it, tap on Clear History and Website data to remove your browsing data (note that clearing your browsing data will have no impact on your AutoFill information).
  3. If you are willing to clean more than just your browsing history, head to settings > Safari again, but this time find ‘advanced’ and after tapping on it, look for the ‘website data’ option.
  4. You will then find ‘Remove all browsing data’ after tapping on which, you will have all your web data removed.
  5. If you wish to surf the net without leaving a trace, you can turn on private browsing.

Mac

Clearing browsing data is much easier on Mac:

  1. Open the Safari browser on your laptop.
  2. Head to the menu and find ‘Safari’; click on it to find ‘clear history’ in the middle.
  3. Click on ‘clear history’ to remove your browsing data but note that you can also opt for different periods when doing so.

The Bottom line

Although the above methods work 100%, it is best to browse privately or in incognito mode to avoid awkward situations when using a public device or browsing on your friend’s phone or laptop.

How to tell if someone blocked your number?

Let us face it; we have all been in situations where asking people to stay away doesn’t work. Receiving hundreds of calls and messages from sales executives, nosy former high school friends, and even scammers is not something you would long for after a busy workday.

Blocking people from your phone seems like a permanent solution, but how are you going to do that? What happens after and in the process? Please stick with us to get the answer to those questions.

How to tell if someone blocked your number

Although no notifications will be sent to the people you have blocked from contacting you, there are a few hints and signs that, if interpreted, could provide strong evidence of your doing so:

  • Usually, you will receive a delivered confirmation after sending text messages. By tapping and holding on to the message, you will be presented with a drop-down menu; scrolling down on it will find ‘more,’ by tapping on which you will receive information about the message’s status and the delivery confirmation.
  • The person you have blocked will not receive the delivery confirmation. If they are smart enough to go through the above process and find the message status, they will not find the delivery confirmation there and will start guessing you have probably blocked them.
  • Another way they could tell you have blocked them is by calling you. The caller will be directed to a voice mail or hear a pre-recorded message after a few beeps.

Can you know if the number has ever tried contacting you after you have blocked them?

Although there are no ways to find out this from your phone, some applications might give hints about who out of the Blacklist has attempted to contact you.

  • Call Blacklist 1.99 EUR

The app allows you to access the blocked log call in the free version, but you could always buy the premium version to stay safe from the countless ads in the unpaid version. You can find the app in Google’s Play Store. After installing the app, open it and tap on the record option right on the main screen. After tapping on it, the app will give you a list of all the blocked numbers that have tried to call you after being blocked.

How to block a number on Android

Android phones come in different names and brands. Like their appearances, the blocking process varies significantly in each of them.

Blocking a number via the Phone app

  1. The phone app on most android phones is at the bottom of the home screen, it could come in any color, but you can’t miss the phone sign on it. Anyway, tap on the app to open it.
  2. There, you will see a list of all your recent calls; look for the number you want to block from calling your phone. You could also search for the number in your contacts if it is already saved.
  3. Tap the number to view the options located at the bottom of the screen. If you are trying this from the recent calls section, do not tap on it. Instead, tap on the ‘!” sign beside the number.
  4. To see more options, tap on the sign with three dots.
  5. You will see the ‘Block Number’ option here; tapping on it, you will get rid of the pesky calls.
  • Blocking numbers on Samsung phones

Samsung holds first place in the android phone market, with 22% of market share and a market capitalization of 301.65 billion dollars. Given that, there is a good chance the phone you are holding in your hands comes from the former brand; if it is so, take a look below to find out how to block numbers in your phone:

  1. Tap on the phone app. Scrolling down the screen, find “Recents” at the bottom.
  2. Find the number you intend to block. In the options below the number, you will find an “i” sign; tap on it.
  3. On the new screen, scroll down to find “Block” at the bottom. Well done!
  • Blocking a number on other android devices

The explained methods should work on most Android phones, but the odds are that your phone might not follow the exact instructions as the above ones. In some android phones, tapping on a number may result in a call, which would be pretty strange considering you want to get rid of the caller. Luckily, another procedure could avoid that sort of a situation:

  1. Open the Phone app on your device.
  2. Instead of tapping on the number, hold your finger on the number until a menu shows up on the screen.
  3. Scroll down the menu to find the “Block” option, then tap on it.

Blocking a number via the Cellular carrier

All of the above methods work perfectly on your existing phone, but they will not affect a new phone, meaning the number will have access to you again if you change your phone. If you want to block the number from accessing you permanently, you should opt for stopping it at the carrier. There are no DIY procedures for this method, and you will have to contact your operator to get the job done.

Warning: although the permanent blocking of unwanted numbers sounds like a terrific idea, it comes with a cost! Contact your carrier to get information about their blocking plans.

Conclusion

Blocking a number on Android could be done in various ways, and the process could differ depending on which brand and model you are using, let alone the Android version of your phone. Just as you can never be sure about the procedures of blocking a number on your Android phone, the result always remains the same; pure relief and utter reassurance.

Exit mobile version