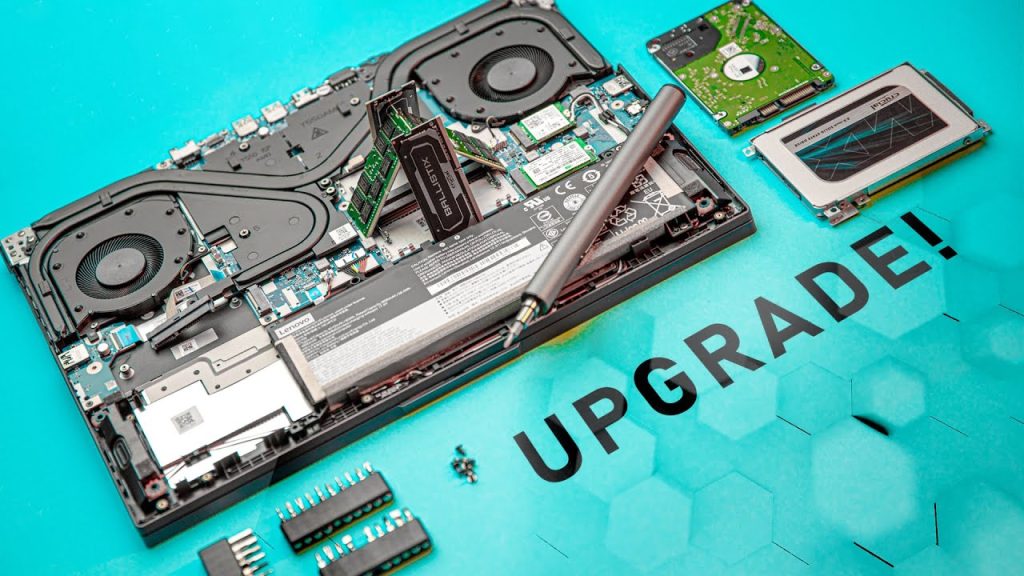
Are you tired of your laptop’s slow performance? Are you looking to enhance its speed and responsiveness? One effective solution is upgrading laptop RAM. In this complete guide, we’ll walk you through process of how to upgrade RAM. It would still help you out even it you’re a beginner or a tech-savvy individual. This article will provide you with the ability and confidence to undertake this simple yet impactful upgrade. So, let’s dive in.
Why Should I Upgrade Laptop RAM
Your laptop’s RAM – It is called Random Access Memory – plays a crucial role in its overall performance. Upgrading the RAM can significantly enhance your laptop’s speed and multitasking capabilities. Here are a few reasons why you should consider upgrading your laptop’s RAM:
- Improved multitasking
With more RAM, your laptop can handle multiple tasks simultaneously without slowing down.
- Enhanced performance
Upgrading RAM allows your laptop to run applications and programs more smoothly, reducing lag and delays.
- Better gaming experience
If you enjoy gaming on your laptop, upgrading the RAM can help improve graphics rendering and reduce game lag.
- Future-proofing
As technology advances, newer applications and software require more RAM. Upgrading now ensures your laptop can handle future demands.

How to Upgrade RAM: Do it in the Best Way
Now that you understand the benefits of upgrading the laptop’s RAM, let’s walk through the step-by-step process of upgrading it:
Step 1: Determine compatibility and maximum RAM capacity
Before purchasing new RAM, it’s crucial to check your laptop’s specifications and determine its compatibility and maximum RAM capacity. Refer to your laptop’s manual or manufacturer’s website for this information.
Step 2: Purchase the appropriate RAM
Once you know your laptop’s compatibility and maximum RAM capacity, you can proceed to purchase the appropriate RAM modules. Look for reputable brands and ensure the RAM matches the required specifications, such as type, speed, and capacity.
Step 3: Prepare your laptop
Before installing the new RAM, ensure your laptop is powered off and unplugged. Also, make sure to ground yourself by touching a metal surface to discharge any static electricity.
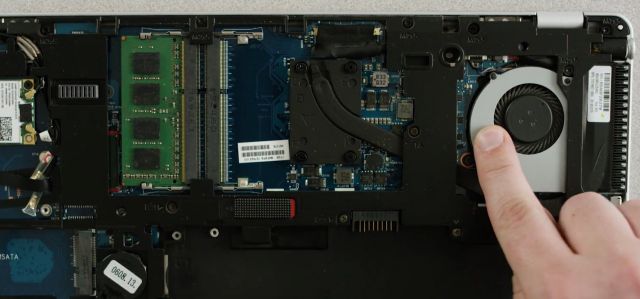
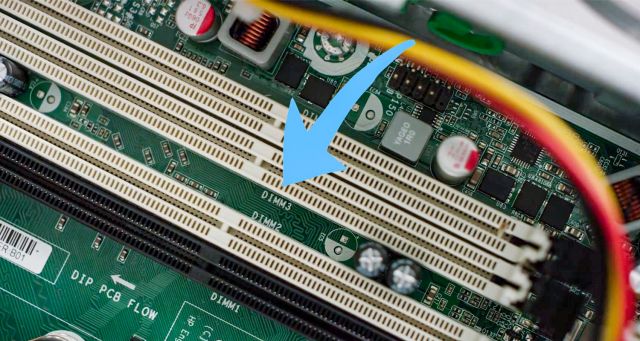
Step 4: Access the RAM slots
Locate the RAM slots on your laptop. In most cases, they can be found on the bottom or under a removable panel. Consult your laptop’s manual if you’re unsure about their exact location.

Step 5: Remove the existing RAM
If there are existing RAM modules in the slots, carefully remove them by pushing the clips on the sides of the module outward. Gently lift the module out of the slot at an angle.
Step 6: Insert the new RAM
Take the new RAM module and align it with the slot at a slight angle. Firmly press it down until the clips on the sides lock into place. Ensure it is securely seated.
Step 7: Repeat for additional modules
If you’re installing multiple RAM modules, repeat the previous step for each module, ensuring they are installed in the correct slots and orientation.
Step 8: Test and verify
Once all the new RAM modules are installed, replace any panels you removed and secure them in place. Power on your laptop and verify that the new RAM is detected by checking your system information.
Also Read: “How to Destroy a Hard Drive“
Benefits of Upgrading Laptop RAM
Upgrading laptop RAM offers several benefits that can greatly improve your computing experience. Let’s explore these advantages in detail:
- Improved Speed and Responsiveness
Upgrading laptop RAM provides it with more temporary storage space, allowing it to access data faster and run applications more smoothly. You’ll experience quicker boot times, faster file transfers, and reduced loading times for programs and websites.
- Efficient Multitasking
With additional RAM, your laptop can handle multiple tasks simultaneously without performance degradation. You can seamlessly switch between applications, run resource-intensive software, and have numerous browser tabs open without experiencing slowdowns or crashes.
- Enhanced System Stability
Upgrading RAM can prevent system crashes and freezes, especially when running memory-intensive programs. It provides stability by ensuring your laptop has sufficient memory to handle demanding tasks without overwhelming the system.
- Better Gaming Performance
If you’re a gamer, upgrading your laptop’s RAM can significantly improve your gaming experience. It allows for smoother gameplay, reduced lag, and faster loading times. With more RAM, your laptop can store and process game data efficiently, resulting in a more immersive gaming session.
Future-Proofing Your Laptop: Upgrading your laptop’s RAM ensures that it remains capable of handling future software updates and technological advancements. As applications become more resource-demanding, having ample RAM will prevent your laptop from becoming obsolete too quickly. If you face any issue in that area, be sure to explore “The Complete Guide to Formatting an External Hard Drive for Mac and PC“. It will provide you with total assistance and solutions.

Common Mistakes to Avoid When Upgrading Laptop RAM
While upgrading your laptop’s RAM is a relatively straightforward process, there are a few common mistakes to avoid:
- Incompatible RAM: Ensure that the RAM you purchase is compatible with your laptop’s specifications. Mismatched RAM can lead to system instability and performance issues.
- Incorrect installation: Take care when inserting the RAM modules into the slots. Ensure they are properly aligned and firmly seated. Improper installation can prevent your laptop from booting up.
- Neglecting static electricity: Static electricity can damage sensitive electronic components. Remember to ground yourself before handling the RAM modules, and avoid working on a carpeted surface.
- Mixing different RAM types: It is generally recommended to use RAM modules with matching specifications. Mixing different RAM types or speeds can lead to compatibility issues and performance degradation.
- Ignoring the maximum capacity: Check your laptop’s maximum RAM capacity and avoid installing more RAM than it can support. Exceeding the limit may result in system instability or failure to boot.
In the End
Upgrading laptop RAM can provide a significant performance boost, making your computing experience smoother and more enjoyable. By following the step-by-step guide outlined in this article, you can confidently upgrade your laptop’s RAM and unlock its full potential.
Remember to consider your laptop’s compatibility, buy the appropriate RAM modules, and follow proper installation procedures. With upgraded RAM, you’ll experience faster speeds, improved multitasking, and enhanced stability.


