


Sometimes it is possible that when connecting your external hard drive to macOS, the hard drive will be in read-only mode and you will not be able to write the disk. If you own an external hard drive and use it on a Windows operating system, it means the format of the disk is NTFS. However, the point is that the format of the Windows operating system is completely different from the format of Mac or Linux, so it is possible that if you formatted a hard drive into NTFS on Windows, it will be read-only in macOS.
Fix external hard drive read-only in macOS
What is the solution now? Read more to fix the NTFS read-only on Mac error. There are several ways to fix a read-only error on an NTFS-formatted external hard drive on Mac, but you should first check the condition of the hard drive. If your hard drive was empty:
Fix 1: Format the drive into Mac-compatible file system
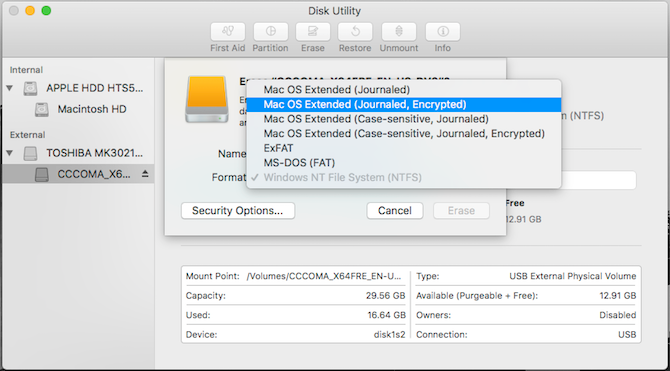
If your external hard drive is empty and you do not have a specific file on it, you can open it on a Mac and run the Disk Utility application and select the Erase option after selecting your hard drive.
In this section, you will be presented with three options and you will be asked how you want to format your hard drive. In this case, when you want to use your hard drive on both Windows operating system and macOS, it’s suggested to choose exFAT and FAT32 as you can use these two formats on any operating system.

Fix 2: Use third-party apps
If you do not want to manually change the format of the external hard drive to make it read-only on the Mac, there is another way that will make things easier for you. Using NTFS for Mac applications can be a great option for fixing read-only error of your external hard drive. iBoysoft NTFS for Mac is one of these applications. Here’s how you can use it:
Step 1: Download the app and install Microsoft NTFS for Mac by iBoysoft on your Mac.
Step 2: Connect the NTFS drives to your Mac. Note that the drive will automatically get mounted in read-write mode.
Step 3: Feel free to read and write your external HDD on Mac.
Really quick and easy, right? Apart from the easy and handy operation, it’s the world’s first NTFS for Mac software that’s fully compatible with Apple M1 Mac and macOS 11.
Fix 3: Modify kernel extension in macOS
There are other ways to fix a read-only error, which is running command line in Terminal. However, this method is too complicated to handle and it’s just an experimental feature offered by Apple, no one can ensure your data will be safe and sound with this fix. Hence, we don’t recommend using this method and will not list the whole process here.
Conclusion
All three methods mentioned above are practiced by users online. What they speak the best of is using an NTFS driver such as iBoysoft NTFS for Mac. It’s no doubt the most secure and easiest way to solve the NTFS read-only issue on Mac. Of course, you can try other ways to see the result yourself. More importantly, if you used the above methods, be sure to share your experiences with the external hard drive read-only error in mac in the comments section.