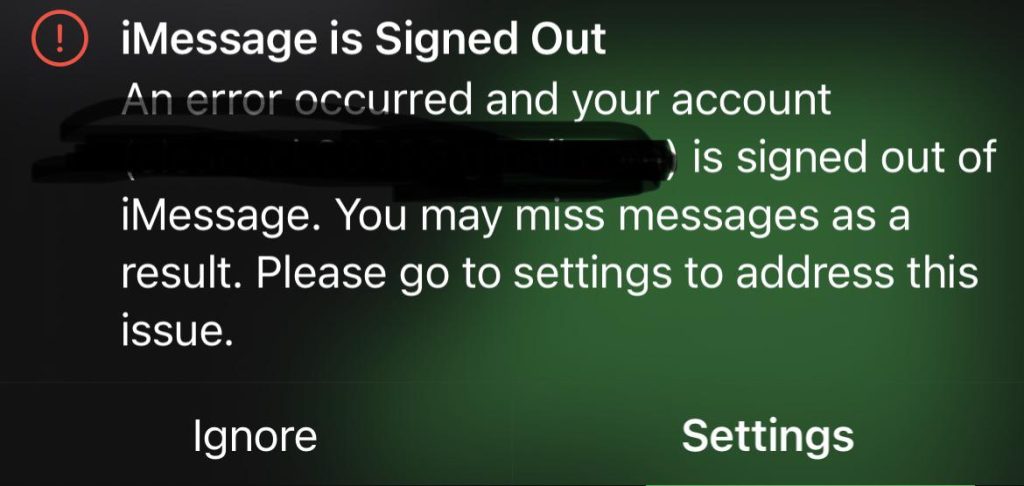
If you have an iPhone or iPad, you’ve probably used iMessage, Apple’s texting service that makes sending messages easy and full of useful features. There are times, though, when you may see the annoying “iMessage Signed Out” message.
You might not be able to send or receive texts because of this error, which could mean you miss out on important conversations. Don’t worry, though! This article will look at 10 working ways to fix the iMessage signed out error and get you back to using iMessage without any problems.
Why Is My iMessage Signed Out?
If you never meant to log out, you might be confused about why your iMessage account suddenly stopped working. Several things can make this problem worse:
- Problems with the Wi-Fi link: iMessage needs a stable Wi-Fi link to work. This error can happen if your Wi-Fi connection is weak or drops out sometimes.
- Problems with Cellular Data Connections: iMessage can also be used with cellular data. If your cellular data link or network goes down, you might not be able to use iMessage.
- Other Causes: It also can be caused by software bugs, wrong iPhone settings, wrong iMessage settings, or problems with Apple servers, among other things.

How to Fix the “iMessage Signed Out” Error (10 Working Fixes)
If you’re having trouble connecting or with something else, you can fix the mistake by following these steps:
Restart Your iPhone or iPad
The first and simplest solution to try is restarting your device. This can often resolve minor glitches causing the “iMessage Signed Out” error. Here’s how you can restart your device:
- For iPhone with Face ID: Press and hold either of the volume buttons and the side button simultaneously until the power-off slider appears. Drag the slider to turn off your iPhone. Wait for 30 seconds or 1 minute, then turn on your device again.
- For iPhone with Touch ID: Hold down the side button until you see the power-off slider. You can power off your iPhone by using the slider. Wait for 30 seconds or 1 minute, then turn on your device again. If the restart doesn’t fix the issue, let’s move on to the next solution.
Disable and Re-enable iMessage
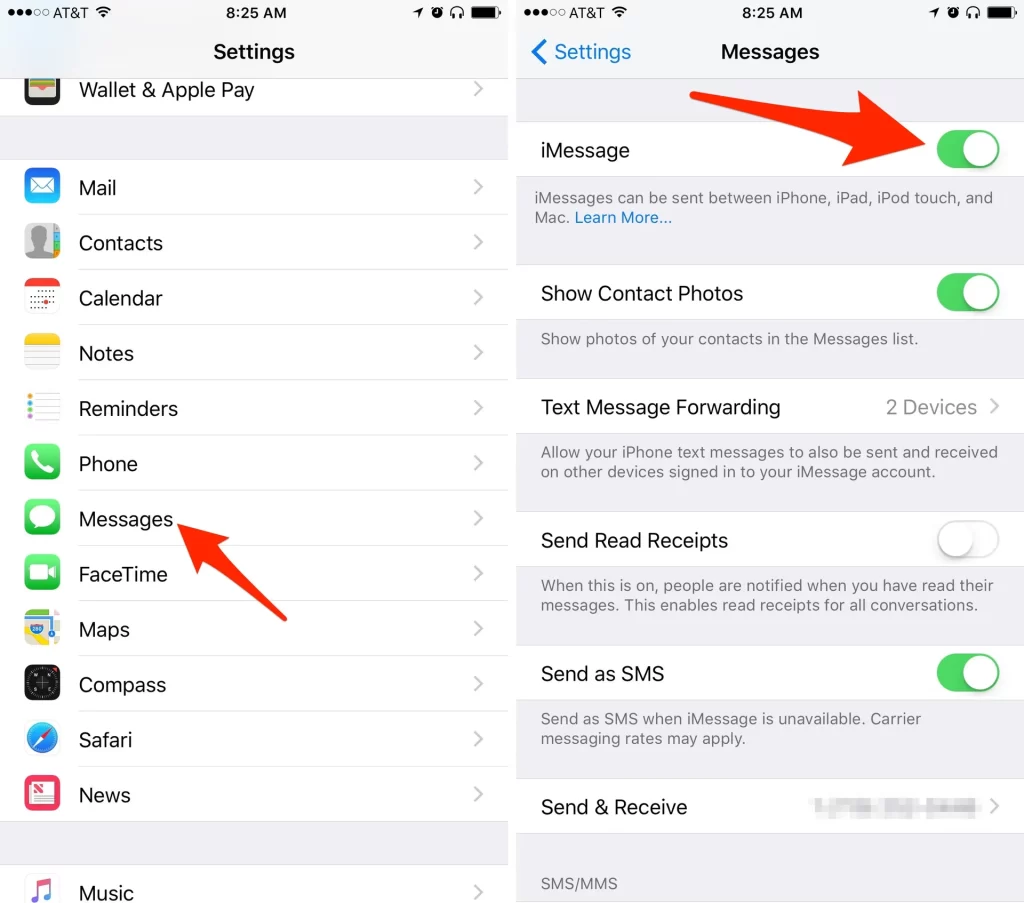
Before trying any other measures, ensure that iMessage is enabled on your iPhone or iPad. Sometimes, simply disabling and re-enabling iMessage can reset any settings errors. Here’s how you can do it:
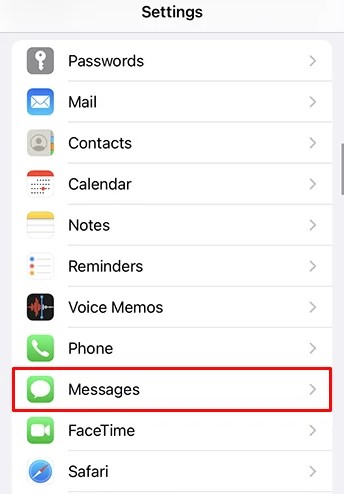
- Open the Settings app on your device.
- Scroll down and tap on “Messages”.
- Make sure the toggle next to iMessage is turned on. If it’s already enabled, disable it and then enable it again.
- If you don’t see the Messages app on your phone, you can find out how to bring it back through Apple’s support.

Check Your Apple ID or Phone Number
If you’re still experiencing the iMessage signed out error, it’s important to ensure that you’re using the correct Apple ID or phone number for iMessage. Follow these steps to check:
- When the pop-up message appears stating that iMessage is signed out, tap on “Settings” to go directly to the settings page. Alternatively, you can go to “Settings” and then navigate to “Messages”.
- Tap on “Send & Receive” and make sure the correct Apple ID email address or phone number is selected. If not, select or add the correct Apple ID or phone number.
Verifying your Apple ID or phone number is crucial in resolving the “iMessage Signed Out” error.
Check Your Network Connection
Since iMessage relies on an internet connection, it’s essential to check your Wi-Fi or mobile data connection. Verify whether the internet is working on your device by opening a browser and loading a webpage. If you’re experiencing issues with Wi-Fi, you can follow various methods to fix iPhone not connecting to Wi-Fi or troubleshoot mobile data not working on iPhone. If the internet is working fine, let’s move on to the next solution.
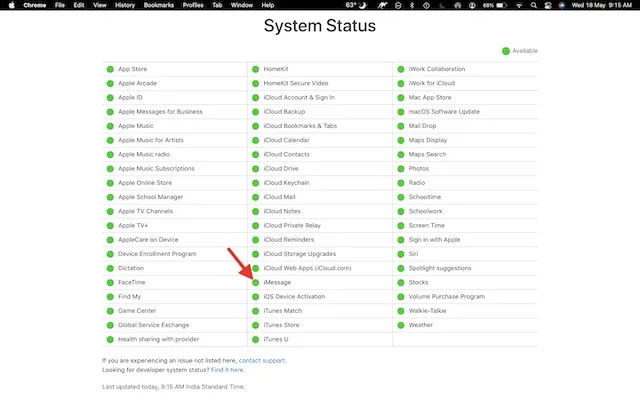
Verify iMessage Server Status
If all your settings appear to be correct, the issue may be on Apple’s end. To check the status of the iMessage server, you can visit Apple’s system status website and look for iMessage’s status. If the status is green and marked as “Available,” you can move on to the next section. However, if there’s a service disruption, you’ll need to wait for Apple to fix the issue.

Update Your Device’s Software
Updating your iPhone or iPad to the latest software version can often resolve bugs and glitches, which may be causing the “iMessage Signed Out” error. Installing software updates is as easy as following these instructions:
- Launch your device’s Settings app.
- Scroll down and tap on “General”.
- Tap on “Software Update”.
- If an update is available, tap on “Download & Update” to install it.
- Keeping your device’s software up to date is crucial for optimal performance and to prevent potential errors.
Change the iMessage Region
Sometimes, changing the region settings for iMessage can help resolve issues related to the “iMessage Signed Out” error. To change the iMessage region, follow these steps:
- Launch your device’s Settings app.
- Scroll down and tap on “Messages”.
- Tap on “Send & Receive”.
- Tap on the email ID next to the Apple ID.
- Select “Change Location” and choose your current region.

- Tap on “Save” to apply the changes.
Changing the iMessage region may help resolve any regional conflicts or settings discrepancies.
Adjust the Date and Time
Adjusting the date and time settings on your iPhone or iPad can also help resolve the “iMessage Signed Out” error. Follow these steps:
- Open the Settings app on your device.
- Scroll down and tap on “General”.
- Tap on “Date & Time”.
- Set the time zone manually or enable the toggle next to “Set Automatically” for accurate time settings.

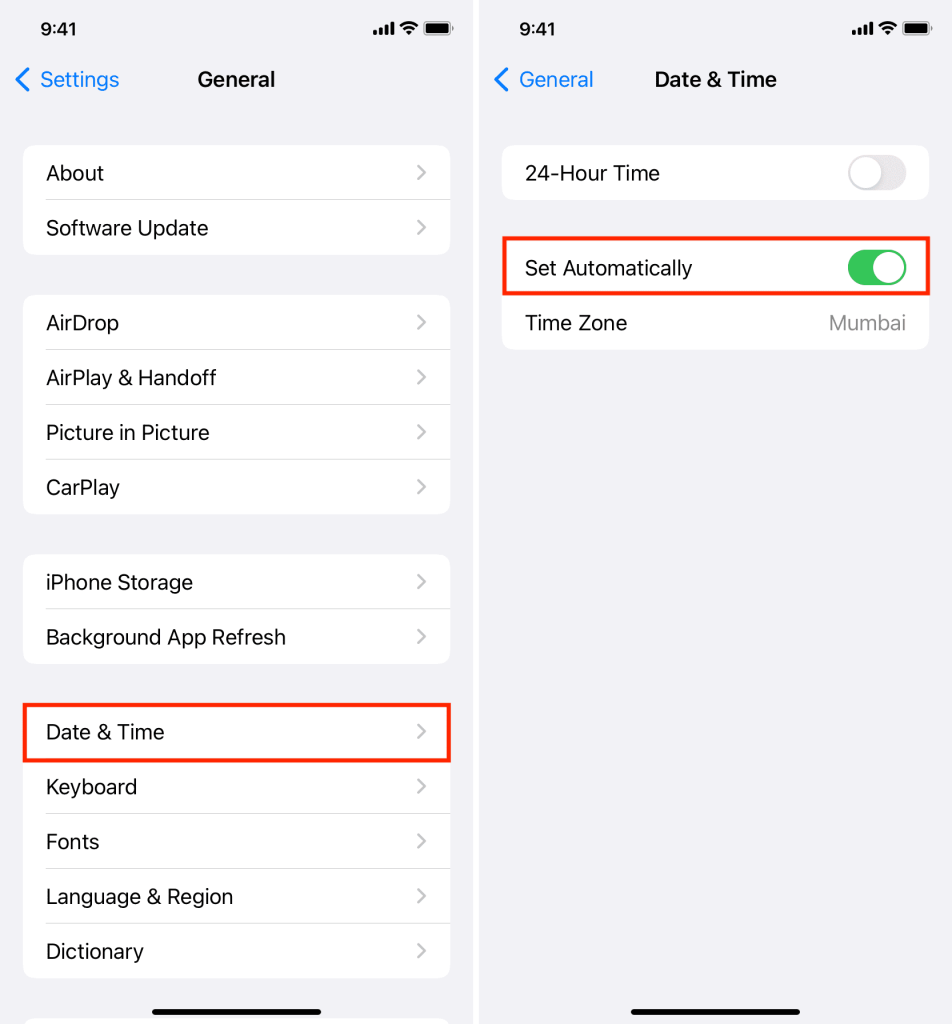
- Aligning the date and time settings with your correct location can often resolve synchronization issues with iMessage.
Sign Out and Sign In to Your Apple ID
In addition to checking the Messages app settings, it’s important to review your Apple ID settings on your device. Make sure that your Apple ID settings are updated by following these steps:
- Open the Settings app on your device.
- If you receive an update alert, tap on it and enter your Apple ID password again.
- If there’s no update notification, you can try signing out and signing back in to your Apple ID. To do this, tap on your profile picture, scroll down, and tap on “Sign Out”. Enter your Apple ID password and turn off the sign out feature. Then, log in with your Apple ID again.
- Refreshing your Apple ID settings can resolve any configuration issues that may be causing the iMessage signed out error.
Reset Network Settings
If all else fails, resetting the network settings on your iPhone or iPad can be a last resort solution. However, keep in mind that this will clear out all network-related settings, including Wi-Fi passwords and VPN configurations. Be careful and do as instructed:
- Launch the Settings app on your device.
- Scroll down and tap on “General”.
- Tap on “Transfer or Reset iPhone” and select “Reset”.
- Next, tap on “Reset All Settings” and enter your password to confirm.

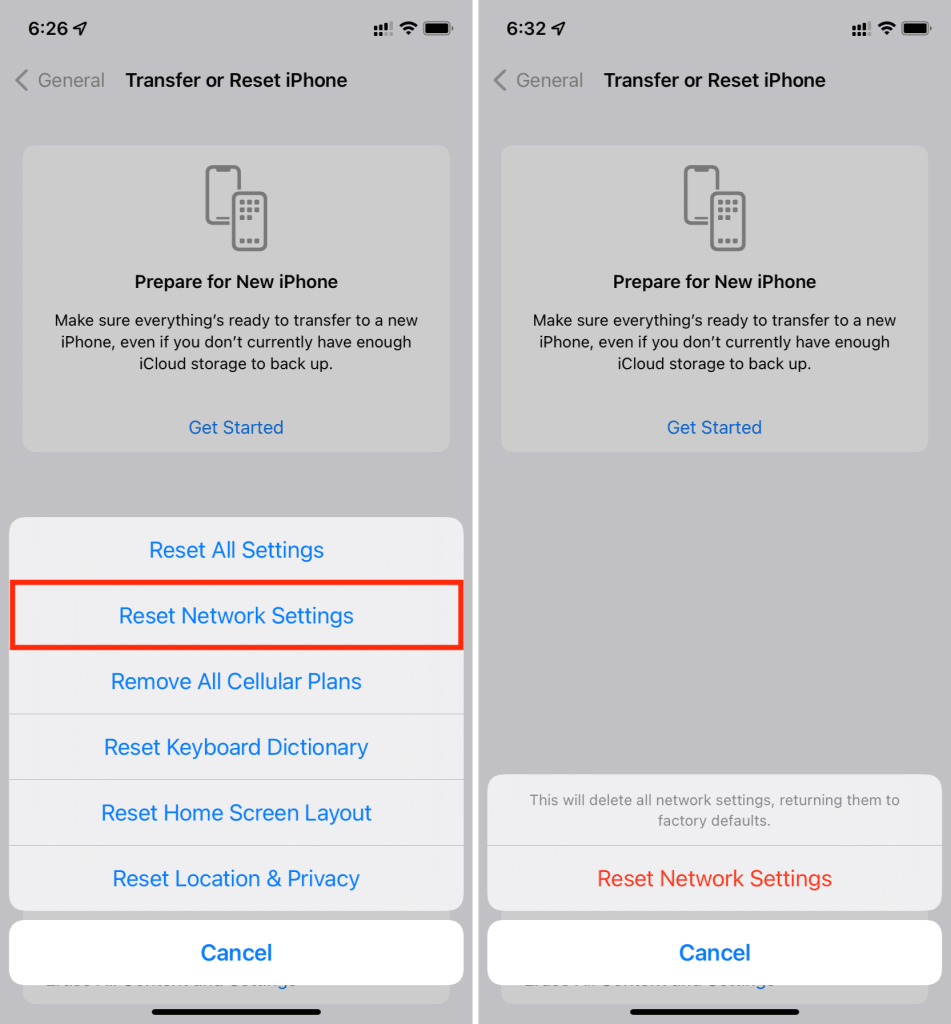
Resetting network settings can help resolve any underlying network configuration issues that may be causing the iMessage signed out error.
Contact Apple Support
If none of the above solutions were able to fix the error, it’s time to seek assistance from Apple Support. Apple’s technical support team can help diagnose and resolve any hardware-related problems or persistent bugs that may be causing the error.
FAQs
- Is the iMessage and Apple ID the same account?
No, iMessage and Apple ID are not the same. iMessage is a messaging service while Apple ID is your unique identification for accessing various Apple services.
- Why won’t my phone number connect to iMessage?
There can be various reasons why your phone number won’t connect to iMessage. It could be due to carrier restrictions or server problems. Contact your carrier provider to resolve this issue.
In Closing
If you get the “iMessage Signed Out” error on your iPhone or iPad, it can be annoying. But these 10 fixes should help you fix the problem and get back to using iMessage normally. It’s important to follow the steps carefully and get in touch with Apple Support if you need to. Stay in touch and enjoy iMessage’s perks without any problems.


![How to Upload YouTube Shorts [2024 Guide]](https://inosocial.com/wp-content/uploads/2024/01/How-to-Upload-YouTube-Shorts.jpg)