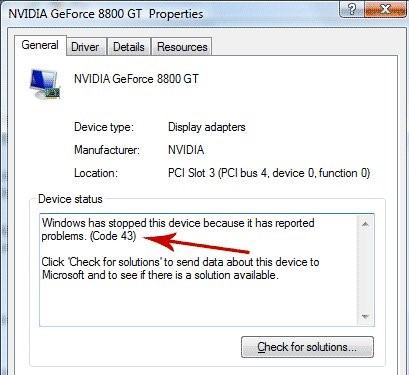
Are you struggling with code 43 error? Windows has stopped this device because it has reported problems. (code 43) is a common error that you may come across while using your computer.
This article will give you some tricks about how to fix this error. You can also visit the official Microsoft website for more information.
Microsoft’s Windows 10 comes with an inbuilt file system scanning tool called CHKDSK, which can be used to check for hard disk errors and solve them if any are found.
If you have come across this error message then there is a high chance that your device has been infected with malware. To fix the problem, you will need to scan and remove all traces of malware from your computer.
There are two ways to do this, one is by going through the process manually and the other is by using a third-party tool. If you opt for the manual method, then you will need to go through each step of the process and remove any virus or malware that might be present on your computer. However, if you choose to use a third-party tool then it will be much easier as it can scan for any hidden threats on your computer and delete them automatically.
What Does “windows has stopped this device because it has reported problems. (code 43)” mean?
Windows has stopped this device because it has reported problems. (code 43) is an error that can be due to a number of different reasons. The most common reason for this error is because the hardware driver was not installed correctly or there are issues with the drivers that are currently installed on the machine.
in other words, this error message usually means that the device is not working properly. It can be due to a hardware or software issue.
If you have a device that has this error message, it is advisable to contact the manufacturer.
How To Check for error “windows has stopped this device because it has reported problems. (code 43)”?
for some reason, the driver for your device has either lost connection with the drive or has crashed.
If you’ve tried turning the device on and off and uninstalling and installing the driver, but it still won’t work, then your drive might be broken.
Here, we will show you how to reinstall your driver on windows.
1) Go to the device manager by pressing Win+X and selecting “Device Manager” from the list.
2) Right-click on the device for which you want to reinstall the driver and select “Update Driver Software”.
3) Choose “Browse my computer for driver software”.
4) Select “Let me pick from a list of device drivers on my computer.”
5) Select your model type and then click next.
6) Select “Install this driver software anyway.”
How to Fix “windows has stopped this device because it has reported problems. (code 43)” ?
As we already discussed, this error message usually pops up when the device is not working properly or has some problems. There are many reasons for this error message to pop up, but the most common ones are:
1) The device driver is corrupted
Sometimes even when we have tried everything possible to fix our computers, we still need to call in for help from our IT department or an expert technician. If you’re looking for a quick solution that does not require much time or effort on your part then try microsoft support.
2) The device driver needs to be updated
Device drivers are a computer program that is a vital component in making your hardware work. Without these, the hardware can’t communicate with the operating system. The device driver needs to be updated to make sure it’s compatible with the new operating system.
3) The device driver needs to be reinstalled.
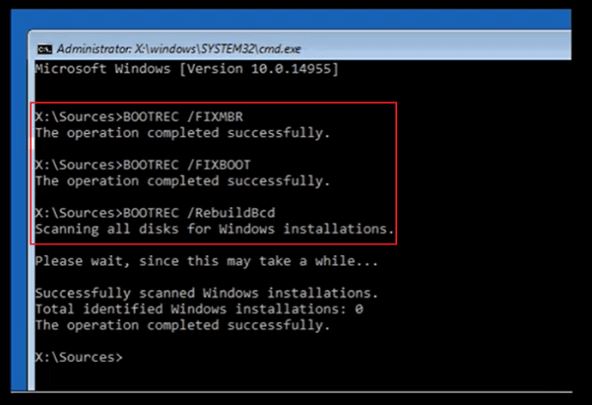
If the driver needs to be reinstalled, power off your PC and unplug it from any power sources. Once your PC is shut down, plug in the power cable and boot up your computer. Insert the Windows installation disc into your CD drive and restart the computer. If you’re not sure how to do this, refer to your computer or motherboard’s manual for help.
4) Windows has stopped this device because it has reported problems. (code 43).
5) Windows has stopped this program because it is not responding. (code 10).
This error is often associated with a driver or other system process that has stopped. This can be caused by many things, such as updates to Windows, hardware issues, and more.
The Windows “Uncorrectable Error” message is displayed when the error cannot be fixed. Usually, the error appears when hardware malfunctions or driver files are missing.
There are three main factors that are responsible for different types of errors. These are an unrecoverable memory hardware failure, a hard disk failure, and a Windows kernel error. The first one is rare but the last two happen quite often.
The WHEA_UNCORRECTABLE_ERROR is a blue screen error that is caused by a hardware problem. It typically means that the hardware has failed or is about to fail.
When your computer or phone freezes, it’s typically because the hardware has failed or is about to fail. There are a number of potential causes for this error like malware, memory leak, power failure and more.
The WHEA_UNCORRECTABLE_ERROR can be fixed by updating BIOS, replacing the system board, replacing the processor, or replacing the memory.
The WHEA UNCORRECTABLE ERROR is a common BIOS error message that indicates that the system has encountered a problem. Users who want to fix this error should determine whether they have a problem with their BIOS or not and then follow one of these steps outlined in this article.
Updating the BIOS on a computer is a necessary process, as it ensures the computer is running at its full capacity. It’s important to know that updating an old BIOS may cause problems. For this reason, it’s best to update the BIOS only if there is a critical bug or flaw in the previous version.
What is the whea uncorrectable error?
The WHEA Uncorrectable Error is a hardware error that can be caused by various system errors.
The most common cause for this error is overheating of the processor.
The error code 0x1E is an indication that the CPU has overheated and needs to cool down before you can use the computer again. The most common cause for this error is overheating of the processor. In some cases, a fan has been blocked by dust, preventing it from cooling down the processor. There are also cases where a heat sink was not properly installed on the CPU.
In other words, The whea uncorrectable error is a software error that can occur when downloading upgrades for Windows OS.
A ‘whea uncorrectable’ error indicates that the installation of several OS and firmware updates failed and these require a third-party tool (Driver Scanner) to rectify.
“The whea uncorrectable error appears only while the operating system is installing itself, but not while updating current OS versions.”
This error is typically associated with a corrupted installation file.
I have often seen this error when I have a corrupted installation file. In the past, if I didn’t get this issue sorted out, the installation process would just stop and not complete.
This error is typically associated with a corrupted installation file. I have often seen this error when I have a corrupted installation file. In the past, if I didn’t get this issue sorted out, the issue would persist and cause problems in my system.
Causes of the whea uncorrectable error
By now you know what is the whea uncorrectable error. it is a detection of malformation of the system memory that led to sporadic crashes.
There are times where Windows 10 would encounter what they call a WUA (Windows updater) Uncorrectable Detection. This means that your system acquired data on some type of software error, usually in the hard drive. A lot of people speculate this has something to do with failing hardware or drivers on some level or not enough bandwidth for your processor while trying to do 2 things at once like open a video game and create more content at the same time.
Q: So what should I do?
A: This is a hard question to answer, but there are things you can do to help mitigate the issue.
-Reduce the amount of processor-intensive processes you have running at the same time. You can do this by closing other background programs, or by closing the game you’re playing before opening another video game.
-Lower the graphics quality in the settings of your video games. Doing this may allow your processor to keep up with
How to Fix the whea uncorrectable error?
Uncorrectable errors are likely caused by interference with hardware or software or physical corruption of the hard drive. Developers of new operating systems visit this issue every time they release a new update, solving some problems and causing others.
The exact cause can be intermittent memory problems on the motherboard, incompatible drivers with certain USB devices, viruses on the computer or erroneous power supply to components around reboot reboot.
There exist several generic pr stratagies for troubleshooting uncoerrectable errors.
To prevent error messages in your call traceback What you should try is installing device drivers update via Windows Update
and in order to Fix the whea uncorrectable error…
1) The first thing you should do is to make sure that your computer is up-to-date with all the latest updates from Microsoft. You can do this by going to Settings > Update & Security > Windows Update and clicking Check for Updates. If there are any available updates, install them and then restart your computer.
2) If the problem persists after updating your computer, go into BIOS settings and disable Quick Boot or Fast Boot mode, then restart your computer again.
If the problem persists after updating your computer, it’s possible that your computer is experiencing an issue with its BIOS settings. To check this, you can go into BIOS settings and disable Quick Boot or Fast Boot mode, then restart your computer again.
3) If the problem still persists after disabling Quick Boot or Fast Boot mode, try to replace your hard drive with one
Replacing your hard drive may solve the issue with the computer turning on but not being able to boot.
We have a list of the best ways to fix the whea uncorrectable error windows 10:
– Make sure that your computer is not overheating.
– Check for any loose cables and connections.
– Uninstall and reinstall the device driver.
– Update your BIOS or UEFI firmware.
– Clean your system registry from any invalid entries.
Computer overheating is the most common cause of system problems. It is important that your computer cools down before any other troubleshooting can be done.
Have you lost your password? because you have googled how to unlock iPad without password! If you are looking for a method to unlock your iPad but you have forgotten the password, there are two options. First, you can restore your iPad to the last synced computer. This will reset the passcode and remove it. This will result in an unlocked iPad that can be used as normal. However, since your data will not be present, this method is only suitable for very basic cases. The second option is to perform a factory reset of your iPad.
The final option for unlocking iPad without password is to erase all your data from the device. This will clear all your data, so you will need to backup your iPad to your computer. This method may not work for your iPad, so you should make a backup of all your data before beginning the process. Moreover, you should always use an experienced technician to perform the procedure. This will guarantee success in bypassing the password of your iPad.
In case you cannot find the correct unlocking method, you can try erasing all the data from your iPad with Auto Erase. This method works if you have typed in the wrong passcode more than 10 times. Besides, this way, you don’t have to use a computer to reset your iPad. You can also perform a reset without a computer. This way, you can prevent your iPad from being unlocked by unauthorized users.
hopefully by now you know how to unlock iPad without password.
How to Unlock a Disabled iPad?
When your iPad is disabled, you may be wondering how to unlock it again. After all, there are several different ways to do this, but it’s important to know the proper procedure for unlocking a disabled iPad. If you can’t figure out what caused your device to be disabled, read on to learn how to solve the issue. Once you know how to do this, you can try restoring your iPad.
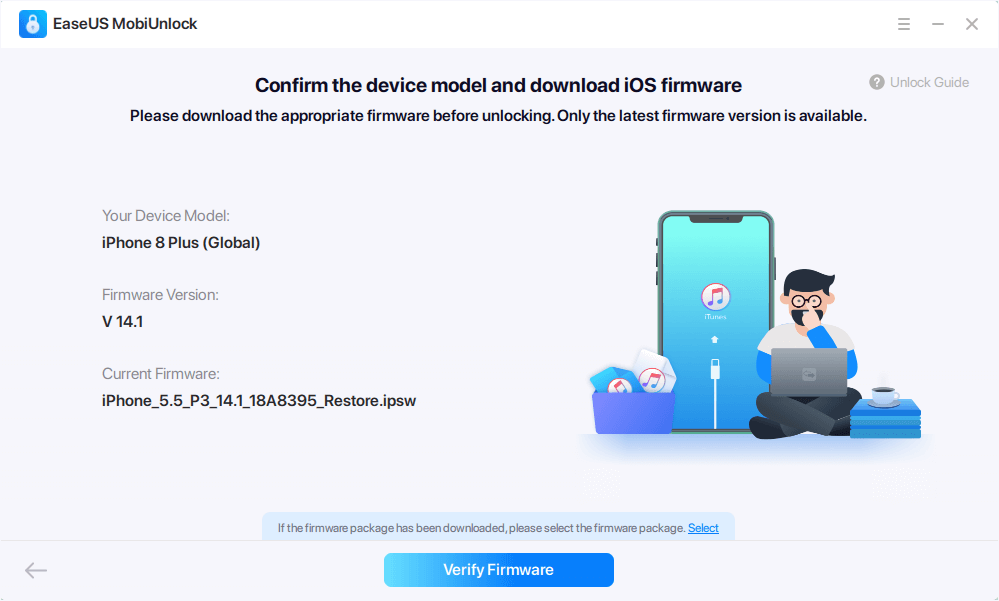
To start the process of unlocking your iPad, you’ll need to start it in recovery mode. This mode resets the device to its factory settings. To do this, you’ll need to download and install the latest version of iTunes on your computer. Next, connect the iPad to your computer using a functioning USB cable. Make sure that your computer recognizes your iPad and enter the unlock code to unlock the device.
Next, download the unlock program for your iPad. This will download the firmware from the internet and prompt you to enter the unlock code. After the download is complete, you’ll need to sync the device with iTunes to restore it. Once the process is complete, you’ll be prompted to enter the unlock code. After a few minutes, you should be able to use your disabled iPad again!
By the way in: “IPad Unavailable” learn how to fix this common iPad error.
Can we unlock ipad without password?
If you’re wondering if you can unlock an iPad without a password, this article will show you how. This method is not very user-friendly and can cause a glitch. But if you’re desperate and your iPad doesn’t come with a warranty, it can be done. The best part is that it’s free. Just make sure you know the right steps to use. After all, you’ll never know when your device will need repairs, so it’s worth trying.
First, you need to connect the iPad to your computer. Once it connects, launch iTunes and choose the option “restore from backup.” You’ll be prompted to enter a passcode, which is usually generated automatically. This method does not require a computer to use, so it’s a good option for people who don’t want to lose their personal data. Remember, the data on your iPad will be restored to the date of your last backup.
Once you’ve backed up any important files, you can then download any unlocking software to unlock the iPad. This is a great option for people who have lost their iPad or simply want to use it on the go. This method works perfectly with any iOS device, so you’ll have to install it yourself. Once you’ve installed the software, simply open the downloaded files and follow the prompts. When your iPad has finished, you’ll need to restart it. This process may take several minutes, so be patient.
The most straightforward method to unlock the iPad without a password is to restore it via iTunes. Make sure you have the latest version of iTunes installed before beginning the process. Once the process is complete, you’ll need to sign in using your Apple ID and password to unlock your iPad. However, this method is the most secure way to unlock an iPad. In fact, it’s one of the most common solutions to a locked iPad.
Enter recovery mode on your iPad. You’ll need to enter this mode to remove the passcode. This is a safe and secure way to unlock an iPad without a password. It’s important to make sure you’ve followed all instructions carefully. You’ll need to use a reputable tool that’s completely free of viruses and spyware. The best option will not cost you a cent and will work on any iPad.
The best option is to use the recovery mode on your iPad. This is a safe and effective method to bypass the password on an iPad. Just be sure to make a back-up copy of the device before you try this method. Then, connect your iPad to the computer with iTunes. You’ll need to connect your iPad to your computer with a USB cable to avoid data loss. This process will wipe the entire device.
How to unlock an iPad without the password?
some hardcore apple users know how to unlock an ipad without the password.Unlocking your iPad can be a pain, so let’s learn how to bypass the passcode. There are a few different ways you can go about doing this, and each method has its own set of advantages and disadvantages. The first thing to know is that most methods will remove any information you have stored on your iPad. So, make sure you create an iCloud backup so you can retrieve any lost data later.
Once you’ve restored your iPad to its factory settings, you can now use iTunes to unlock the device. To do this, you will need to download the latest version of iTunes and install it on your computer. Next, connect your iPad to your computer using a working USB cable. Once the device recognizes the USB cable, you can then use your computer to unlock the iPad. The only requirement is that you have a copy of your password-protected iPad.
The first step in how to unlock an iPad without the passcode is to connect your iPad to a computer. To do this, you must have a wireless connection to your computer. Once you’re connected to the network, connect the device to a computer and log in with your Apple ID and password. You will be prompted to confirm your identity and select your password. After this, you can proceed to the next step.
now you know how to unlock an iPad without the password.
In this article, we will look at some of the best laptops available in the market today, and then we will examine how to choose a laptop to buy in 2023 and MacBook pro alternatives. We will look at what features you’re looking for, and what the future of technology holds for them. Most people will purchase a laptop to use it for gaming, productivity, multimedia editing, and business. If you’ll be using your laptop for all of those activities, you’ll need powerful hardware, such as a high-end CPU and a dedicated graphics card. We’ll also cover the most popular models with the highest-quality displays.
What features should MacBook pro alternatives have?
When you are here, it means you are looking for the best macbook pro alternatives, which I will introduce here. But before that, let’s see what are the most important features that best alternatives to macbook pro should have, and what should you consider when you want to buy a laptop.
The laptop display
Your screen is the only window between you and your computer, so you should be sure that you’re getting the best possible display for your money. For a better experience, try looking for an OLED display, which can cost upwards of Rs 70,000. A screen resolution of 1920×1080 is full HD, which means that you’ll have plenty of space to line up windows and keep things in view. You can also get Full HD models with touchscreens.
The operating system
Regardless of your needs, you should make sure that you’re getting the latest processor and other hardware. The Intel Core i7 chip is the latest high-end processor, but you can also get a Core i5 or Celeron if you’re on a budget.
The laptop CPU
While Intel chips are the most commonly used processors for computers today, there’s no need to spend a lot of money on them. Even if you’re on a tight budget, don’t compromise on features. Chromebooks are a great value if you need a laptop for basic tasks. The only difference between them is that Chromebooks have a full HD (1080p) display and a good keyboard.
The type of display you need
If you’re looking for a high-quality laptop for business use, you’ll have to consider the type of display you need. Of course, if you are a student and all your searchings are “dissertation prospectus help“, you don’t need a potent laptop. If you’re looking for a laptop to use for business, the MacBook Air is a great option with its powerful M1 chip and long battery life. If you’re looking for an affordable laptop with great performance, you can choose the Acer Swift 3 as well.
The kind of usage you’re going to do with your laptop
Before making a final decision, consider what kind of usage you’re going to do with your laptop. If you plan to use your laptop primarily for office work, a low-end 14-inch model is fine. For video editing and gaming, you’ll want a 15-inch screen. For gamers, you should consider a laptop with an OLED screen. If you’re looking for gaming, a 16-inch screen is ideal.
The size and portability of a laptop
The size of a laptop is an important consideration. While its RAM is easily replaceable, its size can vary. Some brands have 13.3-inch models and others offer laptops with non-conventional sizes. In addition to the RAM, the most important aspect to consider is the size and portability. Most general-purpose laptops are about half-inch thick and weigh three pounds or less. They’re ultraportable and have a wide variety of ports, so consider this before you buy a laptop. You’ll want to make sure it has the right size and features to meet your needs. There are many factors to consider, but the most important ones are display, keyboard, and screen resolution, battery, CPU, and other technical specs.
The laptop OS
Some laptops run Windows 10, while others run MacOS or Linux. If you prefer an Apple-based system, go for the MacBook. If you’re an Android user, choose a Windows version of the operating system.
Why to look for macbook pro alternatives?
Previously, MacBook Pro was the best laptop, which provides great features of Apple’s design. Still, it is most designers’ laptops of choice, but there are many other competitors with prowess for design and performance that offer their Windows machines at a lower price. If you want to know more about the best alternatives to macbook pro, read the next paragraph.
Top 10 macbook pro alternatives to buy
There are many reasons to want a MacBook Pro, and a few of the top-rated models are still on the market. But if you don’t need the most powerful computer available, or if you’re just not that keen on the price tag, there are some good alternatives. For example, a Dell XPS 15 is a great budget alternative to the MacBook Pro. Its slim design and high-quality keyboard rival the MacBook Pro. The battery life is also better than that of a MacBook.
Are you looking for alternatives to macbook pro?
The Razer Blade Advanced
this one is a great choice for those who want a MacBook Pro alternative but don’t want to spend the extra money. It has the same size, weight and design as the 13-inch MacBook Pro. Unfortunately, the Mercury White model is no longer available, but there’s a 15-inch model, and both have amazing battery life and performance. Both have headphone jacks and MicroSD cards.
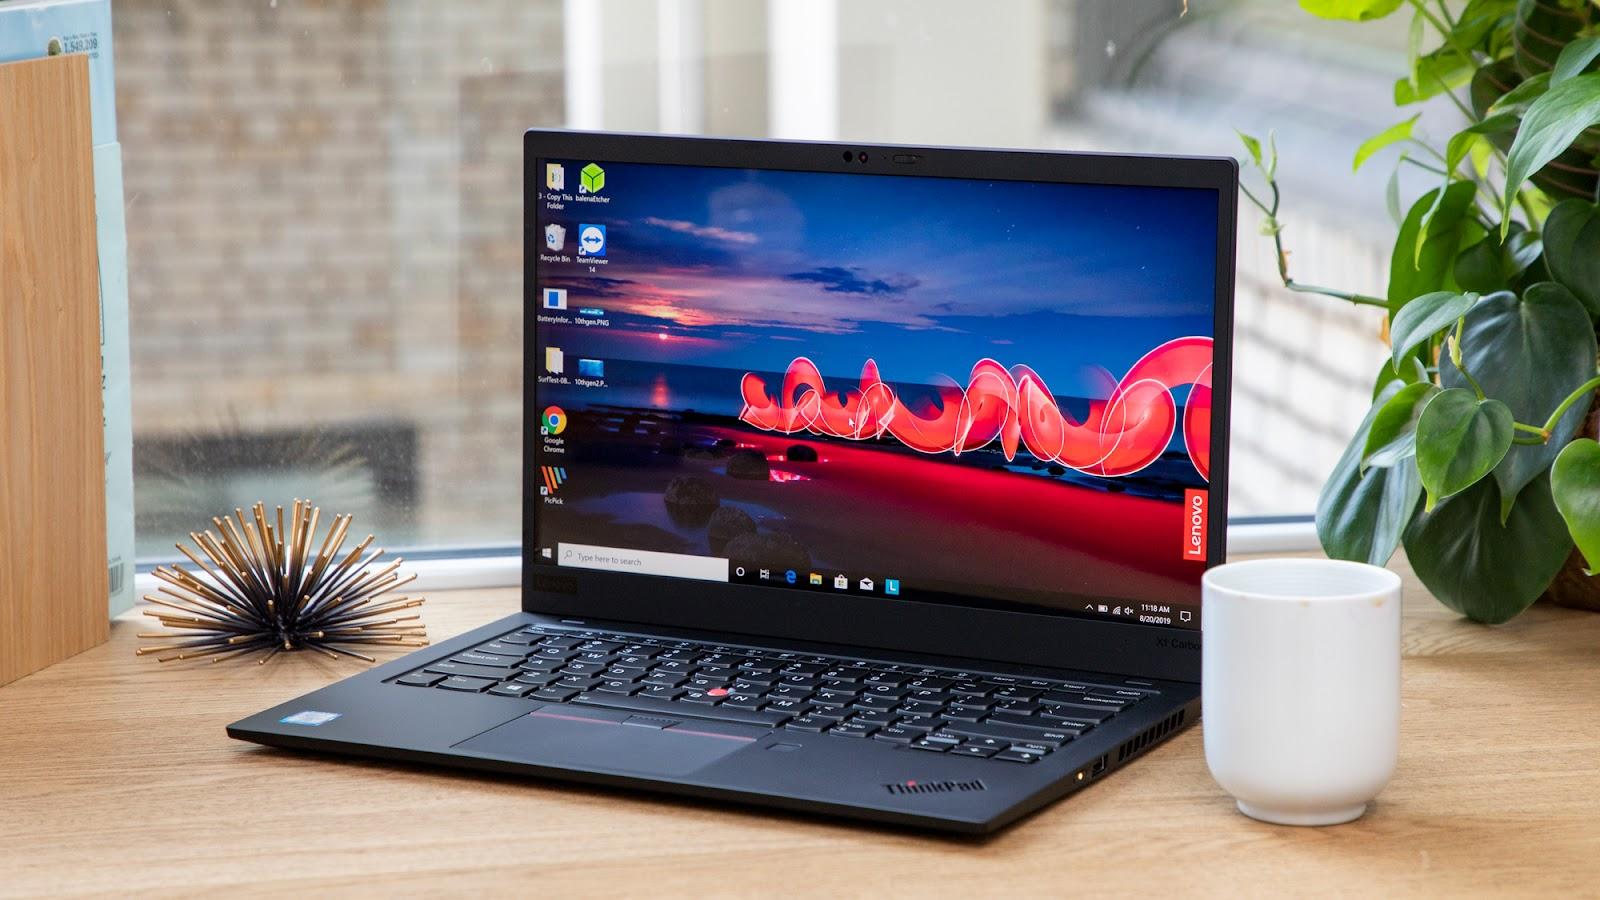
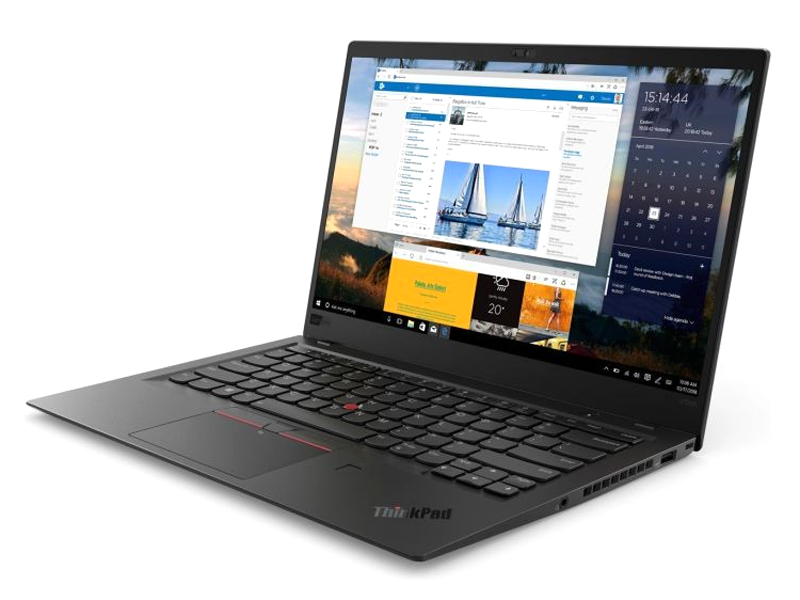
Lenovo ThinkPad X1 Carbon
One of the best alternatives is the Lenovo ThinkPad X1 Carbon is Starting at $1,198, the Gen 6 version offers a full-sized keyboard and a high-quality keyboard. It’s incredibly thin and lightweight, and looks great in black. Unlike the MacBook Pro, this laptop offers a similar experience and is still cheaper than the MacBook Pro. If you’re looking for a cheap, high-quality alternative to a MacBook Pro, the Lenovo Yoga 7 will make an excellent choice.
If you’re not ready to spend the extra money on the MacBook Pro, the Windows PCs can be a great choice. Whether you need an ultra-portable notebook, or an incredibly powerful desktop PC, these Windows PCs are the ideal option for your needs. If you’re looking for a budget-friendly laptop, a Windows 10 laptop will be the best choice for you.
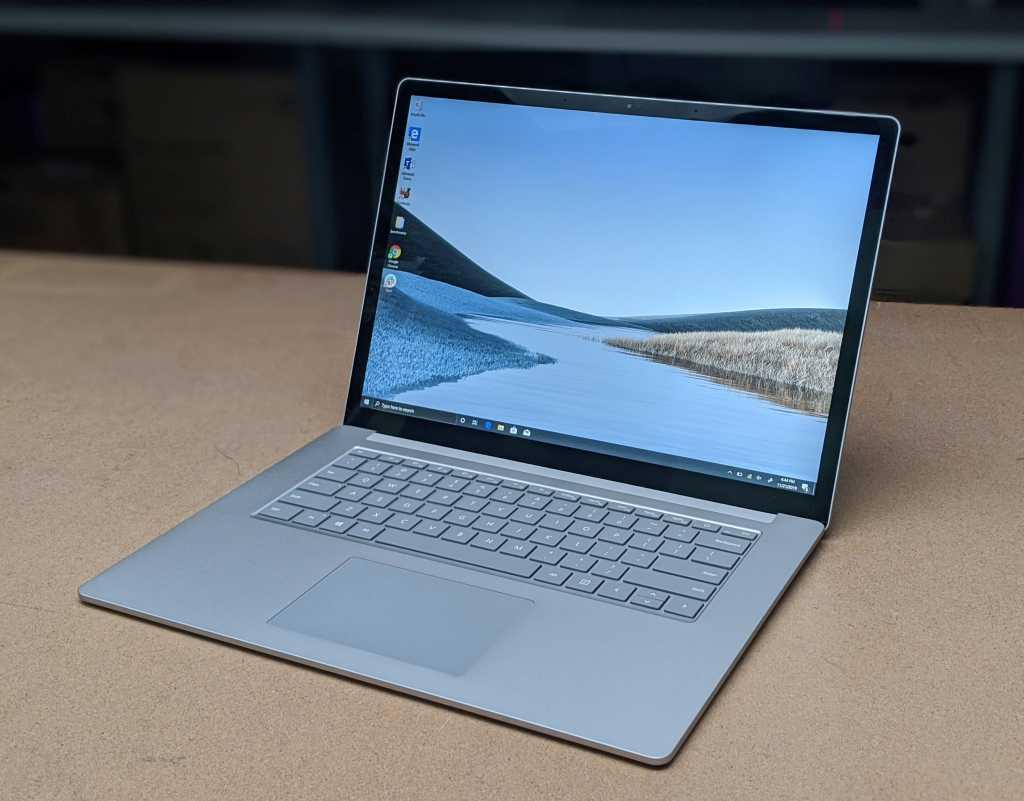
The Surface Laptop
The Surface Laptop 3 is Microsoft’s vision of the perfect laptop. If you want an affordable, powerful MacBook Pro alternative, the Surface 3 is a great choice. It has a metal keyboard and multiple color finishes. And it starts at just $999. It has Microsoft store support, making it a great choice for students. It’s also one of the best alternatives to macbook pro. However, if you’re not a student, a Surface is a great option.
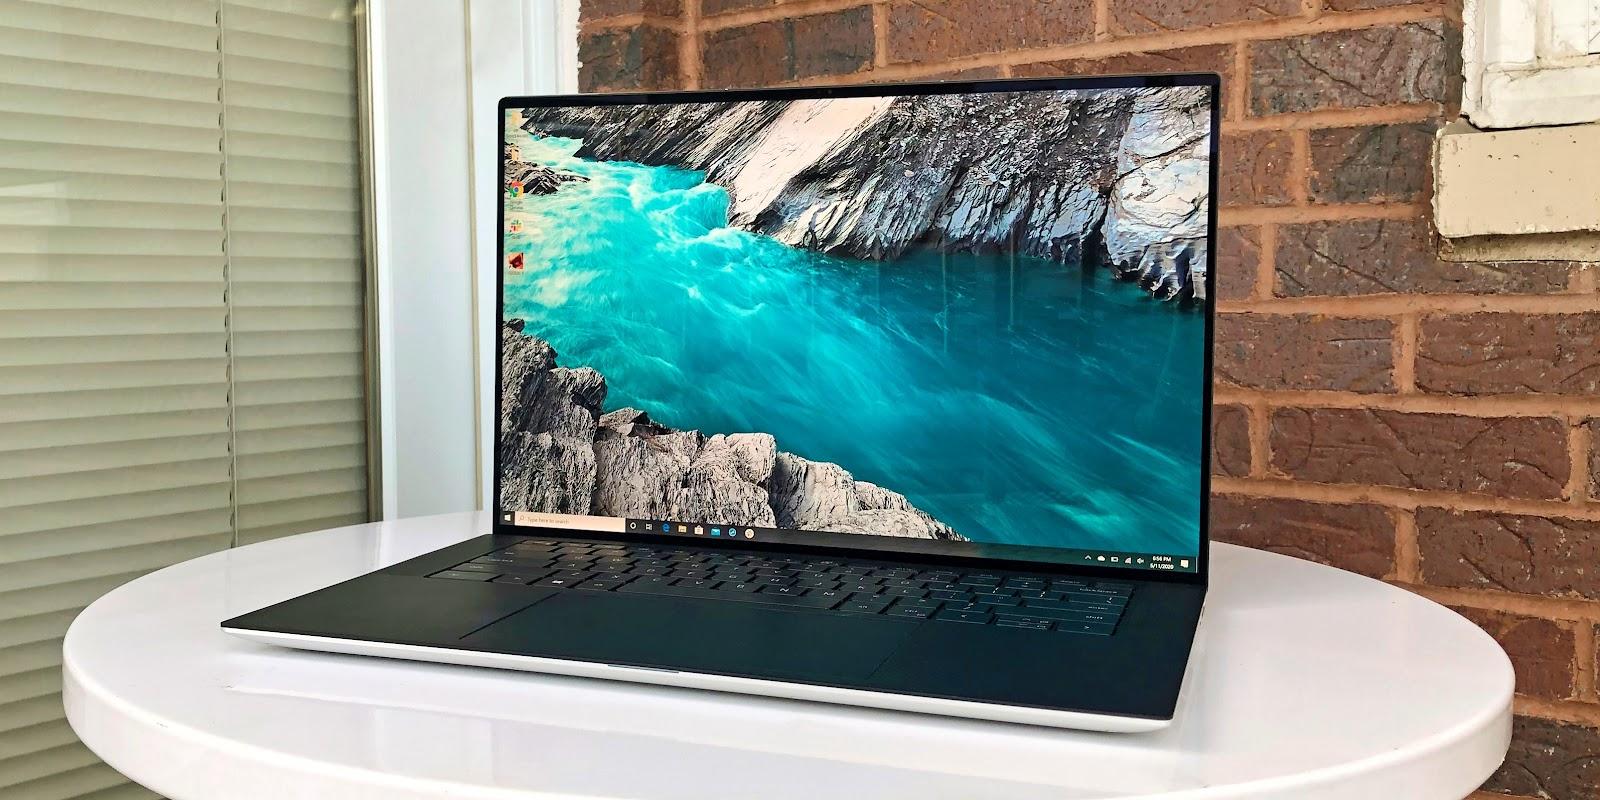
Dell XPS 15
Dell XPS 15 is another great Mac alternative. The 14-inch model is slightly thicker and more powerful than the MacBook Air, but it has the same price. The Acer XPS 15 also has an IPS display and a fingerprint reader. This is a very nice feature, but it can be expensive. But if you’re not an Apple fan, the Dell XPS is a great choice.
Acer XPS 15
Despite the high price tag, these two devices are still great options for the average laptop buyer. The Acer XPS 15 is an excellent option for a budget MacBook. It has a similar size, screen and pen support. And it’s priced much lower than the MacBook Pro. And unlike the MacBook, Asus XPS 15 is a great laptop. There are even cheaper versions of the XPS.
Acer Aspire
If you don’t have the money to spend on a Mac, you can still buy a quality model. Its integrated graphics are superior to the MacBook Pro, but its price is still a factor. The LG Gram 16 is also a good choice if you don’t need a super fast laptop. Its screen resolution is a lot higher than the MacBook.
HP XPS 15
HP XPS 15 is another popular 15-inch Macbook Pro alternative. This model is similar to the 13-inch model, but comes with a touchpad and 16GB of RAM. Its IPS screen is better than the OLED one, but both models are solid options for laptop users. There are several other choices you can consider. If you’re unsure, take some time to look around.
Samsung Galaxy Book 2 Pro
If you are looking for one of the cleanest-looking macbook pro alternatives, the Samsung Galaxy Book 2 Pro could be on the top of your list because of its perfect design that combines beauty and power. Be sure that if you buy this Samsung minimalist design laptop will not disappoint you.
Asus VivoBook Pro 14
If you are a fan of drawing attention, be sure that the sharp-looking OLED screen of this Asus VivoBook Pro is what you want. No other macbook pro alternatives have a 14-inch 2.8K (2880 x 1800) 120Hz OLED NanoEdge wide-view display like this.
LG Gram 15
If you are looking for the best lightweight option, here it is. As you might know, the lightest MacBook is 13-inch and 3 pounds, but this LG Gram 15 is here to surprise you with its 2.47 pounds weight and 15.6-inch 1080p display.
How much should You expect to spend on a macbook pro alternatives?
Now that you know about the best macbook pro alternatives, one of the most important options that you would consider is the price range of these products. I think searching about the price is so important in today’s competitive market. Also, you have to consider, would you get valuable services based on the money you pay? While each of the macbook pro alternatives has a different price based on their specific feature, generally the cost of an alternative will be almost half of a MacBook with the same features. The price of the best alternatives to macbook pro will start from around $799 and reach up to $4400.
Conclusion:
As you know MacBook Pro is among the best laptops that each user likes to have one. But not everyone can buy one of them because of its high price. As a result we wrote this text to introduce the best alternatives to macbook pro from other brands, which have the same features but lower prices. Read the above text and learn more about all details of these macbook pro alternatives.
The Apple Watch is undeniably one of the most advanced smartwatches on the market. However, there may come a time when you want to replace your current Apple Watch with a newer model. In such cases, unpairing your Apple Watch from your paired iPhone or iPad is the first step. In this guide, we will walk you through the process of How to unpair Apple Watch and provide step-by-step instructions for both scenarios: unpairing with an iPhone or iPad, and unpairing without an iPhone.
How to unpair apple watch with your iPhone or iPad?
Unpairing your Apple Watch from your iPhone or iPad is a straightforward process, but it may seem a bit complicated at first. Here’s a step-by-step guide to help you unpair your Apple Watch using your iPhone or iPad:
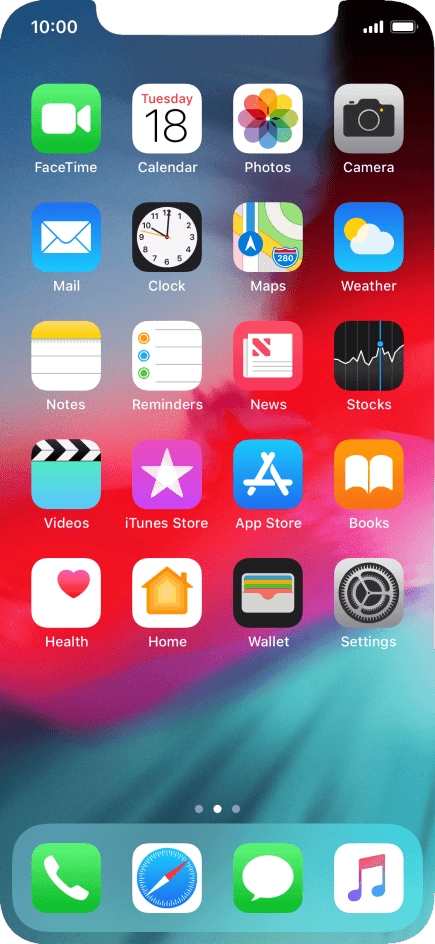
Open the Watch app on your iPhone or iPad.
Tap on “All Watches” at the top left corner of the screen and select your Apple Watch.
Tap the “i” (info) button next to the name of your Apple Watch.
Next, tap the “Unpair Apple Watch” button at the bottom of the screen.
Finally, select the “Unpair (Your Name) Apple Watch” option.
If you have a GPS + Cellular model, you will be asked to keep or remove your mobile plan. Choose the option that suits your needs.
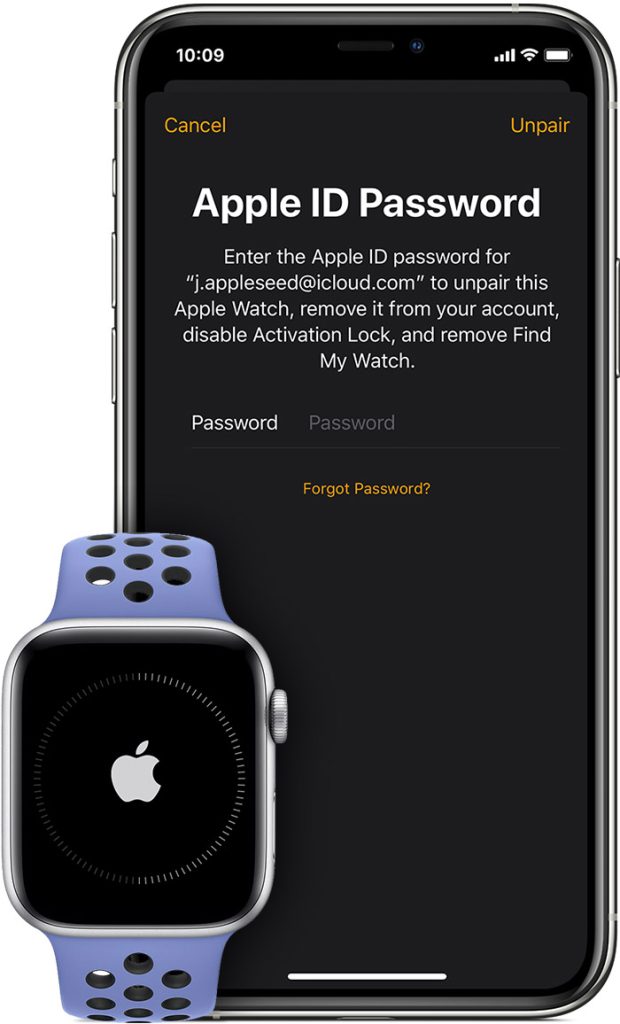
Disable the Activation Lock by entering your Apple ID password and tapping the Unpair button at the top right.
Once you’ve completed these steps, your Apple Watch will begin backing up the latest data on your iPhone before unpairing and deleting all active Bluetooth pairings. After the unpairing process is complete, your Apple Watch will be restored to its factory settings. If you are using a transit card in the Wallet app on your Apple Watch, it is recommended to remove the transit card before unpairing the watch.
But how do you unpair an apple watch, if you do not have access to your phone? Read the next paragraph, and find the answer.
How to unpair apple watch from a lost or stolen iPhone?
In situations where you don’t have access to your paired iPhone or have lost it, you can still unpair your Apple Watch directly from the watch itself. However, please note that this method will result in the loss of all data on the watch. Here’s how to unpair your Apple Watch without an iPhone or iPad:
Open the Settings app on your Apple Watch.
Navigate to General settings.
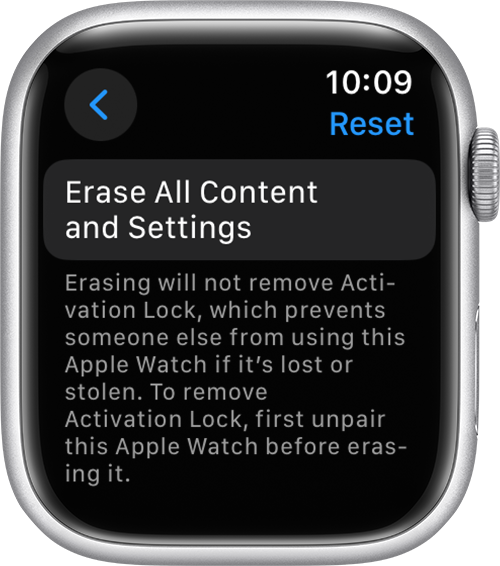
Scroll down and tap on the Reset option.
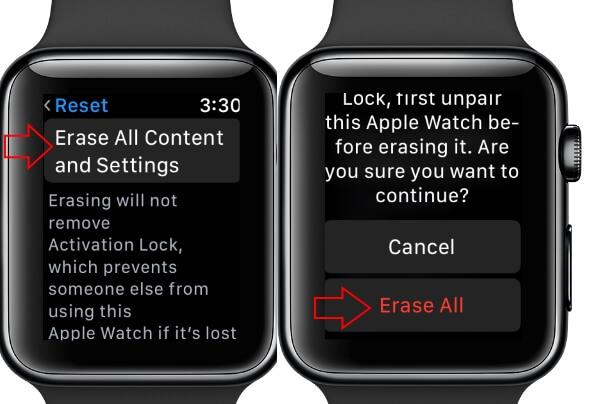
Tap the “Erase All Contents and Settings” button and enter the passcode if prompted.
If you have a GPS + Cellular model, you will be asked to keep or remove your plan. Tap the preferred option.
The Apple Watch will now begin the unpairing process and data restoration. Once the process is complete, follow these additional steps:
Visit iCloud.com and sign in with your Apple ID to disable the Activation Lock.
Click the Find My icon and enter your Apple ID password if prompted.
Select your Apple Watch from the drop-down menu under “All Devices.”
Click the “Erase Apple Watch” option.
Confirm the erase action in the pop-up menu.
Enter your Apple ID password again.
You will receive a notification with a verification code on your Apple Watch. Tap “Allow.”
Enter the received passcode on the iCloud website to successfully remove the Activation Lock from the Apple Watch.
How to unpair apple watch without old phone?
Whether you’ve just bought an Apple Watch or just reconnected your watch to your old phone, you want to be sure you can access all your data and settings without worrying about losing them. It’s also important to know that you can unpair your Apple Watch even when it’s not paired to your iPhone. Here’s how you can do it safely. First, make sure your iPhone and AppleWatch are both off.
Turn off your old phone. Then, open your Apple Watch app. Click on the My Watch tab. Tap the Apple Watch button. You can then unpair your Apple device from the iPhone. Alternatively, you can turn off Health sync on your new iPhone and restart it. After you’ve finished setting up your new iPhone, you can restore your backup and remove any information from your old gadget.
another method is to make sure your iPhone is up-to-date. You should then backup your old phone and then follow the pairing process. Next, you must turn on Health sync in the Settings app. Once your iPhone is up to date, you’ll need to erase the data on your Apple Watch and install the latest software. Lastly, you’ll need to reset your Apple Watch.
How to Unpair Apple Watch Without Your Watch?
How do you unpair an apple watch if you have lost your Apple Watch? or are looking for instructions on how to pair it with another iPhone, follow the steps.
First, erase the watch from your iPhone.
Once you’ve done that, the final step is to enter your Apple ID password.
After all, you don’t want anyone to use your Apple ID to pair your device.
Ideally, you want to unpair your Apple Watch from your iPhone using the ‘Unpair with iPhone’ method. When you unpair with an iPhone, you’ll get the option to delete all the data from your Apple Watch, including the find my device, activation lock, and account information. However, this method won’t work if you’ve paired your watch to your iPhone while out of range. If you’re having trouble removing the activation lock, follow the directions below.
Once the device has been unpaired from your iPhone, you’ll need to unpair it from your iPhone. Doing so will wipe the data from your Apple Watch and reset it to factory settings. Make sure you don’t connect your AppleWatch to any other device before you unpair it. Then, simply pair your iPhone and your new AppleWatch again. If you do lose your iPhone, the process is much easier.
Does unpairing apple watch erase it and delete all my data?
Now that you know how to unpair apple watch from phone, another question that might happen is that what will happen to my data, will all of it be erased? Here, I have to say that unpairing is equal to erasing all data from your Apple Watch. But the good news is that it’s not forever. When you unpair your Apple Watch, a backup of all that data is automatically created, which you can use when you pair a new Apple Watch or that previous one again.
In Closing
Unpairing your Apple Watch is a necessary step when upgrading to a new model or in situations where you no longer require the watch to be paired with your iPhone or iPad. By following the step-by-step instructions provided in this guide, you can successfully unpair your Apple Watch, whether you have access to your paired iPhone or not. Remember to back up your data and consider your options before proceeding with the unpairing process. Enjoy your new Apple Watch or explore other smartwatch options with confidence, knowing that you can easily unpair and set up your devices as needed.
FAQ
How Long Does It Take to Unpair an Apple Watch?
The time it takes to unpair an Apple Watch can vary depending on the size of the backup. Generally, it takes between two to ten minutes.
Does Unpairing an Apple Watch Erase All Data?
Yes, unpairing an Apple Watch using your iPhone or iPad will erase all data on the watch. However, the data will be backed up on your iPhone or iPad.
How to pair an apple watch again?
Until now, you have read about how to unpair apple watch from phone, but what should you do to pair your apple watch again? If you are looking for the answer to this question, just follow the below steps:
Press and hold the side button until the sliders appear.
Drag the power off slider to the right.
Keep your plan if you want to pair your Apple Watch and iPhone again.
But if you get your Apple Watch password from www.iphonehacks.com, Swipe the power off slider to the right, and stay for your watch to go dark.
Then press and hold the side button until you see the Apple logo.
Press and hold the side button until you see the power off slider.
Have you ever faced the situation that your iPhone is not ringing on incoming calls? In this case, you might lose any important conversations, possible business matters, or so on. If you have lost out on this necessary benefit of your iPhone, and your warranty period is over, do not worry. Most of the time it is not a big problem and possible to tackle.
Here, you can read why your iphone not ringing, and how to solve this issue.
Why is my iPhone not ringing
First of all, we have to understand why your iphone not ringing when called. Here are some possible causes:
Your speaker might be broken.
Sometimes, you turn on the mute mode and forget about it.
If you turn on the Do Not Disturb (DND) on your phone, you can not hear your phone ring.
You might have blocked a special phone number.
Some people silence all unknown callers.
Check to see if there is any problem with your ringtone.
You forget that you are stuck in headphone mode, and your phone will not ring.
Continue reading to learn about easy ways to solve your phone ring problem.
How to fix iPhone not ringing?
As you read in the previous paragraph, your iPhone might stop ringing because of some simple reasons. Here, I will show you some simple ways to solve your iphone not ringing issue.
Restart your iPhone.
Like always, the first action is to restart your device because it can simply fix many glitches.
Update your iPhone
If restarting does not work, it is time to update your iPhone to the latest version of the iOS operating system.
Clean the iPhone speaker.
The speaker has an emergency role in playing music, watching movies, or the ringer from incoming calls of your device. If you can not hear the ring of incoming calls, it is time to clear the dirty speakers. Sometimes, you might clean the speaker and turn the volume up but still can not hear any sound, the iPhone speakers may be broken. This case is a more complicated one, so ask for help from an expert.
Turn off mute.
Check if you have silenced your iPhone and overlooked turning the ringer back on.
Turn off Do Not Disturb.
While DND is a great option when you want to silence sounds from calls, texts, and notifications and relax, you might forget to turn it off and miss an important call. So make sure to turn off this useful feature. Pay attention that if you had scheduled DND, you need to change the settings.
Unblock a blocked number.
Sometimes, people call you, but you do not receive any sign of the call on your iPhone. In this case, you might have blocked that special number. To unblock a number on your iPhone, do like this:
There is a red circle beside the blocked number, which you can choose to Unblock.
Disable Silence Unknown Callers.
New iPhones have a feature to silence all calls from unknown numbers. If this feature is on, you will not hear the phone ring. Instead, the iPhone sends calls right to voicemail. Here is how to disable this feature: Go to Settings > Phone, and turn off the Silence Unknown Callers key.
Modify your custom ringtone.
If none of the above solutions work, it is time to check your ringtone. To check the default ringtone, do these actions:
Go to Settings > Sounds & Haptics > Ringtone, and choose a new ringtone.
Check if your phone is stuck in Headphone mode.
In this case, your phone is ringing but sending the audio to another place. You can solve it simply by detaching the headphone or disconnecting the Bluetooth.
Conclusion:
Many people might worry why my iPhone is not ringing, while it is not a complicated problem in most cases. In the above text, you can read about the possible causes of this issue. Also, we have told you how to solve it in some simple action.
“This site can’t be reached” error occurs because the website is unable to resolve DNS (Domain Name System), which is a network address that translates a website’s name into its Internet address. This error can occur on any device, including desktops, laptops, and mobile phones. To get rid of the error, you can try to clear your browser’s cache and history. You can also change your browser’s maximum TLS version, which may help.
If the This Site Can’t Be Reached error keeps popping up on your screen, you can try flushing your computer’s DNS cache. This can help update your IP address cache, which prevents your browser from recognizing the website’s URL. To flush your DNS cache, run the command below on the computer. If the error still persists, try flushing the cache. Then, your DNS should be pointing to the correct DNS server address. Similar issues arise when you are using fast mobile proxies. However, these issues can be solved.
Sometimes, your computer’s firewall or antivirus software may be preventing access to your website. Make sure to remove the program before trying to access the website. If this doesn’t work, try clearing your antivirus or firewall settings. If you’ve tried these methods and still experience the error, you may have a problem with your DNS. You should check your router and see if this is the cause.
A local DNS cache contains information about a website’s IP address, and invalid entries can lead to this error. This will flush the information that is stored locally, and your computer should start functioning normally again.
When your router’s DNS cache has been cleared, the website should be accessible again. The DNS server is responsible for translating domain names into IP addresses. If it isn’t, then the error will occur.
Why does the “This Site Can’t Be Reached” Error occur?
There are several causes for the ‘This Site Can’t Be Reached Error. Most of the time, the problem is with the DNS servers, which are responsible for converting the website name into an internet address. If you can’t access the website, try disabling any firewalls or updates. You might also want to check your computer’s settings or try changing the DNS servers.
here’s everything you need to know about this site cant be reached the connection was reset error.
This site can’t be reached error message appears when your Internet connection has been reset. In most cases, it occurs when your DNS settings are not configured correctly. You can check your network settings by visiting your computer’s network configuration settings. Sometimes, your network has been hampered by third-party applications, such as VPN, which can alter your settings. Another reason why you can’t access the website may be related to your firewall or router settings. If you are experiencing this error message, you should check your internet and VPN setup.
Changing your DNS servers can solve your error. This process will increase your internet connection speed by a few percent. To change your DNS server, you need to know the current DNS servers that are set on your computer. For example, you can use Google’s DNS or OpenDNS to fix the problem. If you’re using an older DNS server, you need to restart your computer in order for the new one to take effect.
If you have a working internet connection, you can try changing your DNS server to Google or OpenDNS. Similarly, you can also reset your TCP/IP address by typing ‘cmd’ into the search box. Then, you should type netsh int ip set dns, or netsh winsock reset.
Often, broken links can prevent you from reaching your desired page. Alternatively, a faulty connection could be the culprit. Your browser, firewall, or DNS servers can cause a faulty connection, which will lead to a “This Site Can’t Be Reached” error. When your computer encounters this error, it’s wise to clear your cache and history.
Invalid DNS cache is another common reason for the ‘this site can’t be reached’ error. Flushing your DNS cache can help resolve the problem. If the error still persists, you can try resetting your DNS server. This may help you avoid the ‘This Site Can’t be Reached’ error, but the ‘network changed’ error can be caused by many different reasons.
Proxy connection issues are the most common reason for the error. If your router doesn’t support HTTPS, a proxy can cause problems. If this happens, try disabling your proxy in Windows 10. Restarting your router can also fix the problem. Reinstalling your browser can also resolve the error. If your DNS cache is outdated, your computer will be unable to resolve the website.
If you’ve tried restarting your computer, it won’t help. The DNS server can cause the error. It may be blocked by your company’s content policy, or it may be blocked by a firewall. Your IT department can check this for you. If the problem continues, you should contact the website’s hosting company. If the problem persists, try resetting your DNS server and trying again.this site can’t be reached the connection was reset
How to fix this site can’t be reached Error easily?
if you want to know how to fix this site can’t be reached Error easily, keep on reading.
Sometimes you’re unable to view a website or a page on the internet. Whether the problem is a server-side error or a website fault, you can fix this error easily by trying to access the website through another browser. This way, you can get your site up and running again in no time. Listed below are some methods for resolving the site can’t be reached error.
First, try to change your DNS. This could be the cause of this error. restart your system. You should be able to view the web page again. If this method does not work, try uninstalling and reinstalling Google Chrome. This will remove all files from the computer and solve the problem. You should also disable your antivirus and reinstall network drivers.
If you have a working internet connection, you should try to restart your modem or router. This will take just a minute and will resolve the problem. In addition, most internet service providers suggest that you disconnect the router’s power cable, wait a minute, and then reconnect it. If this doesn’t work, try clearing your browser cache and trying to access the webpage again. If the issue persists, you may need to update your network adapter drivers.
Some sites are only available in certain regions or countries, so you’ll have to find a way to use a different DNS server. You can use the free unlimited browsing VPN that comes with the Opera browser. This method allows you to check the IP address and DNS cache of a website. To do this, simply press the windows key and enter “cmd” as an administrator. When the Command Prompt window appears, run it as a administrator. Then hit the Enter key to confirm the action. Then press ‘y’. You should see a ‘flushed DNS resolver cache’ message. If this method does not work, you can restart the computer and check again.
if the error persists, you can try clearing the cookies and browsing history. By doing this, you will be able to browse the internet with ease. This will solve the “This site can’t be reached” error in Chrome.
If you’re having trouble managing calls on your iPhone, you can try some of these tips. One of the easiest ways to do so is by whitelisting your contacts in the ‘People’ section of the Settings app. After you enable this feature, you will no longer receive notifications from unknown numbers when someone calls you. This is a useful feature that lets you avoid annoying phone calls, and it’s available in the ‘Contacts’ section of your Settings app.
Another helpful feature is the Focus tool, which allows you to set specific focus profiles. This tool is great for setting your iPhone up for specific purposes. You can easily filter incoming notifications, and set your Home Screen pages to be hidden from notifications. You can also turn off Wi-Fi calling to avoid being disturbed by calls. The focus mode allows you to focus on what’s important to you. Once you’ve finished setting up your Focus profile, you’ll be able to switch back to your regular mode whenever you’re ready to take a call again.
To enable the Focus tool, open Settings > Focus and tap ‘Allowed notifications’. In the ‘People’ section, tap ‘Add’ to add a contact or group to the exception list. Toggle the toggle next to the contact or group and select ‘Allow repeated calls’. This will allow you to silence unwanted notifications. When this option is toggled, the person can send you a message stating that they are not available and won’t be disturbed.
What is call forwarding iphone?
don’t you know what is call forwarding iphone? call forwarding feature allows you to forward calls from one phone to another. When you receive a call from someone you do not recognize, you can choose to forward it to a new number. This feature will allow you to continue receiving calls from the number you are calling while not on the phone. There is a small cost associated with using this service. Once you’ve set it up, you can turn it off at any time.
Once you’ve done that, you’ll be able to go to the Settings app and set up call forwarding. Depending on your carrier, this feature can vary. GSM users can simply enter the destination number in the Settings app, while CDMA users will need to enter a carrier code. If you’re using an unlisted number, you can use your phone’s dial pad to enter the destination number.
Once you’ve set up the service, you’ll need to choose the carrier you want to use. If you’re using a CDMA-based carrier, you’ll need to enter a carrier code. If you’re on a GSM-based carrier, you can use the same carrier code to set up call forwarding. If you’re not sure what carrier you have, you can check your phone’s manual to determine which carrier offers the best service.
How to forward calls on iphone?
sometimes novice ios users don’t know how to forward calls on iphone. When you have reception or signal issues on your iPhone, you can forward your calls to a family member or friend’s cell phone. Using iphone call forwarding feature is also convenient if you want to call someone in another city or country without having to deal with signal or reception issues. In order to set up call forwarding, open your iPhone’s phone app, select the keypad, and type in the number you want to forward. Once you’ve entered the number, press “dial” and wait for confirmation.
If you are on your iPhone, you can easily turn on call forwarding, which is a convenient feature, you can also send voice messages on iphone. All you have to do is to enter a new number and save it, and your iPhone will forward your calls to that number. When you are done, you can turn call-forwarding off and resume taking calls. Alternatively, you can enable and disable the feature, if you prefer. Regardless, enabling call-forwarding is easy and intuitive.
Before you can use the Call-Forwarding feature on your iPhone, you must be on the same network as the other person. You must have a dual SIM card to set up call forwarding. If you have a GSM phone, you have two options: one for the primary phone and another for the second. In order to enable call-forwarding, you must first make sure the number is active. Then, you can go to the Settings tab and choose the carrier codes that are required.
How turn off call forwarding iPhone?
Do you know how turn off call forwarding iPhone?
If you want to stop receiving phone calls on your iPhone, you can enable call forwarding. You will then have to enter a destination number to receive the calls. It is important to choose the number carefully, because it could be used for several reasons. For example, you can forward calls to your office phone or home phone. You can also use this feature to block prank calls. If you haven’t set it up yet, you should check the instructions provided by your carrier.
First, you need to activate the feature. In order to activate it, you must go to Settings > General. Tap on Call Forwarding. You can then enter the number of the person you want to block, such as your partner or a family member. If you don’t want to be bothered by the phone’s reception, you can turn off the call forwarding function by following the steps outlined above. You should see a small “forwarding” icon on your status bar.
To stop call forwarding, you need to make sure your iPhone is in range of the cellular network. To disable call forwarding, tap the ‘call forwarding’ icon in the Control Center Status Bar. Then, tap the switch that appears in the forwarding box. This will disable the feature for the time being. If you are going to use it for a longer period, you can always reactivate it when you need it.
What is call waiting iPhone?
If you are wondering, “what is call waiting iPhone?” you’re not alone. Most of us have at least one friend or loved one who calls us constantly, and this feature helps us answer all of them. What is the best way to turn this feature off? You can do this by tapping the button that says “Call Waiting” on the top right hand corner of the screen. If you want to get the most out of your iPhone, it’s best to enable this feature.
How to enable iPhone call waiting is easy. All you need to do is open the Phone app and go to settings. Click on Call Waiting and tap it. If it does not appear, you should try removing your SIM card or updating your carrier settings. If these do not work, you can escalate the issue to your carrier. You can also simulate this service by pressing and holding the “wait” button while your iPhone is in use.
Based on recent research, the worldwide number of Google users is nearly four billion. Therefore, Google tries to upgrade its facilities in order to make a better experience for its utilizers day by day. Google has recently added the dark mode (or dark theme) option for browsing the web more comfortably. This choice might come handy to those who would rather work at night, or generally in a low light.
By choosing this option, the interface, and some elements like setting, homepage, and toolbar turn into a dark color to reduce the eyestrain. This also increases the battery life of your device. The attractive outlook also is undeniable, since it changes the whole screen color and feels like something new. In this article we are going to learn how we can enable “the google dark mode” in chrome or other systems. It is noteworthy that although this feature seems so helpful, it has many different advantages and disadvantages at the same time. So let’s start.
How to enable or disable dark mode in Chrome
(note: this instruction is for windows 10)
Google has started rolling out dark mode for people who search on desktop. You can use that to get the new dark mode on your PC for Chrome browser (this is available also for Mozilla Firefox and Microsoft Edge, here we check this for Chrome browser). Then you should follow these instructions:
Open chrome.
Search for: chrome://flags.
Search ‘dark mode’ on the search flags section.
From ‘force dark mode for web contents’ change the default form into ‘Enabled’.
Then enter the Relaunch for saving the changes.
Therefore, by following these steps, your screen and the whole search are in the dark mode. This is a handy addition.
Note: if you want to disable the dark mode on PC, simply change the ‘Enabled’ into ‘Disabled’.
How to enable dark mode on your Android phone
Also if you want the google dark mode on your android phone, follow these steps:
2. Type chrome://flags in the address bar and click on it.
3. Just search ‘Force Dark Mode’ in the search bar.
4. Then you will see ‘force dark mode for web contents’, tap on ‘Default’.
5. Pick ‘Enabled’.
6. At the bottom screen, tap on ‘Relaunch’, and Google Chrome will be restarted.
Now the Google homepage is black, and if you search for anything, all the websites have a black theme.
(Note: for disabling dark theme, at the fifth step, just change the ‘Enabled’ into ‘Disabled’ and simply relaunch it.)
Advantages of dark mode
Although beside this, we must pay attention to the pros and cons of this new option which are considerable as well.
Of course everyone had the experience of sitting in a dark room while working on the internet and had a bad feeling of the harsh light of the screen harming their eyes, making them dry and painful. Most of us use our mobile devices and laptops all day and night. This is the biggest change in the world as a result of dealing with technology every day.
According to some research, people are spending more than 11 hours of their day and night spending time on computers for work or pleasure. Consequently, it is far better to turn on google dark mode since it’s really safer for your own health and well-being. (of course there are some significant points that you should consider while using this option. We will cover them in the rest of the article).
Another advantage of dark mode is that it prolongs the battery life of your device. It has been confirmed by google that using dark mode on OLED screens is so useful for battery life. For example, at 50% brightness while using an application such as YouTube, 15% of the battery life can be saved compared to a bright and light background. And at 100% brightness of the background, there is 60% less wasting of the energy while using the google dark mode.
Last, but not least, the visual beauty is actually considerable. Whereas we have always been dealing with white and bright screens, google dark mode seems something different that feels mysterious and new.
As a conclusion:
1. It reduces the eyestrain.
2. Saves the battery life.
3. It seems attractive.
Disadvantages of dark mode
There seems we have covered the main advantages of google dark mode. But for sure we must pay attention to the disadvantages and ‘dark’ aspects of that, too. Google dark mode actually has a conflict with human nature.
Human nature has developed itself through years of evolution and got used to read dark letters on white or bright backgrounds. In other words, this choice isn’t always applicable as it can be so harmful for eyes and causes digital eye strain and eye dryness. For example, while using a device in a bright and well-lit room, or in the daylight, the screen and texts can’t easily be read. For addressing this issue, the automatic switch of bright to dark and vice versa is a must-have feature. Users don’t necessarily need to keep switching that all the time.
Needless to say, Studies have shown that Our eyes are roughly 26% worse at reading when it comes to google dark mode. Therefore, in order to read long online essays and texts, it is more challenging to read in google dark mode.
As a conclusion:
1. It can cause digital eye strain and eye dryness when it’s used during daylight or in a well-lit room.
2. The eye concentration might be lesser when reading in dark mode since it’s more challenging.
All in all
Generally, most people have loved google dark mode because it saves on battery life and it’s claimed by many to be better for our eyes. (But still there are different opinions in this case). Battery life is somewhat obvious for everybody: if your screens are putting out less light, that means you could turn off a huge chunk of pixels and that means it can save energy. In addition, the visual beauty and mysterious outlook is undeniable. As people like being different or make a change in their google web-page this could be interesting.
Of course, we can’t use that all the time, since nothing could be totally useful all the time. Obviously while using google dark mode during daylight or in a well-lit room, you should resist this feature in order to help your eyes easily have their focus on the screen. We all just need some time to learn how to use google dark mode better.
Something worthwhile which google has done is for users who utilize google for note-taking matters, there is an option for turning the dark theme into a gray color that has shades of dark gray instead of black to resist the harm to the eyes. Finally, google dark mode like everything else is a tool, and not every tool is made for every circumstance. For sure it depends upon each person’s particular habits and experiences.
One of the best pieces of Apple goods is the capacity to AirDrop data wirelessly over your phones— and even the phones of other Apple users. AirDrop causes you to save much time and is very helpful when you transfer big data like videos and music folders.
You can simply AirDrop folders from Mac to iPhone if you configure your system perfectly on your projects. Here is a comprehensive model to work with AirDrop, along with some details you might need during this process.
How to Use AirDrop on a Mac
On your Mac:
Start with Finder.
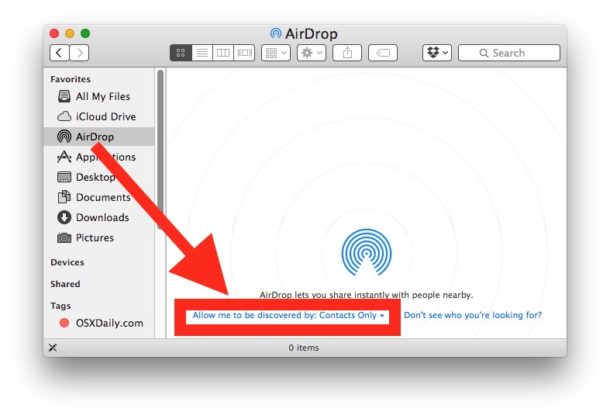
Tick AirDrop from the left-hand side. Then you will see the AirDrop window.
At the back of your cover, there is an “Allow me to be discovered by,” option and a dropdown menu that you can take “Contacts Only or Everyone”.
Check that Bluetooth and Wi-Fi are all switched on. Also, you have to be within 30 feet of your iPhone to start conveying files.
In the AirDrop list, take “Contacts Only” to just send files to users in your contacts list or “Everyone” to send folders to anybody near you that have an Apple device.
Check that you turned on the Bluetooth and Wi-Fi, and you should be within 30 feet of your Mac to start sending files.
How to Share Content with AirDrop
Start with the file you need to transfer, then tick the Share switch in the app pane. Or Control-click the folder in the Finder, then take Share from the shortcut list.
Take AirDrop from the sharing choices entered.
Take a user from the AirDrop sheet:
Choose AirDrop in the side list of a Finder window. Or take Go > AirDrop from the list bar.
The AirDrop window displays near AirDrop users. Choose one or more folders, photos, or other files and drag them to the receiver displayed in the window.
AirDrop from Mac to iPhone
Now, let’s go to our area for transferring data from your Mac to your iPhone. The method is very simple.
How to get a photo or video from Mac’s Finder to your Camera Roll?
First, check the Wi-Fi and Bluetooth of both devices to be on.
Drive to the Finder on your Mac and go through the folder that you store your photos and videos.
Choose any photo or video that you need to highlight. If you need to transfer more than one photo or video working with AirDrop, press down the Command key while ticking each photo or video to mention them.
Tick the shared key at the head of the cover and point AirDrop.
Choose the title of the device you need for AirDrop too.
Tick Done and finish.
Now, you can open your photo or video in the Photos app on your iPhone.
How to AirDrop a photo from macOS Photos to your iPhone
Go to the Photos file on your Mac.
Choose the photo or video that you desire to send. If you need to transfer more than one file, press down the Command switch while ticking the photos or videos.
Tick the share symbol at the head of the cover and select AirDrop.
Pick the phone you need to transfer your file(s) to, and then tap Done.
Now, you will find your photo or video automatically on your iPhone.
Why is AirDrop not working on Mac?
Is AirDrop stopping on your Mac? Do not worry, here I show you some likely causes and resolutions. You can decide to use any of these techniques described.
Your airplane mode is on.
Airplane mode impairs cellular communication within your phone. You have to turn off the Airplane mode and try your Airdrop again.
You are working with a Personal Hotspot for your Mac’s Wi-Fi
If you use your phone’s Hotspot for your Mac, you can not use AirDrop. Your Hotspot and AirDrop need Wi-Fi for themselves. You can turn it off in iOS by driving to Settings > Personal Hotspot and turn it off.
There is a problem with your Bluetooth connection.
Strange obstacles arise sometimes. If you did not find any other solution, try to turn off Bluetooth and again try it on your Mac.
Conclusion:
Here, you will learn how to transfer files from Mac to iPhones by AirDrop. If you know how to send files to this system, you will see how you ever endured without AirDrop.