
Do you use an Apple AirTag? If so, you might be thinking about how to get a new battery when the old one dies. While Apple says that an AirTag’s battery should last about a year, it’s always smart to be safe than sorry. Today, we will show you how to replace AirTag battery in a quick way. This guide is simple to follow, no matter how tech-savvy you are or how new you are to it.
Why AirTag Batteries Need to be Changed?
Before we talk about how to replace the battery in AirTag, let’s talk about why it’s important to do so. The charge in your AirTag will run out on its own over time. You may notice that Bluetooth and UWB signal ranges get shorter as the battery level drops, and the Find My app’s precision finding feature may stop giving you correct distance information.
You may also get messages and alerts through the Find My app when your battery is low. It is suggested that you change the battery in your AirTag once a year to get the best performance and avoid any problems.
How to Replace AirTag Battery
If you want to safely change the battery in your AirTag, follow these steps:
Materials Needed
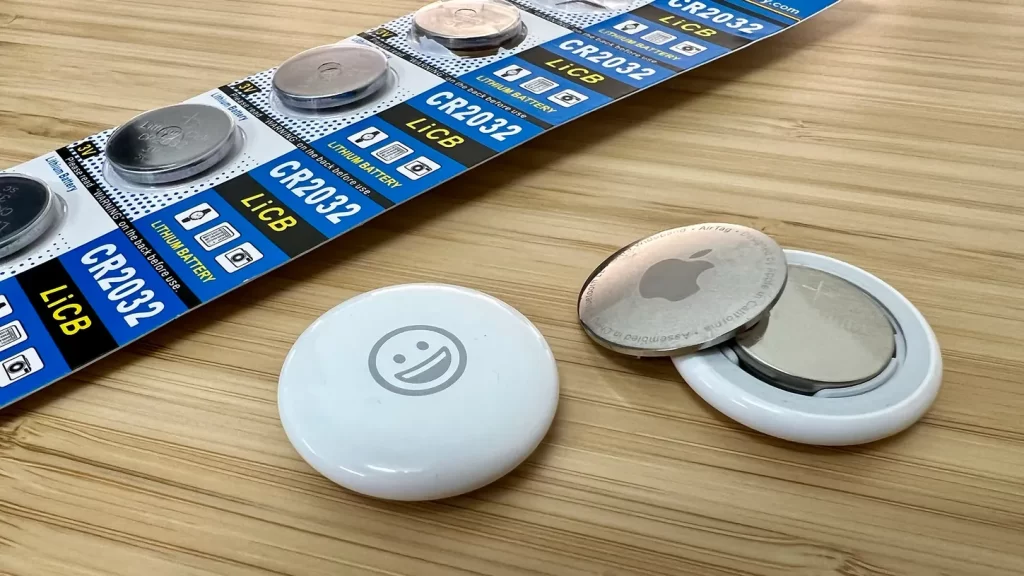
To replace the battery in your AirTag, you’ll need a few materials. Gather the following items before you begin:
- A new CR2032 coin cell battery: This standard 3V lithium battery is commonly used in watches, remotes, and other small electronic devices. Make sure that you purchase an authentic battery from a reputable retailer.
- A non-conductive pry tool: You’ll need a thin plastic pry bar or portable tool to safely open the AirTag casing. Avoid using metal tools, as they can damage the components.
- A soft lint-free cloth: This will be used to clean the AirTag and remove any fingerprints or smudges on the surface.
- Disposable gloves (optional): If you prefer, you can wear disposable gloves when handling used batteries to avoid skin exposure to battery acid.
Prepare the AirTag
Once you have these materials ready, we can proceed with the battery replacement process but before you begin the battery replacement process, remove the AirTag from any accessories it’s attached to, such as a keychain or luggage tag. This will give you direct access to the device.
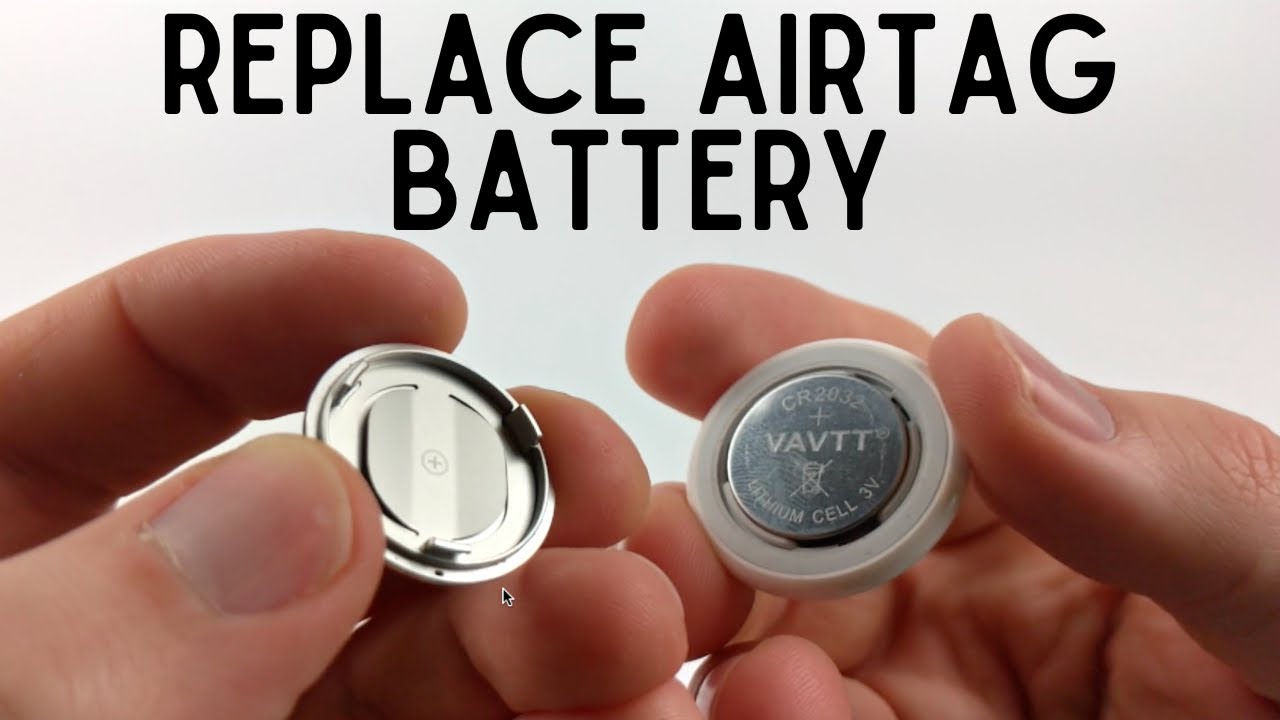
Open the AirTag Casing
- Locate the thin seam running along the edge of the AirTag casing. This seam is where you’ll pry open the casing.
- Take your non-conductive pry tool and gently insert it into the seam gap. Slowly twist the tool to widen the gap.
Continue prying all the way around the perimeter of the AirTag until the plastic casing pops open. Be cautious not to use excessive force or bend the AirTag excessively.

Remove the Old Battery
Once the AirTag casing is open, you’ll see the old CR2032 battery inside. Gently lift the battery out of the holder, taking care not to damage any internal components. There are two options you can try if you come across a CR2032 battery that is treated in bitterant and might not work with AirTags:
- Option 1: Look for a brand of battery known to be compatible with AirTags. Check the packaging for compatibility information.
- Option 2: If you already have a bitterant-coated battery, you can slightly scratch off the coating using a sandpaper sheet. Ensure that the battery contacts are not damaged during this process.
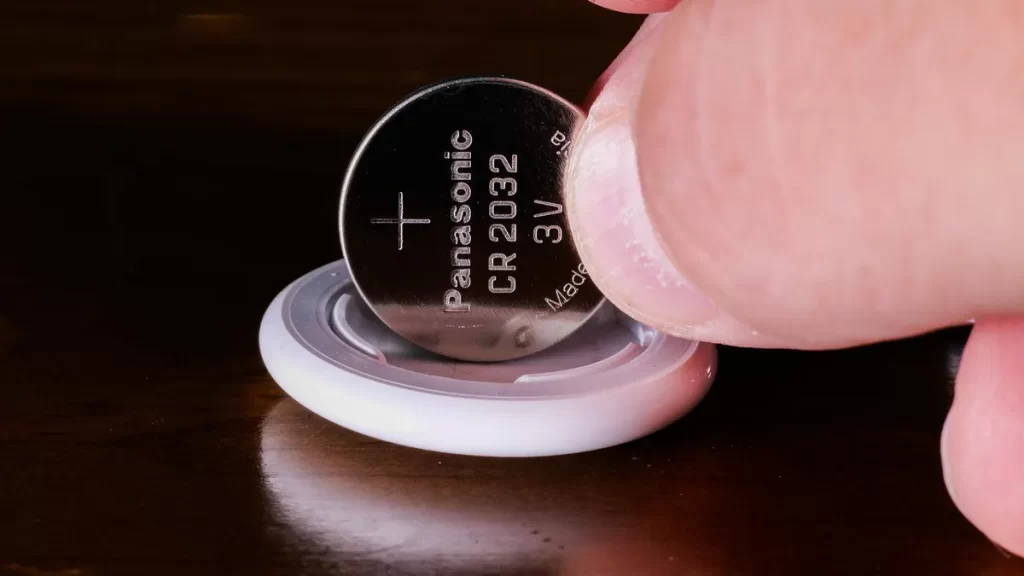
Insert the New Battery
- Check that the new battery you have is a CR2032 and that the positive side (marked “+”) is facing up.
- Using disposable gloves (optional), carefully place the new battery into the holder, ensuring that it is firmly seated.
- Double-check that the battery is properly aligned and securely in place. You should hear a click or chirping sound, indicating that the battery is recognized.
Reseal the AirTag
- Align the front and back pieces of the AirTag casing.
- Firmly press the casing shut with your hands, ensuring that it clicks back into place. Take care not to apply excessive force or damage the plastic casing.
- Once the AirTag is resealed, reattach it to its accessory or item.
Test and Verify
- Open the Find My app on your Apple device and check that the AirTag appears connected with a good battery level.
- Navigate to the “Items” tab in the Find My app, select your AirTag, and look at the battery level indicator. If it shows a healthy battery level, the replacement was successful.
Also Read: How to Reset Apple TV Remote? (+Fix Apple TV Remote Not working)
Final Words
You may easily and quickly replace the battery in your AirTag so that your item tag continues to function properly. You can save yourself the trouble of dealing with a dead battery by keeping an eye on the level and replacing it annually. With the correct equipment, care, and following our guide, you can simply learn how to change AirTag battery and continue to track your assets. Do the right thing when you throw away old batteries and keep them out of children’s reach.