How to fix “discord javascript error”?

Discord is one of the unique environments where people can make groups and share their ideas and experiences. Like all human-made applications, Discord also can be associated with several bugs and errors, which can put its users into trouble.

In this complete post, we will talk about “javascript error Discord,” what causes this error to happen, and how we can fix it quickly.

Do you want to know how to make a discord poll? read here.

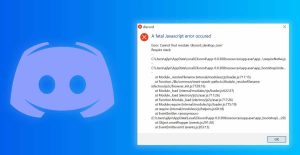
What is the “discord javascript error”?

Many people have encountered this Discord fatal javascript error while they were trying to install Discord on their desktop devices. However, we don’t actually know the root reason for this phenomenon until now.

There are some theories about a javascript error that occurred in the primary process discord; for example, Discord or its settings may have gone corrupt because of bad installation, or Discord runs with administrator permissions, and you should remove this option to let the application work properly.

What Causes the “discord javascript error”?

As mentioned earlier, there is no well-known reason for “fatal javascript error Discord.” But we can summarize all possible answers into these four reasons here;

  • Discord corruption because of lousy installation or damaged downloaded package.
  • Ceased Quality Windows Audio Video Experience service.
  • Discord stores temporary data on your PC or laptop to work efficiently. And damage to these files can break the function of the application on your device.
  • Discord is running with administrator settings.

How to fix the Discord JavaScript Error?


After we know what makes Discord a fatal javascript error, now let’s see how we can get rid of it with no mistakes. We have collected available solutions into seven categories down here:

Remove the Discord process from your Task Manager

The easiest way to solve the Discord javascript error is to remove the Discord process from Task Manager. This method is straightforward, so we have put it at the beginning.

To remove Discord from Task Manager, right-click on the “Taskbar” tab, choose “Task Manager,” click on the “process” tab, select “Discord,” and finally, click on the “End task” button.

Run Discord without Administrator permissions

Many users have reported Discord never functions as an administrator, though it is the preferred option on the system. If you want to change settings to get rid of the administrator option, follow these steps;

  • Start with right-clicking on the Discord app and selecting “properties.”
  • In the properties window, go to the Shortcut tab and then click on the “Advanced” option.
  • As a result, a “Run as administrator” option appears on the screen. Make sure you uncheck it and click on the “Ok” button.
  • Repeat the above step in the Compatibility tab as well. Never forget to click on the “Ok” button to save the changes.
  • You have successfully changed the settings on your Discord.

Delete your Discord files from “%appdata%” and “%localappdata%” on the device

If you want to reset Discord settings, you need to delete the Discord files and folders in AppData and LocalAppData. To solve the “fatal Discord javascript error” issue on your device, follow these steps;

  • First, open the Run Dialog box by pressing “Windows key + R”
  • Now, type in “%appdata%” and click on the “OK” button. Your AppData folder will be opened for you.
  • Now, you need to delete the Discord folder in the AppData folder. As mentioned earlier, you need to end the task in Task Manager first to do this process. If you have already turned off the Discord process in Task Manager, it would be easy for you to delete the app.
  • Click on the search button next to the Start button and type “Run” or press “windows key + R.”
  • As the Run dialog box appears on the screen, you have to write “%localappdata%” and press “Enter.”
  • A folder will pop up on your screen. Here, you need to navigate to the Discord folder, right-click on it and move on to delete the folder.
  • As a result, no folder must remain for being deleted. Finally, restart your device and see whether you still know the Discord JavaScript error.

Change some of the settings options in the Windows Audio Video Experience service

The Quality Windows Audio Video Experience service is one of the essential services for Discord. If a simple bug appears in this program, the whole Discord system will be ceased functioning.

To change some settings on the Quality Windows Audio Video Experience service, follow these steps;

  • First, press the “Windows + R key” to open the run dialog box.
  • Next, type in “services.MSC.” and click on the “Enter” key. As a result, you will have the Services toolbox opened up the very next second.
  • Navigate to “Quality Windows Audio Video Experience” and open the program by right-clicking. A menu will appear, and you have to select “Properties.”
  • If the Service is already running, you need to click on the “Stop” button given in the middle of the window. If it is not, you have to click on the “Start” button to rerun the Service.
  • In the properties window, check for the option under the “Startup type” menu and set it to “Automatic” rather than “Manual.”
  • If you click on the “Start” button, you may encounter this error:

“Windows could not start the Service on the local computer.

Error 1079: The account specified for this service differs from the account settings for other services running in the same process.”

If you want to solve the problem, in the Service’s properties window, open the “Log on” tab and click on “Browse.”

  • Next, you can see an entry box with the writing “enter the object name to select” where you have to write your account’s name. Click on the “Check Names” button.
  • Click on the “Ok” button, and type in your password.
  • Congratulations! You have successfully made the changes to the Service.

Whitelist Discord installation files

Many people are using antiviruses to protect their PC from harmful software. However, sometimes these protectors prevent some Discord files from running correctly, and therefore, you need to put Discord in your whitelist.

Whitelisting is done differently in any antivirus software, and there are several antivirus software available. Most of the methods are almost the same, so we use Avast antivirus as an example. To do that, follow these steps;

  • First, right-click on the Avast icon to open up Avast. A list will appear, so you need to select “open Avast user interface.”
  • After the user interface appears on your screen, you have to click on the “Protection” tab.
  • You can see an option called “Virus chest” on the right side of the screen. Clicking on this option will show all the blocked and quarantined files by the antivirus.
  • Here, you need to select all Discord folders. After that, bring your cursor to the files to see the “three dots” option.
  • Next, click on those three dots and opt for “restore and add an exception” on the appearing list. You need to repeat this method for all Discord folders.
  • Finally, once you have whitelisted the files, try reinstalling Discord.

Uninstall and reinstall the Discord application on your device

If none of these methods make the problem “fatal Discord javascript error” cleared, maybe you need to unstill the whole program and reinstall it again. Follow these steps to uninstall and reinstall Discord;

  • Open “Start Menu” on your Windows, and click on the “Search” option to find “Control Panel.”
  • Click on the “uninstall the program” option in the control panel.
  • You can see different applications on the list. Find the Discord icon, click on it and choose “uninstall.”
  • After successful uninstallation, right-click on the Start menu and select” run.”
  • Now, type in “%appdata%” in the box and click on “run.”
  • Delete the Discord folder as it appears.
  • type in “%localappdata%” in “run” and delete all Discord folders.
  • Finally, you need to visit Discord’s official website and download Discord again.

Also Read: “How to Add Roles in Discord

Summary

Thank you for reading. In most cases, “fatal Discord javascript error” is not an issue to be worried about, and you can solve it with the six solutions explained above. However, if you still are wrestling with this problem, you can visit Discord’s official website and get more information about the error.

Home » Ashborn Lynch » Page 4

Everything about Minecraft horses?

Do you love horses? If your answer is yes, I think you also love Minecraft horses. As you need a tool to speed up your journey in the game or transport chests, these animals will come to help you. More after, you can put armor on these creatures and make them ready for battle.

In this guide, we will show you what your feet horses are in Minecraft, how to make them ready for riding, and what is the best Minecraft horse in the game.

And everything about Minecraft donkeys is here.

How to get a horse in Minecraft?

Finding Minecraft horses are too easy. You can find these lovely animals spawning in plains and savannas in herds of around two to six. All herds are the same color, but markings can be different for each horse. You can also find horses in villages, naturally generating stables or animal pens.

To know more about Minecraft horses, an adult horse is 1.4 blocks wide, 1.4 blocks long, and 1.6 blocks high. Foals start at half the size of adults, and in the Bedrock version, they will get progressively bigger as they age. Horse’s hearts ranges from 15 to 30, with an average of 22.5. A Minecraft horse with an odd number of health points (for example, 17) does not show the last half-heart.

What do horses eat in Minecraft?

You can feed the horses with the same food you feed donkeys, and again, you need golden apples and golden carrots to make them ready for breeding. You can feed your Minecraft horses with apples, sugar, carrots, hay bales, and wheat.

Some of these foods have unique characteristics. For example;

  • Sugar will heal half a heart and speed up a baby’s growth by 30 seconds. You can make an untamed horse easier to tame by a small amount.
  • Apples will heal 1.5 hearts and speed up a baby’s growth by one minute. You can make an untamed horse easier to tame by a small amount.
  • Hay Bales will heal ten hearts and speed up a baby’s growth by three minutes, but the bad news is that they cannot be fed to untamed adult horses. As a result, you cannot make the taming process of an untamed Minecraft horse with Hay Bales.

How to tame a horse in Minecraft?

Before trying to ride a Minecraft horse and take a journey with it, you need to tame your horse and, after that, put a saddle on it (the latter will be discussed in the next section). Note that a horse’s color won’t change after you tame it. If you want to know how to tame a horse in Minecraft, take these steps;

  • First, find a horse for yourself. If you can’t find one, you can summon one of them using “/summon EntityHorse.” Note that don’t even try to train skeleton or zombie horses, as you won’t be able to ride them.
  • Next, you have to make sure your character’s hands are empty and not holding any tools or items.
  • Now, you have to mount the horse. This can be done by right-clicking or tapping on the horse (if you are playing with a desktop), pressing L2 (if playing on a PS3 or PS4), pressing LT (if you are an Xbox player), or pressing ZL (on the Wii U or Nintendo Switch).
  • Take the mounting process again and again until the horse is tamed. You can stay on the horse a little longer each time you try mounting it. You can give the horse some snacks (such as apples, carrots, wheat, and sugar) to speed up the taming process.
  • after taming, you can sit on your Minecraft horse, but you are not able to control its movements; since you need a saddle for it.

How to put a saddle on a horse in Minecraft?

As mentioned earlier, you are not able to make a saddle by yourself in Minecraft, and you have to search for it in the game (or you can trade goods for a saddle with villagers). Once you have found one, it is time to see how we should put on a Minecraft horse. This is very easy, and you need to follow these steps;

  • Since you have gotten a saddle, open your inventory and select the saddle you have achieved.
  • Now, you have to mount the horse. This can be done by right-clicking or tapping on the horse (if you are playing with a desktop), pressing L2 (if playing on a PS3 or PS4), pressing LT (if you are an Xbox player), or pressing ZL (on the Wii U or Nintendo Switch).
  • As you know, the horse also has a separate inventory for itself. In order to open it;
  1. Press “E” on your computer
  2. Click on the 3-dot button if you are on a mobile device.
  3. Press the “X” button if you use a Wii U or Nintendo Switch.
  4. Press the triangle button if you are using a PS3 or PS4 console.
  5. Press the “Y” button if you are an Xbox player.
  • Finally, drag the saddle from your inventory to the horse’s inventory.

As you can see, you have a saddled Minecraft horse now.

How to ride a horse in Minecraft?

After getting a Minecraft horse, you may like to ride it. In this section, I will teach you what we need to have and do to ride Minecraft horses. Follow these steps;

  • First, find a horse and tame it. The taming process has been explained in the previous section.
  • Next, put your saddle from the inventory on your Minecraft horse. You can also optionally put horse Armor on Minecraft horses (not donkeys or mules). This item also needs to be found, and you cannot craft it.
  • You can now ride your horse by mounting on it. Note that you cannot ride your horse in water deeper than one block. If you do this, just use a lead to get your horse out of the water so you can ride it again. Your horse can walk over flat land and over blocks that are one block high.

You can also jump with your Minecraft horses. To do that, you need to hold down the space bar until the action bar reaches the top of the blue line. Now let it go, and at the same time, you have to move forward.

What is the fastest horse in Minecraft?

As you know, there are many different types of horses in Minecraft (besides skeleton and zombie horses), such as black pegasus and normal horses. According to statistics, the maximum speed of horses varies between 4.74 blocks per second and 14.23 blocks per second, and you compare this with Minecraft’s speed (which is about 4.3 blocks per second).

In general, white horses seem to be faster than other Minecraft horses; however, a horse’s speed can also be affected by potions, and there is no rigid relationship between a horse’s speed and appearance.

Summary

Thank you for reading this guide. Working with horses is always great, no matter if it is a real horse or just a Minecraft horse on your device. Most of the time, horses are more valuable than donkeys in Minecraft. However, they need more care and attention.

Home » Ashborn Lynch » Page 4

Everything about Minecraft Donkeys

As a Minecraft user, you cannot neglect donkeys in the game. These unique animals, with powerful features, can boost your abilities while playing Minecraft. But, how can we use them?

To answer your question, this guide will ultimately show you what donkeys eat in Minecraft, how to breed donkeys in Minecraft, and where donkeys spawn in Minecraft.

Or if you just want to breed horses, read this article.

What is the use of a Minecraft donkey?

As mentioned in the beginning, donkeys are really unique. The fact is that players can attach a chest to them, allowing 15 extra slots. This amazing is very useful for long journeys across the harsh biomes of the Overworld. Another unique feature about donkeys is that they regenerate health over time, which means the player will not have to feed them.

One of the disappointing tips about a Minecraft donkey is that they cannot use Armor, unlike Horses, which can use Leather, Iron, Golden, and Diamond Horse Armor.

If you want to tame a donkey, you need to mount it. To mount a Minecraft donkey, don’t hold any item in your hand, then right-click. If you are playing Minecraft on a mobile device, go near the donkey (your hands must be empty), the “Mount” button will show up on the screen, and you should click on it.

To know if you have successfully tamed the donkey, check these two conditions;

  • The donkey will not buck you off his back anymore.
  • You can open its equipment menu.

A Minecraft donkey has between 7.5 and 15 hearts for health, depending on the type of donkey. Therefore, a donkey has 15 and 30 health points (because one heart = 2 health points). To kill a donkey, you need to inflict between 15 and 30 points of damage, depending on the donkey. By killing a donkey, you will receive one item of leather.

How to breed donkeys in Minecraft?

Note this statement; each Minecraft donkey has unique stats: its health, movement speed, and jump strength. As a result, the bred foal will receive an average of its parent’s randomly attributed stat, along with some stats of both of their parents.

Generally, two Donkeys can be bred with either Golden Apples or Golden Carrots. As they are eating, the Donkeys will walk toward each other and ram their heads against the opposite Minecraft donkey. After a few seconds, a new foal will appear on the screen.

What do donkeys eat in Minecraft?

A Minecraft Donkey can be fed a variety of food, including Sugar, Wheat, Apples, and Hay Bales, to restore its health. All of these mentioned items can be useful when taming or healing your donkey, but remember that only the coveted golden apples and golden carrots are required in breeding donkeys.

Where do donkeys spawn in Minecraft?

This is another unique feature of donkeys; they only spawn in select biomes. To discuss more precisely, one to three donkeys will spawn in the Plains biome, and you can see only one donkey will spawn alone in the Savanna biome (Java Edition only).

Two to six donkeys will spawn in the Plains biome based on the Bedrock Edition. You can also crossbreed a donkey and a horse using the same items. You will get a Mule if you breed them. A mule is similar to a donkey, but the mule has a different texture, cannot be reproduced with another donkey or horse, and does not naturally spawn.

It is recommended to keep these foals within a fenced or closed area to avoid wandering off and getting themselves into dangerous situations. 

Summary

Thank you for reading this article. Although donkeys are somehow stubborn animals, they become very useful when you are playing Minecraft. A donkey under your purview is technically a donkey that could quickly assist you in your travels; so, just get engaged and tame some donkeys for yourself!!!

Home » Ashborn Lynch » Page 4

How to get free Minecraft servers 2023?

Minecraft is a brilliant sandbox game for all age ranges of people, and of course, it can convert into a more brilliant option when you have an excellent Minecraft server. There are thousands of free and paid servers with different features, which can give the users a very nice headache deciding.

This guide will explain how to get free servers on Minecraft, whether is there any way to create a new free server and what are the best free Minecraft server 24/7 hosting platforms.

You may like to know how to make a server for Minecraft, so check it out now.

Are servers free in Minecraft?

The most available Minecraft servers on the internet are totally free. However, if you decide to unlock special events, unique skins, chat flair or unlock some surprise content with mystery boxes, you need to spend some money.

In the next section, we will see how to provide a free Minecraft server for ourselves.

Can you make a free Minecraft server?

The answer is yes. There are some Minecraft server services on which you can host your free Minecraft server on it. Before starting to create a free Minecraft server, kids must get a parent’s permission for that. Follow these steps to use a free Minecraft server maker and own your free Minecraft server;

  • First, you need to choose one of the free Minecraft server services on the internet. Here, we choose Minehut. Minehut allows you to host 2 Minecraft servers with up to 10 players for free. You can also purchase credits if you want to get permission to add more than ten players or make more than two servers.
  • Go to Minehut’s official website on your web browser and click on the “Sign up” button in the center of the page. If you already have an account, you just need to log in.
  • Enter your email address on the line that says “Enter your email” text box, which is the first line at the top of the page. Make sure this email is working because you are going to verify it in the next steps.
  • Now, you need to enter your birthdate. To do that, click on the second line on the page, and select the year, month, and day you were born in the drop-down menu.
  • Click on the checkbox at the bottom of the appeared window. By clicking on this checkbox, it ensures that you accept Minehut’s terms of service and privacy policy. You can read the policies by tapping on the blue text in the sentence at the bottom of the form.
  • Next, click on the “Continue” button on the appearing window.
  • Now, you have to verify your email address. To verify it, open the email address inbox. Then click on the Minehut Account Verification email from “info” and review the 8-character code in the email’s body. Finally, enter the 8-digit code into the “Verify” text box on the Minehut page. Click on the “Continue” button; if the code is correct, you will be taken to the password creation page.
  • On the next window, type your preferred password in the “Choose a password” text box, and retype it to confirm. Click on the “Continue” button to complete your account creation.
  • Now, you have to enter your preferred server name in the middle of the page. Note that your server name must not exceed ten characters, and it cannot contain special characters or spaces. Click on the “Create” button, and as a result, you will be taken to the dashboard.
  • As you enter the dashboard, click on the “Activate” button on the right of your server status. It may take a little time for your server to convert to a high-performance DDoS-protected server.
  • As your server is done, click on the “Continue” button next to the “Online” button.
  • Now, you have to determine your server’s Address in the upper-left corner of the first box at the top of your screen. If you need to stop or restart the server, just click on the red buttons with “Stop” or “Restart” captions at the top of the page. If you want to change your server’s name, click on the blue “Change Name” button below the server address. After entering the new name, click on “Apply.”
  • You can also change the server’s appearance and settings by clicking on the “Appearance” and “Settings” buttons on the page, respectively.
  • If you want to add a plugin to your server, click on the “Plugins” tab in the top-right corner of your screen. Now scroll down and browser plugins to find your desired one, and finally, click on the plugin to install it.
  • If you want to manage your server files, click on the “File Manager” tab in the top-right corner of the screen, and select a file to modify it. You can save a file by clicking on the “Save” button. You can also click on the icon that resembles a cloud to upload a file from your computer.
  • Leave your server dashboard open to adjust your server quickly by minimizing the Minecraft window and maximizing your browser window.
  • Now open Minecraft, which has an icon that resembles a grass block.
  • Click on the green “Play” button on the Minecraft Launcher to launch Minecraft.
  • After that, click on the “Multiplayer” button in the middle of the Minecraft title page. Now, click “Direct Connect” at the bottom of the multiplayer menu in the middle.
  • Finally, enter your server address on the page, and click on the “Join Server” button to connect your server.

You can run the almost same method with other online Minecraft services.

How to get free servers on Minecraft?

If you decide to save your money, there are three main routes to achieve a free Minecraft server; First, you can search the internet ocean, and I am sure there are some dedicated cracked free Minecraft servers for your demand.

Second, you can visit Minecraft service websites that offer a free Minecraft server for you (such as Alternos and FreeMcServer.net). Although these free servers are too limited in technical specifications, they can certainly meet your basic demands.

As we explained in the previous part, the third pathway is to create a new free Minecraft server. You need to take some time and be patient while working with a free Minecraft server maker.

Where to find free Minecraft server 24/7 hosting?

If you decide to get a free Minecraft server 24/7 hosting, there are many online services on the internet to give you the best plan for you. Here we have collected some of the best free Minecraft servers for 24/7 hosting;

  • Shockbyte

Shockbyte is one of the best and most inexpensive services which offers various plans with an array of RAM sizes per server to fit anyone’s budget. This company offers 12 and a custom plan to customers ranging from 1 (20+ slots) to 16GB RAM (180+ slots).

Pros

  1. It creates a subdomain for your server to attract more people to join your game.
  2. It guarantees DDoS protection according to its SLA.
  • Sparked Host

Sparked Host has just made everything easy for users; since their servers use industry-leading hardware, everything has automatically been set up for you, and you can always ask your questions from the support team. Their plans start as low as just $1.00 a month.

Pros

  1. they are rated 4.7 / 5 stars on Trustpilot
  2. It guarantees “99.99% network” uptime for you.
  • ScalaCube

No matter here if you are a professional or just a newbie to Minecraft, never forget to try ScalaCube. This platform is aware of users’ demands across its servers, so you get the best network services from them. ScalaCube’s lowest plan starts with 768 MB RAM, 3.4 GHz CPU, and slots for ten players at $2.5/month.

Pros

  1. It monitors the players on your server using the configured website and forum.
  2. It offers a 50% discount on the succeeding server you purchase for the first time.
  • Hostinger

If you want to make sure your server is the best one, try Hostinger. This service offers the best Minecraft hosting plan without advanced server and network setup knowledge. Prices range from $8.95 to $29.95 a month, with the highest plan (Enderman) offering 8GB RAM and eight vCPU. 

Pros

  1. It has servers across the globe to provide low latency to players wherever they may be.
  2. It protects servers from DDoS through its advanced automated hardware protection.
  • HostHavoc

With an average score of 4.7 stars out of 5.0 on Trustpilot, you can trust HostHavoc definitely. The company’s premium services are available in any region in Europe and the US. You can choose the most inexpensive plan with 1-4 recommended players with 1GB RAM or the most luxurious option with 16GB RAM, allowing expanding your multiplayer game up to 250 players.

Pros

  1. It guarantees real person support 24/7 with 15min average response time.
  2. It provides full FTP access alongside a web-based file manager for those who prefer to self-manage.

Summary

Thank you for reading this post. Free Minecraft servers always seem exciting, but using premium servers can boost your experience of playing Minecraft. If you need more information, you just need to check the mentioned Minecraft hosting services and know more about their perfect subscription plans.

Home » Ashborn Lynch » Page 4

How to recover a deleted Roblox account?

Without a doubt, Roblox is one of the most popular sandbox games you can find on this planet, with millions of teenagers and adults playing every day. It has a community where users can participate in games and activities other users have designed and created their own games.

On the other hand, parents are always online predators concerned about them. They can limit Roblox for their children and delete their Roblox account a step further to resolve the problem.

This post will show you how deleting a Roblox account is possible and how to recover a Roblox account quickly.

Also, check out Minecraft versus Roblox.

How to delete a Roblox account?

Converting an active Roblox account to a deleted Roblox account is very easy. However, there is no simple delete button to do that. In general, there are three ways in which you can make a Roblox account into a deleted one:

  • Email support

This is the easiest way you can try to delete an account. Here, you just need to email Roblox’s support staff at info@roblox.com and request it be deleted. Furthermore, to show that the target account belongs to you, you need to write your name, email, and address for ID verification.

  • Customer service

The email process maybe requires being patient to receive a response so that you can take the quicker method. As a result, you can call 888-858-2569 to speak to a representative and ask them to delete your Roblox account.

  • Being absent for a year

Consider that Roblox deletes inactive accounts in order to free up space on its servers to absorb new players. Thus, if you don’t log in to your account for a whole year, the account will be deleted for you.

Can you recover a deleted Roblox account?

Before thinking about deleting a Roblox account, you have to know that recovering a deleted Roblox account is almost impossible. In some cases where misunderstandings have occurred, users have been able to recover their information. But this is not true all time.

Also Read: “How to Trade in Roblox?”

How to recover a deleted Roblox account?

Recovering a deleted Roblox account is something similar to converting a house to its bricks. To start the journey, you can email info@roblox.com; it is improbable that they will deal with the case, but it is worth a shot.

More after that, you can contact customer service to get some information about recovering and ask and see if Roblox still has your saved data on their servers through the customer service link on their site.

This method is also helpful for those people who don’t know which email address was precisely used to create the Roblox account. However, recovering a deleted Roblox account is very difficult, and in general, we have to accept that “Once it is deleted, then it is gone.”

Summary

Thank you for reading this post. We have explained three main methods to delete a Roblox account, and to answer the question “how to recover a Roblox account,” we have considered some suggestions. If you still have a problem with one of these two processes, you can contact Roblox’s customer support and ask for help.

Home » Ashborn Lynch » Page 4

How to make Discord bots? (On PC and mobile)

Do you love Discord? So many other people are. As a beautiful streaming platform, this is a place to amaze your audience, and there are many patches you can add to your server and make it more bright.

We will show what a Discord bot, a Discord bots creator is, and how to make Discord bots both with your phone and PC.

Also, read about “How to make a discord poll?“.

What are Discord bots, and how do they work?

If you are a Discord user, you should know bots are valuable artificial intelligence that automatically performs several valuable tasks on your server. With this patch, you can welcome new members, add music to your server, and moderate discussion.

What is a Discord bots maker?

Developing a new Discord bot needs expertise and a lot of money. An alternative way is to hire a Discord bots maker. There are many Discord bots makers which you can use for your server, and we have introduced the three most popular Discord bots maker here:

Discord Bot Maker on Steam

Steam is a powerful bot development tool that can boost your audience’s experience on your server. You can use Steam on your PC, and with this software, you will have the power and control to create bots that can do almost anything you want. Steam costs only 10 dollars.

Discord Bot creator on BotGhost

BotGhost is another tool that you can rely on it. As statistics say, around 280 thousand bots have been developed using BotGhost, and this definitely means that the platform is decent and has all the features that you need. You can use BotGhost’s additional modules to create more advanced Discord bots.

Bot Designer Discord

If you are a newbie in Discord bot development, you can use Bot Designer Discord. However, this doesn’t mean that it has no new features for professionals. You can use Javascript for custom coding your Discord bot. Furthermore, Bot Designer Discord has the ability to host your server, too.

How to make Discord bots on PC?

How to create a Discord bot on a PC? You just need to follow these steps;

  • First, download Node.js and Discord on your computer, and create a Discord account. Once both applications have been installed on your device, restart your PC and move on to the next step.
  • Now, create your bot. To do it, you need to access the applications tab in Discord in order to get an authorization token for the bot. with this token, Discord recognizes your code and adds it to the bot when in servers.
  • Get your authorization token. Note that this token is unique to your bot; thus, don’t give the code to strangers. Not unless you have decided to let them change the bot’s settings.
  • Next, send your bot to the servers. You can start the process by finding the applications “General Information” tab and copying your “Client ID” to the blank space.
  • The next step is to create a new folder for your bot on your computer. You need to open a notepad and type;

{

“token”:” YOUR BOT’S TOKEN.”

}

After that, save the file as “Auth.json.” It must contain a. JSON file and not a .TXT file. Your bot will not work if you use it. JSON. Now, open a new file and type in the following information;

{

“name”: “Legendary bot”,

“version”: “1.0.0”,

“description”: “Jeffrey the Bot”,

“main”: “bot.js”,

“author”: “Your Name”,

“dependencies”: {}

}

You can replace any information you feel fits in this section; the BOT’s name should be.

  • Open your text editor and make your bot’s file. To get the most out of your bot at this level, you will need to have an understanding of JavaScript. Now open your notepad and define your bot’s code.
  • Next, open your computer’s “command prompt” and navigate to your Discord bot folder. The easiest way of doing this process is by right-clicking a blank area within the bot’s folder while holding the shift. After that, click on the “open” button in the command prompt. You can also press the Windows key + R, type CMD in the field, and click enter alternatively.
  • Use the command prompt to install your bot’s dependencies. In the command prompt, which is next to the discord bot folder pathway, type in “npm install discord.io Winston – save.” As a result, the necessary files will be automatically installed.
  • Finally, run your bot on the command prompt. If everything is okay, you can enjoy your Discord bot on your server.

How to make Discord bots on mobile?

You can also use your phone device to make Discord bots or add them to your server.

To add a Discord bot via mobile device, follow these steps:

  • First, open the top.gg website on your browser.
  • As you enter the website, you can find the lists of top-rated and top-trending bots and also search for specific bots.
  • After choosing your desired bot on the lists, click on the “View” option on the screen and click on the “Invite” button.
  • Now go to your Discord account. If prompted, enter your credentials and log into your account. On the next move, continue the process of selecting the server and granting permission in the browser.
  • Open your Discord app, select the server in the left side panel of your screen, and tap on the server name at the top section.
  • Next, click on the “Settings” option to open the server settings and then select the “Roles” option.
  • Click on the “+” button below to create a new role for your bots. You need to give the function a name and turn on all the permissions you want the bot to access except administrator and manage server ones.
  • Finally, go back and select the “Members” option to open the Member’s list. As a result, select your bot and choose the role to assign the bot to that role.

How to make Discord bots online?

If you are somehow obsessed with coding and trying to find an easier way, you can make your Discord bots online and without exertion. As mentioned before, you can try Discord bots development tools like BotGhost; and here, we will teach you how to use another great website to create your bots, which is Zapier.

Follow these steps to use Zapier’s tools to make your Discord bot, based on its official website;

  • Let’s imagine you want to inform everybody about today’s weather. You can start by building a Zap and then choose the “Weather by Zapier” option as the trigger app.
  • Now select the “Will It Rain Today?” option as the trigger, then click on the “Save and Continue” button.
  • In this case, you will be asked for your longitude and latitude and whether you would like to use Celsius or Fahrenheit.
  • Next, click on the “Continue” button, and go to your Discord.
  • Choose the “Send Channel Message” button and click on “Save + Continue.”
  • You need to connect your Discord server with Zapier now.
  • To set up your template, select which channel the post should go to, then customize your message.
  • You can pull in information from the trigger step by clicking the fields button. By clicking on the button, a dropdown menu will appear. You are also allowed to enable text to speech, change the bot’s name, and give the bot a custom icon. Click on the “Continue” button.
  • Now, you can test your bot on your Discord server. To do that, click on the “Send Test to Discord” icon, and you should see a success message on your screen.
  • If you see the message, then you have successfully created your bot!!!

This is an example of creating a simple Discord bot using Zapier on the internet, and of course, there are so many other platforms that can help you develop unique bots for your channel.


Summary

Thank you for reading this text. As you see, we explained why we need Discord bots, what is a Discord bots creator, and how to make Discord bots on your phone or PC. In general, it seems like duck soup, and I hope you will learn quickly to do it. So, let’s go and make some bots!!!

How to change the Minecraft skin?

Any kid will love to play the Sandbox game Minecraft, as it is fantastic and thoroughly educational. Sometimes, we need to redesign our screen and bring more excitement to our game. You may ask, “How do I change my skin in Minecraft?”

The post you already are reading will show you how to change skins on Minecraft, whether your device is a PC, a console, or a mobile device.

You may like to know “How to find diamonds in Minecraft?“.

Is changing skin Minecraft possible?

Most people are wondering if it is possible to edit Minecraft online. The answer is yes. You are able to change the skin on both Minecraft versions of “Java” and “Bedrock,” and to change your “Minecraft” skin; you will need to upload a compatible PNG image that you have either made or downloaded.

The following sections will show how to edit Minecraft skins online on your console, PC, or phone device very easily.

Change the Minecraft skin on the console

Now, if you or your kid are playing Minecraft on a console, we will show you how to change Minecraft’s skin on it. Follow these steps:

  • First, open your Minecraft. Choose the “Minecraft” game from your console’s library. If you bought Minecraft on a disk, you have to insert the disk into your console.
  • Now, click on the “Help & Options” button in the middle of the Minecraft main page.
  • Next, click on the “Change Skin” tab at top of the page. This action will open the Skin Packs page for you.
  • You can scroll up and down to view different packs. Please choose one of them.
  • As you choose your desired pack, scroll left or right to find a skin you want to use. Note that some skins are part of premium packs, and they are not free. You can see a padlock icon near them.
  • Finally, press A (Xbox) or X (PlayStation) on your joystick. With this action, the selected skin will be set as the default. You will see a green checkmark appear in the bottom-right box. If you have chosen the wrong skin or the premium one, you can press B (Xbox) or O (PlayStation) to exit the pop-up.

How to change the Minecraft skin on PC

If you are using your PC or laptop for playing Minecraft, this guide will show you how to change skins on Minecraft:

  • Before anything, go to http://minecraftskins.com/ to open the Skin Index library.
  • Now, choose a skin that you want to use for your Minecraft characters. You can also search for a specific skin from the search bar at the top of your page. You can make your custom skin on this page if you are creative.
  • Click on the “Download” button on the right side of the skin’s page. As a result, you will have the file immediately on your computer.
  • Now, you have to open the Minecraft website. To do this, go to https://minecraft.net/
  • Step five: Click on the three horizontal lines “Menu” icon on the top-right corner of the screen. A drop-down menu will appear.
  • Step six: After that, click on the “Profile” button at the top of the drop-down menu. Before going to the skins page, make sure you have logged into your Minecraft account.
  • Step seven: Now, you can browse the skin file with a white button near the bottom of the screen.
  • Step eight: Go to your “Downloads” section on your computer, and click on the skin file that you downloaded just a few minutes before.
  • Step nine: There is an “Open” button in the window’s bottom-right corner. Your skin file will be uploaded to the profile page.
  • Step ten: Finally, click on the “Save” button near the bottom of the page to upload and save your new skin.

What about Minecraft PE?

If you have a mobile device and want to try Minecraft on your phone, you can also change skins on Minecraft. To alter them, just follow these steps:

  • Open a web browser on your phone, either Google Chrome or Firefox.
  • Next, view the Skindex website. Go to http://minecraftskins.com/ in your mobile browser.
  • Now, select a skin you want to have on your Minecraft. You should download it.
  • To download the skin, click on the “Download” button on the upper-right side of the skin’s page. The skin’s image will be opened in a new browser tab.
  • Tap and hold the skin’s image and click on the “Save Image” button to save the skin.
  • Now, come back to your phone’s screen and open your Minecraft PE app.
  • There is a coat hanger icon on the lower-right side of the screen. Click on it.
  • Go to the “Default” section in the top-left corner of the screen, where you can see a blank skin icon on the right side. Please click on it.
  • Click on the “Choose New Skin” button at the top of the “Custom” window, which is on the right side of the screen.
  • Click on the image of the skin that you downloaded. This action will save your selected skin.
  • Tap on one of the skin models in the pop-up window. If you are not sure which one is better, the right-side model is recommended.
  • Finally, click on the “Confirm” button in the bottom-right corner of the screen. You will see your selected skin will be set as the default.

Summary

Thank you for reading this text. Minecraft is so lovely to play; thus, users want to add multiple skins and bring more brightness to the game. You can download your wanted skin on the websites or design a new one if your perfect skin is not available on the internet.

If you have any problem with uploading skins on Minecraft, you can send a request message to Minecraft servers and ask for help.

Home » Ashborn Lynch » Page 4

How to find diamonds in Minecraft? (Easy Guide)


As a Minecraft player, you need to know which things are your friends in the game. You can benefit from many items in Minecraft, but none of them can reach diamonds.

Once you find one of these shiny jewelry pieces, they can be crafted into some of the best items in the game. You can also craft diamonds into enchanting tables and jukeboxes. If you don’t know where to find a diamond in Minecraft, continue reading this text.

This brief guide will explain how to find diamonds in Minecraft easily.

Also, you can find out about changing the Minecraft skin, here.


How to find a diamond in Minecraft

Before starting to answer the question “where can I find diamonds in Minecraft?” let’s see “what do I need to find them?”. View the list below;

  • An iron pickaxe or better

Never forget that diamond ores can only be mined with an iron pickaxe or better (such as gold, diamond, or nephrite). If you want to try mining diamonds with a stone or wooden pickaxe, you can see the block will break, but you will get no diamond as a result.

  • Torches

The following items are torches. They will light your way while you are mining, making it more difficult for enemies to get on you. You can also craft torches by placing a piece of coal on top of a stick.

  • Food

When working, never wait to be hungry!!! Although any edible item can be helpful to us, chicken nuggets or steps are the best options. You cannot expect when you will need the extra health.

There are many layers in Minecraft based on altitude, and diamonds can only be found in layer 15 or lower. As a comparison, the sea level in “Minecraft” roughly layers 64. Layer 15 seems too deep as you reach the bottom of the world in the game.

You can use the debug menu if you don’t know which layer you are on. To open the debug menu, press F3 on a PC or Fn + F3 on a Mac. Your current layer is the Y coordinate.

If you reach layer 15 in Minecraft, start digging. Layer 12 is the layer where diamonds are beginning to appear, indicated by blue dots. There is also minor lava on layers 11 and 12, and the best place to find diamonds. Most diamond comes in linear “veins,” meaning that there will be multiple diamond ore blocks connected to each other.

Tips and Tricks to finding a diamond in Minecraft

You may ask now, “Where can I find a diamond in Minecraft?” well, there are always some tips and tricks for that.

First, it is better to find a cave in the game. Note that never dig straight down; if you accidentally search dig the cave’s ceiling, you will find yourself falling into lava or a massive ravine. To not lose your route track, you should use torches.

Second, always be alert to keep yourself far from enemies like spiders, skeletons, zombies, and witches. You can also hear them as they are getting near you.

Third, use your blocks to build a tower and escape to higher ground if you need to run. Suppose you encounter a dead-end in your route, quickly mine into a wall, and place blocks to seal the exit.

Is there any alternative way to mine diamonds in Minecraft? Although the best way to find diamonds in Minecraft is to dig and mine, there are some alternative methods to find diamonds. You have a chance to find your diamonds in village treasure chests. Furthermore, desert temples and mineshafts might also hold diamonds in their treasure chests. Remember that the most common place for finding these chests is underground.

Summary

Thank you for reading this post. Never forget the rule; you will drop everything in your inventory if you die. And once an item has been dropped, you will only have a few minutes to retrieve it before it disappears. If you have bad luck and fall into lava, all your items will be immediately destroyed as they hit the lava.

Home » Ashborn Lynch » Page 4

Minecraft versus Roblox (Which one is better?)

Without a doubt, most kids love video games, and their parents want to find a video game that is not boring, educational, and, of course, appropriate.

Nowadays, technology has reached a position that has enabled the creation of online worlds and communities for kids to explore, design and share. Especially when we are talking about “Sandbox” games, they help children think more critically, use their creativity, and improve their brain storage abilities. In general, Roblox and Minecraft are the most popular Sandbox games in the world.

As a parent or just deciding to have a child in the future, you may want to know which video game is better and who wins the Roblox versus Minecraft competition. This article will help you to think better.

What is Minecraft?

Let’s start to describe the games better for ourselves. Minecraft is a Sandbox computer video game where players explore a 3D world made from blocks. Although it is called a “3D game,”, honestly the graphics are basic and easily adjustable.

As a Sandbox game, children are not going to see a specific storyline, and they should build, explore and destruct freely using everything in the game from the beginning. Minecraft lets players reconstruct the world by manipulating blocks. Any player can travel between environments, explore new things, and add or remove blocks on the situation.

What is Roblox?

As a newer version of the Sandbox games, Roblox itself isn’t the game; it is just the system that facilitates the other games. The elements of Roblox are somehow LEGO-associated, and graphics quality can be set to high or low by the player. Roblox allows players to travel and interact with things in the world, creating communities and developing their ideas.

Minecraft versus Roblox (Differences Between Minecraft and Roblox)

Well, now what do we have here as differences in Minecraft versus. Roblox competition? We can arrange them into three separate items;

  • Structure

The most significant difference between Roblox and Minecraft is their structure. Minecraft is a self-built system in which worlds are made of blocks and children can manipulate them. In contrast, Roblox is just a platform to let other games run on it.

  •  Origins

The origins of mods are too different in these two games. Minecraft is updated with modules made by the core development team. However, Roblox mods are made by another player.

  •  Price

Never forget the cost of a product when you want to buy it. As one of the best-selling video games, you can buy Minecraft for $30 for the basic package or get the advanced pack with more add-on features for $50. On the other side, Roblox is free to start playing, and anyone at any age spectrum can register on their own. Remember that each game has extra plugins that you have to pay for if you want.

Read about finding diamonds in Minecraft.

Advantages in Minecraft versus Roblox

When we are talking about Minecraft vs. Roblox, each video game must be reviewed based on its pros and cons. As a result, we have brought some positive points from each candidate below;

Advantages of Minecraft

  • The most significant advantage of Minecraft is its quality control. As you see, the game is continuously developed by a team of professional developers and content creators. So all updates and mods must be checked by the company’s criteria, and parents can be relieved of any concerns about inappropriate content in the game.
  • Minecraft is totally unlimited. This means that your child can explore, manipulate, and experiment with the world Without thinking about the video game world’s dimensions and rigid storyline.
  • From a parent’s perspective, they want to buy a solo game in which the child is not going to interact with online people. Although Minecraft has some tools to communicate with other players, it is not necessary for the game process.

Advantages of Roblox

  • Maybe the most valuable advantage of Roblox is being free. Anyone, from a bit of child to a senior adult, can start playing and try the game without an additional cost.
  • Another good news is that you can create new content continuously. As a result, new game modules are being added every day, thanks to the game community of builders. Thus, it can be a unique experience if you play a new game every week.
  • In some cases, users create new content to practice coding rather than just playing games. This is happening because Roblox uses a more complicated coding system that actually involves creating code for the game. Some people even are earning thousands of dollars from Roblox as a career.

Read about recovering a deleted Roblox account, too.

Frequently asked questions:

Can users play cross-device with both Minecraft and Roblox?

This subject is another difference between Minecraft versus Roblox. With Roblox, you are allowed to play on your Android mobile or with your Windows PC in your house. On the other side, you can play with Roblox both Java Edition and Bedrock Edition with others, but you can’t mix the editions.

Child account setup in Minecraft versus Roblox; which one is easier?

Based on reviews, Roblox is more straightforward to set up when it comes to accounts for children. In contrast, you must follow a complicated process in Minecraft to set up an account there.

Summary

Thank you for reading this text. In general, if you don’t want to spend much money upfront for your child to try the game, Roblox is your best choice. But if you don’t mind investing upfront for a single-player game, Minecraft is the better option. Besides your decision, both Minecraft and Roblox can boost your child’s creativity and critical thinking, and they can benefit from these abilities in the real world.

Home » Ashborn Lynch » Page 4
Exit mobile version