Today more people try to use Twitch. It is among the real-time streaming video program for video games. Recently, this program has matured the most famous region for a gamer. The best point is that Twitch users will not only see the game matches on it. They will also learn different game strategies from other players. Players can utilize their cellphones to follow different game matches videos, such as LOL, WOW, SC2, DIABLO3, WAR3, etc.
Several users are seeking methods to download Twitch clips and store them offline.
What are the best twitch clip downloaders?
- What is a twitch clip downloader?
- Best Free Twitch Clip Downloader
Here, I will explain about twitch clip downloaders and introduce the five best ones.
What is a Twitch clip downloader?
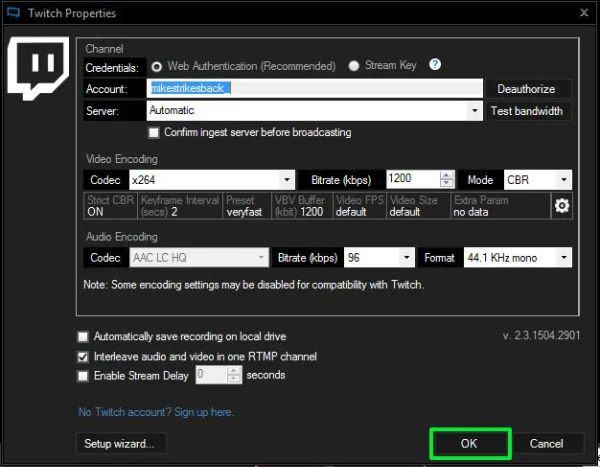
Twitch is one of the enormous video real-time records today. A vast number of gamers distribute their relationship to the number of followers. In each instance, examine the chance that you want to download a video from Twitch.
Twitch Clip Downloader is a stunning device that helps you save your number one twitch video and clips. As Twitch’s program does not allow disconnected watching or downloading, these video downloader tools could be helpful. When you use any of these twitch video downloaders, you can avoid wasting time by saving your video from simply online to an offline mp3 file. In this way, more than just watching streaming and clips on the network, you would soon be ready to download twitch clips and watch them offline.
What Are The Best Free Twitch Clip Downloaders?
Here, I will introduce the top five twitch video downloaders that you can use freely.
- 1.Clipr
- 2.NINJA
- 3.UnTwitch
- 4.4HUB
- 5.Windsya
- Clipr
The first tool that I want to talk about is Clipr. It is a secure, available, reliable, and safe Twitch clip downloader on the Internet. Clipr constantly attempts to change the user activity and have its service possible. In just a few levels, you can save Twitch videos and clips to your computer simply.
In the first step, you have to copy the URL of Twitch clips and paste it. If you do not know that your URL is valid or not, you can try it, and if it was not the right form. Now it will show you the correct URL sample, and you can track its advice.
In the second step, it will present the Twitch clip you decide to download. You can move the slide bar to trim the video and arranged the video feature.


- NINJA
Another Twitch clip downloader that I want to mention is NINJA is a free online one. This app can help you save Twitch videos at a lightning-fast pace. Additionally, when you use this app, you can use other features like changing the Twitch clips to mp3 and making the thumbnail JPG file. What you have to do is copying the Twitch clip URL and pasting it. Then you can click SUBMIT key to begin.

- UnTwitch
UnTwitch is another free online Twitch clip downloader. This app can help you save Twitch videos and change Twitch to mp3 easily. If the mentioned video is much longer than 1 hour, this app will constantly try to download around 1-hour long clip from the start of the video.
You have to copy and paste your favorite Twitch clip’s URL and tick SUBMIT to start.

- 4HUB
4HUB is also a favorite Twitch clip downloader that helps to download Twitch videos online with comfort. Just paste the URL of the Twitch Clip in the square space given. Then tick on getting Download Link. It takes you to a page displaying a preview of the clip, and now you can click on Download.

- Windsya
Windsya recognizes how great it is for game players to enter streams on Twitch, and there are occasions that you may need to download Twitch videos to view them offline. For this goal, Windsya gives a great answer to you. You need to copy the Twitch clip URL and paste it in place. Then tick SUBMIT to download it.

Conclusion:
That is all around the five most reliable Twitch clip downloaders, and you can also create a video or edit a video online with them. If you are among the Twitch followers, you might think about downloading Twitch videos. You can read this text and choose any of these mentioned apps that you like more.