Best Portable Printer of 2024 (List of Top Models)

Portable printers are getting more and more popular because they are small, light, and easy to use with battery power. A portable printer gives you the freedom and flexibility you need, so we will talk about the best portable printers in this guide. Our objective is to give you all the details you need to make a smart choice and pick the best portable printer for your unique requirements and tastes.

Why Portable Printers Are Better Than Traditional Printers?

Portable printers offer several advantages over traditional printers, making them a popular choice for individuals on the go. Here are some key advantages to consider:

  • Portability: As the name suggests, portable printers are designed to be lightweight and compact, making them easy to carry around in a bag or backpack. This makes them ideal for students, business professionals, and anyone who needs to print while traveling.
  • Wireless Connectivity: Portable printers come with various connectivity options, such as Wi-Fi and Bluetooth, allowing you to print wirelessly from your laptop, tablet, or smartphone. This eliminates the need for cumbersome cables and provides the convenience of printing from anywhere within range.
  • Print Quality: Despite their smaller size, portable printers do not compromise on print quality. Many models are specifically designed for photo printing and deliver impressive results, especially when used with the right photo paper. This makes them a great option for photographers or anyone who values high-quality prints.
  • Battery Power: One of the key features of portable printers is their ability to operate on battery power. This means you can print without being tied to a power source, making them perfect for outdoor events, business meetings, or when you’re on the move.
  • Versatility: Portable printers are versatile devices that can handle a variety of printing tasks, from documents and photos to labels and receipts. Some models even offer additional features like scanning and copying, making them a convenient all-in-one solution.

Best Portable Printer of 2024 (Top Models)

We can tell you about some aspects that you should look for in the best portable printers in a general sense. To get the most up-to-date information, you might want to look at our newest reviews:
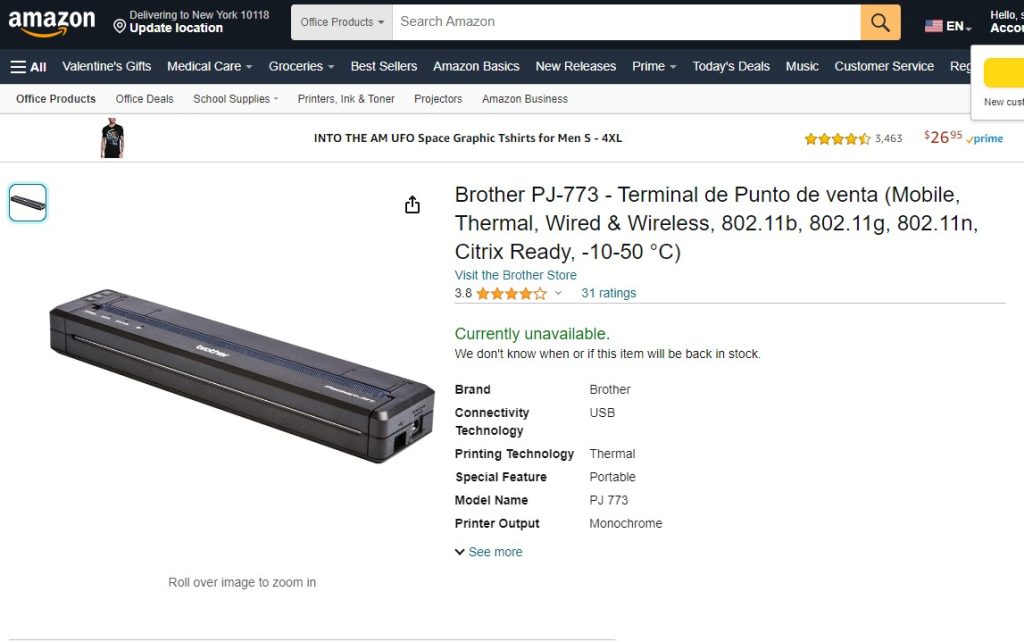
The Brother PocketJet PJ-773 is a top contender when it comes to portable printers. Utilizing thermal print technology, this printer requires no ink and is incredibly compact. It can easily fit into a bag or briefcase, making it ideal for travel.

The printer offers a print speed of 8 pages per minute and supports paper sizes up to A4. With built-in Wi-Fi, Bluetooth, and USB connectivity options, it provides seamless wireless printing from various devices. The PocketJet PJ-773 delivers detailed prints and is suitable for text-oriented documents. However, it may not be the best choice for those looking for complex graphics or vibrant photo prints.

Pros of the Brother PocketJet PJ-773 Portable Printer:

  • Inkless thermal print technology eliminates the need for ink cartridges.
  • Compact and lightweight design for easy portability.
  • Multiple connectivity options for wireless printing.
  • High-quality prints with sharp details.

Cons of the Brother PocketJet PJ-773 Portable Printer:

  • Requires thermal paper for printing.
  • Prints mostly in black and white.
  • Limited printing speed compared to larger office printers.
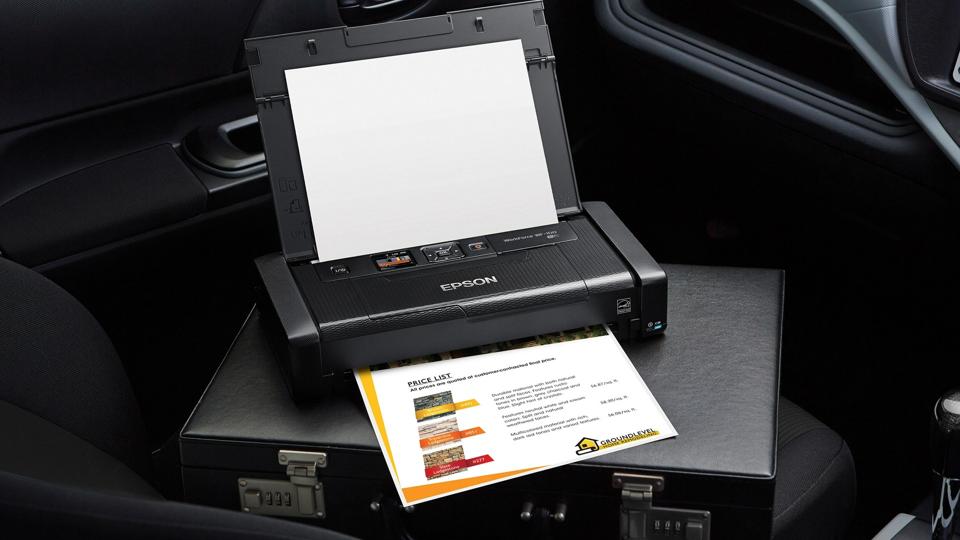
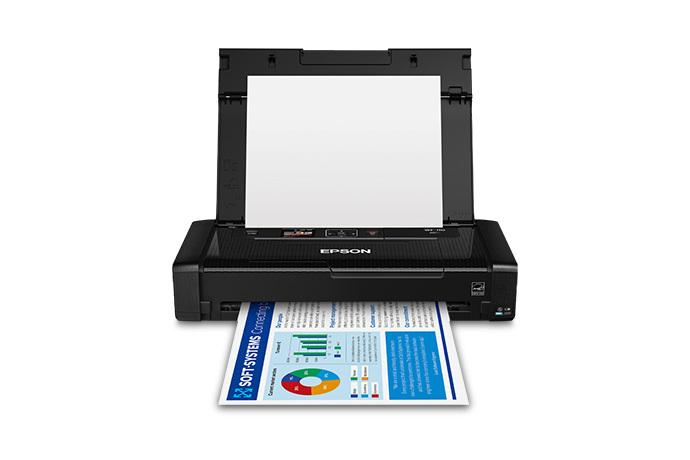
The Epson WorkForce WF-110 is a portable inkjet printer that offers excellent print quality in a compact size. With a resolution of 5,760 x 1,440 dpi, this printer produces vibrant and detailed prints. It supports paper sizes up to A4 and has a paper capacity of one sheet.

The WF-110 features Wi-Fi Direct and USB connectivity, allowing for easy printing from laptops, tablets, and smartphones. It is powered by a rechargeable battery, making it perfect for on-the-go printing. However, the WF-110’s printing speed is relatively slow compared to some other portable printers.

Pros of the Epson WorkForce WF-110 Portable Printer:

  • Compact and lightweight design.
  • High-resolution prints with vivid colors.
  • Supports wireless printing from various devices.
  • Rechargeable battery for portable use.

Cons of the Epson WorkForce WF-110 Portable Printer:

  • Costly ink cartridges.
  • No automatic duplex printing.
  • Slower print speed compared to other models.
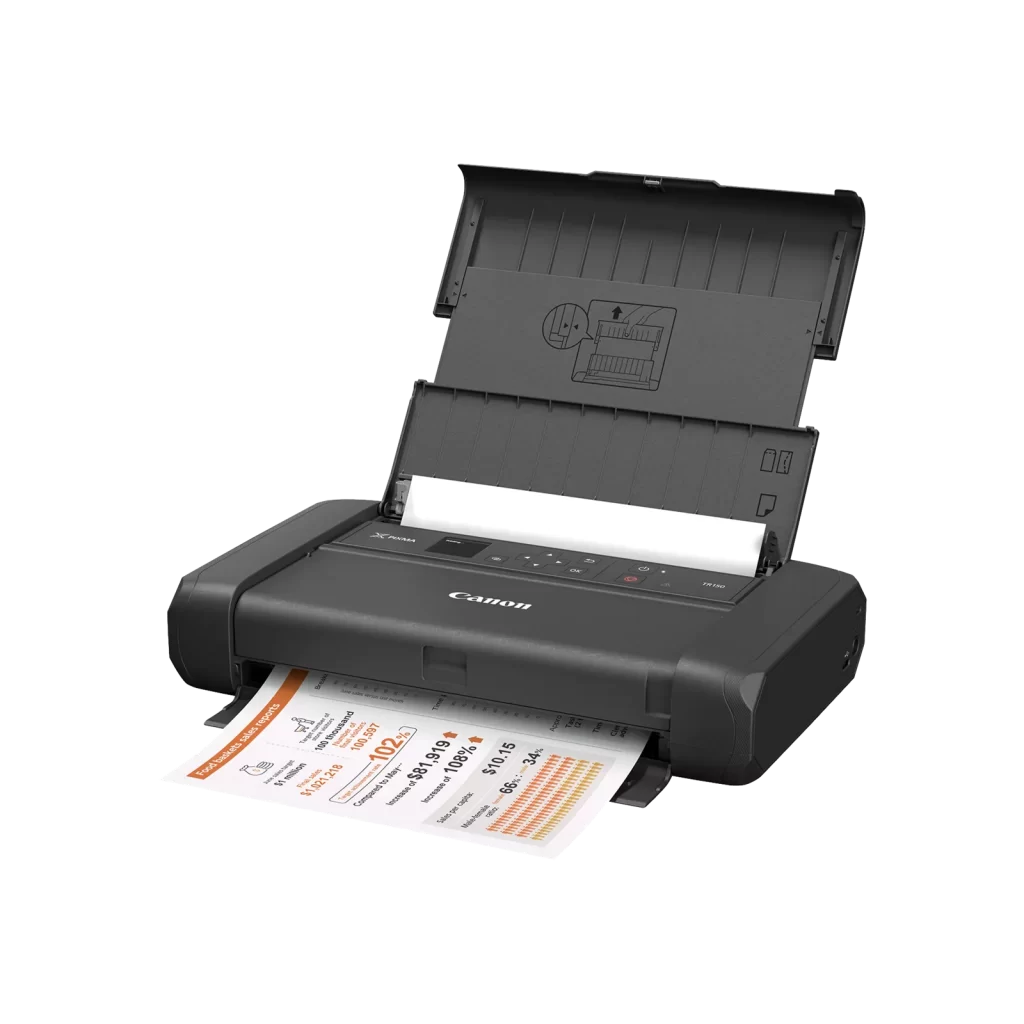
The Canon PIXMA TR150 is a portable inkjet printer that offers both compact design and high print quality. It supports paper sizes up to A4 and has a paper capacity of 50 sheets. With Wi-Fi and optional battery power, this printer provides convenience and portability.

The TR150 is compatible with AirPrint and Google Cloud Print, allowing for easy printing from mobile devices. It is also equipped with the Canon Easy-PhotoPrint Editor app, which offers various templates and customization options. However, the cost of ink cartridges for the TR150 can be expensive.

Pros of the Canon PIXMA TR150 Portable Printer:

  • Compact and lightweight design.
  • Optional battery power for on-the-go printing.
  • Wireless connectivity for easy printing from mobile devices.
  • Canon Easy-PhotoPrint Editor app for customization.

Cons of the Canon PIXMA TR150 Portable Printer:

  • Expensive ink cartridges.
  • Limited paper capacity.
  • Not suitable for large document printing.
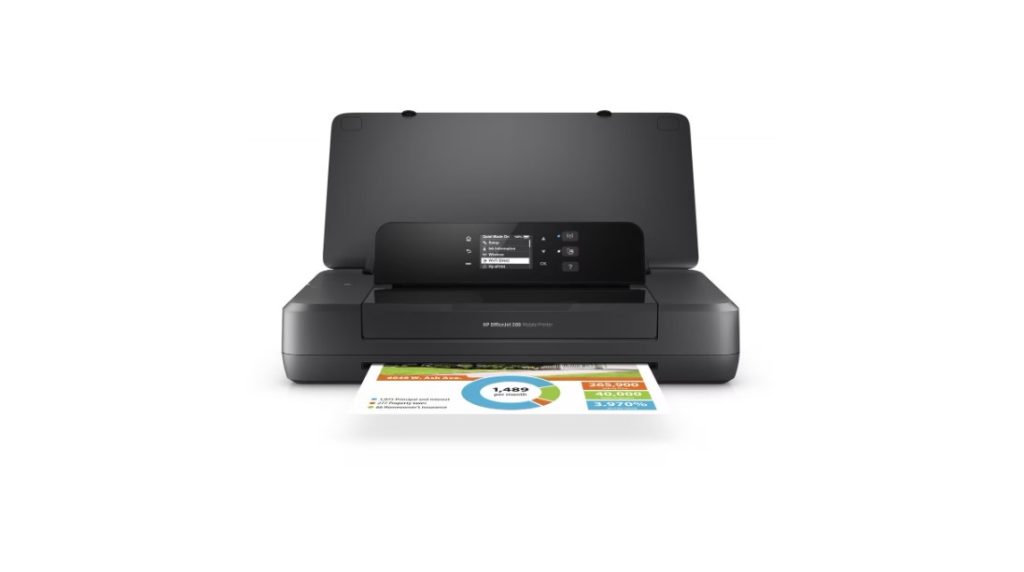
Included in the list of the best portable printer of 2024, the HP OfficeJet 200 is a portable inkjet printer that offers a balance of portability and functionality. With a print speed of 10 pages per minute, it can handle a variety of printing tasks. The printer has a paper capacity of 50 sheets and supports paper sizes up to A4. It offers wireless connectivity options such as Wi-Fi and Bluetooth, allowing for easy printing from laptops, tablets, and smartphones.

The OfficeJet 200 is powered by a rechargeable battery, making it suitable for on-the-go use. However, the cost of ink cartridges for the OfficeJet 200 can be a drawback for some users.

Pros of the HP OfficeJet 200 Mobile Printer:

  • Compact and lightweight design.
  • Wireless connectivity for easy printing.
  • Rechargeable battery for portable use.
  • Suitable for a variety of printing tasks.

Cons of the HP OfficeJet 200 Mobile Printer:

  • Expensive ink cartridges.
  • No automatic duplex printing.
  • Limited paper capacity.

The Fujifilm Instax Link WIDE is a portable printer specifically designed for instant smartphone photos. It uses a unique instant film technology to produce prints without the need for ink cartridges. The printer supports paper sizes of 86 x 108mm and has a paper capacity of 10 sheets.

With Bluetooth connectivity and the Instax Link Wide app, users can easily print photos from their smartphones. The Instax Link WIDE is compact and lightweight, allowing for easy portability. However, the printing speed of this printer is relatively slow compared to other models.

Pros of the Fujifilm Instax Link WIDE Portable Printer:

  • Unique instant film technology for instant prints.
  • Compact and lightweight design.
  • Bluetooth connectivity for easy printing from smartphones.
  • Fun and creative printing experience.

Cons of the Fujifilm Instax Link WIDE Portable Printer:

  • Expensive photo film.
  • Slow printing speed.
  • Limited paper capacity.

Things to Think About Before Buying a Portable Printer

When choosing the best portable printer for your needs, there are several factors to consider. Here are some key considerations to keep in mind:

  • Size and Weight: The size and weight of the printer are important factors to consider, especially if you plan to carry it with you frequently. Look for a compact and lightweight model that can fit easily into your bag or backpack without adding unnecessary bulk.
  • Connectivity Options: Check the connectivity options offered by the portable printer, such as Wi-Fi, Bluetooth, or USB. Ensure that the printer is compatible with your devices, whether it’s a laptop, tablet, or smartphone, to ensure seamless wireless printing.
  • Print Speed: Consider the print speed of the portable printer, especially if you frequently need to print large documents or photos. Look for a model that offers fast printing without compromising on print quality.
  • Print Quality: Evaluate the print quality of the portable printer, particularly if you need to print high-resolution photos or detailed documents. Look for models that offer high DPI (dots per inch) for crisp and clear prints.
  • Battery Life: If you plan to use the printer on the go, battery life is a crucial factor to consider. Look for a portable printer with a long battery life that can last through your printing needs without frequent recharging.
  • Printing Costs: Consider the cost of ink or thermal paper for the portable printer. Some models may have expensive consumables, which can add up over time. Evaluate the printing costs to ensure it fits within your budget.
  • Additional Features: Some portable printers offer additional features such as scanning, copying, or mobile app integration. Assess your specific needs and look for models that offer the features that will enhance your printing experience.

In Summary

For those who need to print while they’re on the go, portable printers have become important tools. Thanks to their small size, wireless connection, and battery power, they can be used for a wide range of printing tasks. Think about things like size, weight, connectivity choices, print speed, print quality, battery life, and printing costs when picking the best portable printer for your needs.

You can choose the best portable printer for your needs by carefully considering these factors and looking at the best models on the market in 2024. A portable printer will give you the freedom and convenience to stay busy on the go, whether you’re a student, a worker, or someone who just loves printing photos.

How to Transfer Ownership on Discord Server [Desktop and Mobile]

In the past few years, Discord, a famous voice and text chat platform, has become very popular. It gives people an easy way to talk to each other, share thoughts, and do different things. As the owner of a Discord server, it’s your job to keep the server and its users running smoothly. But there may come a time when you want to give someone else ownership. This complete guide will show you how to transfer ownership on Discord account on both desktop computers and mobile phones.

Ownership Transfer on Discord: How Does It Work?

You should know what will happen when you change your Discord title before you start the move process. The person who owns the computer needs to follow the rules, make important decisions, and make sure everything works well. This is what you give someone when you give them ownership. You should choose a person you can trust to run the server and its groups well.

How to Transfer Ownership on Discord Server on Desktop

Transferring ownership of Discord is a straightforward process. Follow these steps to transfer ownership on a Discord server using a desktop device:

  • Open Discord App and Select the Server

To begin, open the Discord app on your desktop and log in to your account. Once logged in, navigate to the server for which you want to transfer ownership. Click on the server name to access its options panel.

  • Access Server Settings

In the options panel, select “Server Settings” from the drop-down menu. This will take you to the server settings page.

  • Navigate to the Members Tab

Within the server settings, locate the “Members” tab under the “User Management” section in the left sidebar. Click on it to access the list of server members.

  • Select the Member and Open Options

Scroll through the member list and find the individual whom you want to transfer ownership to. Once you’ve identified the member, click on the three dots next to their name to open the individual options.

  • Choose “Transfer Ownership”

From the options menu, select “Transfer Ownership.” A confirmation prompt will appear, ensuring that you want to proceed with the transfer.

  • Confirm the Transfer

Read the confirmation prompt carefully, acknowledging that the ownership will be transferred to the selected member. Once you are certain about the transfer, click on the appropriate button to confirm and complete the process.

How to Transfer Ownership on Discord Server on Mobile

If you prefer to use Discord on your mobile device, the process of transferring ownership is equally simple. Follow these steps to transfer ownership on Discord using a mobile device:

  • Open Discord Mobile App

Begin by opening the Discord application on your mobile device. Locate the Discord icon and tap on it to launch the app.

  • Select the Server and Access Options

Once the app is open, navigate to the server for which you want to transfer ownership. Tap on the three dots located next to the server name to access the options menu.

  • Go to Server Settings

From the options menu, select “Server Settings” to access the server settings page.

  • Access the Members Tab

Within the server settings, locate and tap on the “Members” tab. This will display the list of server members.

  • Choose the Member and Open Options

Scroll through the member list and find the individual to whom you want to transfer ownership. Tap on the member’s name to open their options.

  • Transfer Ownership

Within the member’s options, select “Transfer Ownership.” A confirmation prompt will appear, ensuring that you want to proceed with the transfer.

  • Confirm the Transfer

Carefully review the confirmation prompt, acknowledging that ownership will be transferred to the selected member. Once you are certain about the transfer, tap on the appropriate button to confirm and complete the process.

Important Things to Think About When Transferring Ownership

When transferring ownership on Discord, there are a few important considerations to keep in mind:

  • Trust and Reliability

Choose a member whom you trust and who demonstrates reliability in managing the server. Ensure that they have a clear understanding of the server’s rules and responsibilities associated with ownership.

  • Communication with Members

Before transferring ownership, communicate with your server members to inform them of the upcoming change. This will help maintain transparency and prevent any confusion or concerns.

  • Ownership Limitations

Keep in mind that Discord servers can only have up to four owners. Additionally, at least one owner must always be present. If the server becomes ownerless, it may be deleted after a period of time.

  • Leaving the Server

Transferring ownership does not automatically remove you from the server. If you wish to step away entirely, you must manually leave the server following the appropriate steps.

In Summary

There you have it! That’s all you need to know on how to transfer ownership on Discord, and it should be easy to perform it. Remember to pick someone you can trust who can run the server and its community well. Talk to the people on your server as well to make sure the transfer goes smoothly. If you follow these steps, you can give someone else ownership of your Discord server and their duties, letting the server grow.

How Do I Stop Microsoft Teams from Showing Away After 5 Minutes (Solved)

Microsoft Teams is an excellent tool for working together that lets teams that are spread out easily do their jobs. Users often get annoyed, though, because Microsoft Teams keeps showing them as “Away” even when they are actually using the platform. This can cause misunderstandings and make it take longer to respond. How do I stop Microsoft Teams from showing away after 5 minutes? This article will answer that question and make sure that your presence is correctly shown.

How Do I Stop Microsoft Teams from Showing Away After 5 Minutes?

Why does Microsoft Teams show you as “Away” even when you’re using the platform? Let’s find out before we get to the answers. This problem might be caused by a number of things, such as inactivity, incorrect state settings, or issues connecting to the network. By taking care of these core issues, we can find good ways to stop Teams from showing you as “Away.” Let’s take a closer look:

Manual Reset of Your Status

One simple solution to override the automatic “Away” status is to manually reset your status to “Active” on Microsoft Teams. This will keep your status as active until you manually change it to “Away” or “Offline.” The steps to do this vary slightly depending on your device.

On Windows or Mac:

  • Launch the Microsoft Teams application.
  • Click on your profile picture at the top right corner of the screen.
  • Select the “Availability” option from the drop-down menu.
  • Choose “Available” from the options provided.

On Android or iOS:

  • Open the Microsoft Teams app on your mobile device.
  • Tap on your profile picture or initials in the top-left corner.
  • Select the “Offline” option or the option below your account name.
  • From the drop-down menu, choose “Available.”

By manually resetting your status, you can ensure that Microsoft Teams accurately reflects your presence and prevents it from automatically changing to “Away.”

Check for App Updates

Sometimes, the issue of Microsoft Teams showing you as “Away” can be due to a glitch or an app-related problem. To resolve this, it’s important to check for updates and ensure that you have the latest version of the Teams app installed on your device.

On Windows or Mac:

  • Press the Windows key on your keyboard and type “Microsoft Teams.”
  • Open the application and click on the three-dot icon next to your profile picture.
  • Select “Check for updates” from the drop-down menu.

On Android or iOS:

  • Go to the Google Play Store or App Store on your mobile device.
  • Search for “Microsoft Teams” and check if there are any available updates.
  • If updates are available, click on the “Update” button.
  • Updating the Teams app on your device can often resolve any issues related to the “Away” status.

Set a Status Message

Another workaround to ensure that your availability is communicated to your team members is by setting a status message on Microsoft Teams. This message will be displayed when others message or mention you, even if your status shows as “Away.” Setting a status message is easy and can be done on both desktop and mobile devices.

On Windows or Mac:

  • Launch the Microsoft Teams application.
  • Click on your profile picture at the top-right corner of the screen.
  • Select “Set status message” from the drop-down menu.
  • In the modal that appears, type your status message in the text section.
  • Tick the box next to “Show when people message me.”
  • Click “Done” to save your status message.

On Android or iOS:

  • Open the Microsoft Teams app on your mobile device.
  • Tap on your profile picture or first-name alphabet icon in the top-left corner.
  • From the left pane, tap on “Set status message.”
  • On the next screen, type your status message in the text section.
  • Toggle the switch next to “Show when people message me.”
  • Tap the tick mark in the top-right corner to save your status message.

Use Third-Party Apps to Keep Your System Active

You can use third-party apps or utilities to stop Microsoft Teams from going into an idle or inactive state if the other options don’t work for you. These apps can keep your machine running, which means that your Teams status stays live as well. For Windows, Move Mouse and Jiggler are two apps that you might want to try.

These apps will keep your computer open and running, so Teams won’t be able to mark you as “Away.” Keep in mind that Microsoft and other software companies do not officially support these apps. Be careful when you use them and make sure they work with your system.

Also Read: FIX: Microsoft store error code 0x80131500

In Closing

Microsoft Teams is a great way to work together from afar, but it can be annoying when it says “Away” when you’re actually using it. In this article, there are methods that will stop Teams from showing you as “Away” after 5 minutes and make sure that your presence is shown correctly. These steps will help you stay connected and busy in your Teams environment. You can use them to reset your status by hand, check for app updates, set a status message, or use third-party apps to keep your system active. Make sure to fix any problems and let your team know when you’re available clearly so there are no mistakes.

FAQs

  • Can screen sharing or active meetings prevent the “Away” status?

Yes, actively participating in screen sharing or meetings can often prevent your status from changing to “Away,” even if there is no other computer activity. This is because Teams recognizes your active engagement with the platform.

  • Can my organization enforce or override my status settings?

Depending on your organization’s policies, administrators may have the ability to enforce certain status settings. It’s advisable to check with your IT department or Teams administrators for specific guidelines.

Deezer vs Spotify: Which Is Better? [The Differences]

Streaming music has become an important part of our lives because it gives us instant access to a huge library of songs. There are many streaming services, but Deezer and Spotify are two of the biggest and best. For this Deezer vs Spotify comparison, we’ll look at all of the features, user experience, song libraries, sound quality, pricing plans, and more to help you decide which platform is better.

Deezer vs Spotify: All You Need to know on Differences

Deezer is known as one of the best music streaming services. But if Deezer and Spotify went head-to-head, who would win? Let’s see which one is better.

User Interface and Functionality

When it comes to user interface and functionality, both Deezer and Spotify have designed their platforms to provide a seamless and intuitive experience.

Deezer’s User Interface

Deezer has an attractive, user-friendly interface. The vibrant style draws attention and makes browsing fun. The home screen has four tabs: “Music,” “Podcasts,” “Favorites,” and “Explore.” This area makes tailored content, trending music, and recommended podcasts easy to find. The FLOW feature of Deezer’s interface stands out. FLOW creates a playlist based on your music tastes and history. As you like or dislike music on FLOW, the system improves its recommendations.

Spotify’s User Interface

The dark UI for Spotify is beautiful and easy to use. Because it’s simple, the platform is easy for both new and experienced people to use. On Spotify’s home screen, you can find “Home,” “Search,” “Your Library,” and “Premium.” Each place serves a different purpose and makes it easier to find features and content. The layout of Spotify shows animated album covers, which is a unique feature. Some tracks have short movies or montages that add visual interest.

Music Discovery

A key aspect of any music streaming platform is its ability to help users discover new music and artists. Both Deezer and Spotify excel in this area, utilizing advanced algorithms and personalized recommendations to deliver a tailored music discovery experience.

Deezer’s Music Discovery

Deezer personalizes music recommendations using multiple approaches. Deezer asks you to choose genres and musicians you like to create your musical identity. Deezer adapts its recommendations to your listening habits and preferences as you use it. The FLOW function of Deezer’s music discovery is notable. FLOW produces an endless playlist based on your music likes and updates it based on your feedback. This personalized radio station keeps you discovering new music you like.

Spotify’s Music Discovery

Spotify is great for finding new songs. Its smart technology makes personalized playlists and suggestions for you based on what you’ve listened to, liked songs, and bands you follow. Discover Weekly is a Monday mix that lets you find new music that you like. Spotify has more than just Discover Weekly. It also has Daily Mixes, which are personalized mixes of your best songs and new suggestions, and Release Radar, which is a playlist of new music from artists you follow. These things help you find new songs you like.

Music Libraries

The size and diversity of a music streaming platform’s library play a significant role in attracting and retaining users. Both Deezer and Spotify boast extensive music libraries, offering millions of songs across various genres and languages.

Deezer’s Music Library

Deezer offers over 90 million songs. The site supports many genres, so users can locate music they like. You can listen to pop, rock, hip-hop, jazz, or any other genre on Deezer. Deezer also connects with big record companies and independent distributors to deliver a variety of popular and independent music. This lets consumers discover new artists alongside their favorites.

Spotify’s Music Library

Spotify’s musical library exceeds 100 million recordings. Licenses from Universal Music Group, Sony Music Entertainment, and Warner Music give the platform access to a huge repertoire of hits and new releases. Spotify also lets independent musicians submit music, so consumers can discover new and hidden talent. Users can access a vast and growing music catalog because to the platform’s support of independent musicians.

Sound Quality

Sound quality is a crucial factor in the Deezer vs Spotify comparison. Both Deezer and Spotify offer different sound quality options to cater to the varying needs and preferences of users.

Deezer’s Sound Quality

Deezer offers high-quality audio streaming for its users. With a standard subscription, users can enjoy streaming at 320kbps, delivering crisp and clear sound across various devices. However, for audiophiles seeking the utmost sound fidelity, Deezer HiFi is the ultimate option. Deezer HiFi offers lossless FLAC audio streaming at 16-bit/44.1kHz, ensuring the preservation of every detail and nuance in the music.

Spotify’s Sound Quality

Spotify provides users with high-quality audio streaming as well. The platform offers up to 320kbps Ogg Vorbis streaming for its Premium users, delivering excellent sound reproduction. While Spotify does not currently offer lossless audio streaming, it has announced plans to launch a hi-fi tier in the future. This upcoming feature will cater to users who demand the highest level of sound quality.

Pricing Plans

Users think a lot about price when they are picking a music streaming service. There are free versions of both Deezer and Spotify that don’t have many features. There are also paid plans that have more features and no ads.

Deezer’s Pricing Plans

Deezer offers a range of pricing plans to suit different user needs. The options include:

  • Deezer Free: The free version of Deezer allows users to access the platform with limited features and occasional ads.
  • Deezer Premium: Priced at $10.99 per month, Deezer Premium offers ad-free listening, unlimited skips, offline listening, and high-quality audio streaming.
  • Deezer Family: The Family plan, priced at $17.99 per month, allows up to six family members to enjoy the benefits of Deezer Premium under one subscription.
  • Deezer HiFi: For audiophiles seeking the highest sound quality, Deezer HiFi offers lossless FLAC audio streaming at 16-bit/44.1kHz. This plan is priced at $19.99 per month.

Spotify’s Pricing Plans

Spotify also offers a range of pricing plans to cater to different user preferences. The options include:

  • Spotify Free: The free version of Spotify provides access to the platform, but with occasional ads and limited features.
  • Spotify Premium Individual: Priced at $10.99 per month, Spotify Premium Individual offers ad-free listening, unlimited skips, offline listening, and high-quality audio streaming.
  • Spotify Duo: The Duo plan, priced at $14.99 per month, is designed for couples under one roof. It includes all the benefits of the individual plan, along with a Duo Mix playlist tailored to the couple’s musical tastes.
  • Spotify Family: The Family plan, priced at $16.99 per month, allows up to six family members to enjoy the benefits of Spotify Premium under one subscription. It also includes a Family Mix playlist and parental controls for explicit content.
  • Spotify Student: Priced at $5.99 per month, the Student plan offers all the benefits of the individual plan, along with access to Hulu (ad-supported) and SHOWTIME.

Also Read: How to delete Spotify playlist? (Desktop and Mobile)

In Summary

Both Deezer and Spotify offer unique features and cater to diverse user interests. Spotify excels at personalization, social features, and device connectivity, making it a great music streaming service. The HiFi package from Deezer offers lossless music streaming for audiophiles, which improves sound quality.

Your needs and priorities determine whether you choose Deezer or Spotify. Spotify wins for personalization, social features, and device integration. If sound quality and a vast music library are most important, Deezer is best.

Both services include free trials, so you can choose the one that suits your music streaming needs. Deezer or Spotify will provide an immersive and engaging music streaming experience.

15 Questions to Ask When Buying a Used Car [Be a Pro]

Doing your research and asking the right questions are very important when buying a used car to make sure you get a good one at a good price. A used car is a good choice for people on a budget because its monthly payment is usually a lot less than that of a new car. But because you don’t know what happened to used cars in the past, it’s important to know what to look for and what questions to ask so you don’t get any nasty surprises down the road. In this guide, we will walk you through the essential questions to ask when buying a used car.

15 Questions to Ask When Buying a Used Car

Whether you’re purchasing from a dealer or a private seller, these questions will help you gather the necessary information to make an informed decision and find a reliable and financially smart option.

Why Are They Selling the Car?

One of the first questions you should ask is why the seller, including UsJunkCars, is parting ways with the car.. Their answer can provide valuable insight into the condition and history of the vehicle. While it could simply be that they want a new ride, it’s also possible that there are underlying issues with the car that they’re not disclosing. By understanding the seller’s motivation, you can better assess the car’s overall condition and determine if there are any red flags.

How Old is the Car?

You should know how old a car is before you buy it because of depreciation, which is when something like a car loses value over time. Cars lose a lot of value. In fact, most new cars lose 60% of their value in the first five years.1 Five years ago, a new car might have cost $25,000, but now it’s only worth about $10,000.

Before you go to the store or meet that person on Craigslist, make sure you do your research and find out how old the car is. Find out if the car’s value is still going to drop sharply or if most of the damage has already been done.

Could You Drive the Car First?

That’s enough about how the car looks. Now let’s check out how it feels. Taking a test drive is the best way to do that.

Pay close attention when you stop, change gears, and speed up while you’re test driving the car. It might be best to pass on that car and look in a different way if something doesn’t seem right. To get a good idea of how the car handles rough roads with hills, bumps, and potholes, choose a route that has some of those things.

What Did They Use the Car for Most of the Time?

Knowing how the previous owner used the car can give you an idea of its wear and tear. If the car was primarily used for long highway drives, it may have experienced less stress on its brakes and suspension compared to a car used for frequent city driving. Understanding the usage patterns can help you gauge the potential maintenance and repair needs of the vehicle.

What’s the Car’s Mileage?

The mileage of a car is a crucial factor to consider when buying used. The more a car has been driven, the more wear and tear it’s likely to have experienced. While you can typically find this information in the advertisement, it’s also worth asking the seller about their driving habits. Highway miles are generally considered less taxing on a car than city miles. By understanding the mileage and driving conditions, you can get a better sense of the car’s overall condition and potential maintenance needs.

How many People Have Owned it Before?

The number of previous owners can provide insights into the car’s history and maintenance. If a car has changed hands frequently, it may be challenging to obtain a comprehensive maintenance and repair history. Conversely, a single owner who has had the car for a long time is more likely to have taken good care of it. Understanding the ownership history can help you assess the overall reliability and condition of the vehicle.

Has the Car Ever Been in an Accident?

Accidents can significantly impact a car’s condition and value. While some accidents may not be deal-breakers, it’s important to know if there has been any damage to the vehicle’s frame or other critical components. Asking the seller about the car’s accident history is crucial, but it’s also wise to obtain a vehicle history report from reputable sources like Carfax or AutoCheck. These reports can provide detailed information about past accidents, repairs, and other important details that may impact your decision.

Could You Give me the VIN Number or the Report on the Car’s History?

A vehicle history report is an invaluable tool when buying a used car. It can reveal crucial information about the car’s past, including accidents, title information, service history, and ownership records. Many dealers offer free vehicle history reports from reputable providers like Carfax or AutoCheck.

If you’re buying from a private seller, you can purchase the report yourself to ensure you have access to accurate and comprehensive information. Obtaining a vehicle history report can help you make an informed decision and avoid potential headaches down the line.

How Was the Car Maintained and Serviced?

Regular maintenance is essential for a car’s longevity and performance. Ask the seller about the car’s maintenance history and where it was serviced. If the car was regularly serviced at a reputable dealership or by a certified mechanic, it’s a good indication that it has been well taken care of.

Additionally, inquire about any service records available. While some of this information may be included in the vehicle history report, it’s always beneficial to have direct information from the seller. A well-maintained car is more likely to be reliable and require fewer repairs in the future.

Can a Mechanic Inspect the Vehicle?

Before finalizing the purchase, it’s crucial to have the car inspected by a trusted mechanic. A pre-purchase inspection can uncover any underlying mechanical issues that may not be apparent to the untrained eye.

It’s best to choose a mechanic who is not affiliated with the seller to ensure an unbiased evaluation. If the seller refuses to allow an inspection, it’s a major red flag and may indicate hidden problems with the car. Investing in a pre-purchase inspection can save you from purchasing a vehicle with potential costly repairs.

Can I Inspect the Car’s Interior and Exterior?

To get a sense of the car’s overall state, you need to look at both the inside and outside. Check the inside for any signs of wear, like tears, spots, or strange smells. Check the outside for big dents, scratches, or rust spots that could mean the car has been in an accident or was fixed incorrectly in the past.

Open and close all the doors, the hood, and the trunk to make sure they work properly. Looking at the tires for damage or uneven wear is also important. A thorough look at the inside and outside of the car can help you figure out what might be wrong and help you make an informed choice.

What is the Car’s Title Status?

The title status of a car is an important consideration when buying a used vehicle. A clean title signifies that there are no outstanding legal or financial issues associated with the car. However, a salvage or rebuilt title indicates that the car has been previously damaged or declared a total loss.

While there are instances where buying a car with a salvage or rebuilt title can be a viable option, it’s essential to understand the associated risks and potential complications. Ask the seller about the car’s title status and verify the information through the vehicle history report.

How Does the Price Compare to its Value?

Determining the fair market value of the car is crucial to ensure you’re getting a good deal. Use reputable online pricing guides like Kelley Blue Book or Edmunds to compare the seller’s price with the car’s estimated value. Evaluate the vehicle based on its age, mileage, condition, and any extra amenities or upgrades. Armed with this information, you can negotiate a fair price and avoid overpaying for the vehicle.

Is the Price Negotiable?

Don’t be afraid to negotiate the price when buying a used car. Once you know everything you need to know about the car’s history, condition, and worth, you can use that information to get a better deal. When you’re negotiating, be polite but strong, and don’t be afraid to leave if the seller won’t accept the price you want. Keep in mind that there are many used cars out there, and it might take some time and effort to find the right one at the right price.

Also Read: How to Sell on Amazon Without Inventory (2024 Updated)

In Summary

Now that you know which questions to ask when buying a used car, you need to think about it carefully and do a lot of study. You can be sure you’re making a good investment and getting a reliable car by asking the right questions and gathering the right information. Take your time and be ready to leave if something doesn’t feel right. You can feel confident in the used car market and find a car that fits your needs and your budget if you work hard and pay attention to the little things. Have fun looking for a car!

What is Textverified and How Does It Work? (2024 Guide)

Online safety and privacy are top priorities. Cyber dangers and data breaches are increasing, therefore individuals and businesses are looking for solutions to protect their data. Account verification is essential for online security. This ensures only authorized users can access important data and services. In this guide, we will explore the features and benefits of Textverified, a leading provider of account verification services.

What is Textverified?

A lot of people use Textverified to check the validity of phone numbers online. It provides a safe and dependable way to check phone numbers for many reasons, such as creating an account, using two-factor authentication, and identity verification. By using Textverified, businesses and individuals can ensure the authenticity of their users, mitigating the risk of fraud and unauthorized access.

Textverified Features

Textverified simplifies the process of account verification by providing users with real US phone numbers that work with any service. Whether you need to verify your identity on a social media platform, mobile app, or any other online service, Textverified has you covered. Let’s explore some of the key features and functionalities of Textverified in more detail.

  • Huge Coverage

One of the key features of Textverified is its extensive coverage of phone numbers from different countries. This global reach enables businesses to verify phone numbers from around the world, making it ideal for international operations.

  • Voice

In some instances, account verifications may require a phone call for voice verification. Textverified understands this need and provides the option to select the “voice” option. By choosing this option, you can receive your verification code over the phone. Similar to SMS verification, you will only be charged if the call successfully connects.

  • Secure Subaccounts

Subaccounts let users select one account as a “Parent” and distribute credits to several “Child” accounts in Textverified. Employers with several account verification personnel will benefit from this capability. Track each account’s verification history with subaccounts. Textverified permits up to 5 subaccounts, but support can help you add more.

  • Flexibility with Area Codes

Textverified allows users to choose any area code listed in their dropdown menu. This feature provides flexibility and allows you to receive a phone number with a specific area code. You can find this filter under “Advanced Options” on the verification page.

  • Detailed Verification History

Textverified provides a complete verification history. This feature details all your verifications. The service name, phone number, verification code, pricing, and SMS/voice verification are displayed. To see if you can reuse a number, check the verification history.

  • Android App

Textverified offers a user-friendly Android app that allows you to conveniently access their services on your mobile device. The app provides a seamless experience for managing account verifications and accessing temporary phone numbers.

  • Easy Payments and Cryptocurrency Support

You can pay at TextVerified with any major credit or debit card. You can also use Ethereum, Bitcoin, and Tether among many other significant cryptocurrencies. Users will have a variety of choices for supporting their Textverified accounts thanks to this flexible payment structure.

  • Larger Verification Volumes and API Support

Textverified permits one verification at a time by default. If you need more verifications or faster processing, Textverified can boost your concurrent verification limitations. This upgrade benefits power users and API integrators of Textverified’s services. Textverified API integration is simple due to HTTP REST principles. Their API support team can help with any concerns.

  • 24/7 Tech Support

Textverified prioritizes providing excellent customer support. Their dedicated tech support team is available around the clock to answer your questions and assist with any issues that may arise within 24 hours. If you require a service that is not listed in their database, you can contact their team, and they will strive to add it to their offerings.

Textverified Alternatives

While Textverified is a powerful and reliable service, it’s always good to explore alternative options to suit different needs and preferences. Here are a few alternatives to Textverified that you can consider:

  • Twilio: Twilio is a popular cloud communications platform that offers phone number verification services. It provides a range of features, including SMS and voice verifications, and supports a wide variety of programming languages and platforms.
  • Nexmo: Nexmo is another trusted provider of phone number verification solutions. It offers a comprehensive set of APIs and tools for seamless integration, along with features like number insights and real-time analytics.
  • Sinch: Sinch is a global communications platform that offers phone number verification services through its robust API. It provides secure verification solutions, along with additional features like voice calling and messaging capabilities.
  • Plivo: Plivo is a cloud communication platform that helps organizations add voice and SMS to their apps. They provide APIs (Application Programming Interfaces) that let developers add phone calls, text messaging, and conference calls to their software or apps.
  • VerifyWithSMS: VerifyWithSMS is a service that specializes in providing disposable phone numbers for users to receive SMS verifications or OTPs (One-Time Passwords) from various websites and applications. This type of service is commonly used to verify accounts when users do not wish.

When choosing an alternative to Textverified, it’s important to consider factors such as pricing, available features, ease of integration, and customer support. Conduct thorough research and evaluate your specific requirements to make an informed decision.

How to Fund Textverified

To make use of Textverified’s services, you need to have sufficient funds in your account. Here’s a step-by-step guide on how to fund your Textverified account:

  • Create an account: If you don’t already have one, visit the Textverified website and sign up for an account. Finish the registration by providing the required details.
  • Navigate to the funding section: Once you have logged in to your Textverified account, navigate to the funding section. The dashboard or account settings are normally where you’ll find this.
  • Select a funding method: Textverified offers various funding methods, including credit/debit cards, cryptocurrencies, and online payment gateways. Select the option that best suits your needs.
  • Enter the funding amount: Specify the amount you wish to add to your Textverified account. Take into consideration the pricing structure and your expected usage to determine the appropriate funding amount.
  • Complete the transaction: Follow the prompts and provide the necessary details to complete the transaction. Please verify the details twice before moving on.

Remember Textverified accepts all major credit/debit cards for payments. Additionally, they support a variety of major cryptocurrencies, including Bitcoin, Litecoin, Ethereum, USD Coin, Monero, and Tether ERC20 and TRC20. This flexible payment system ensures that users have multiple options for funding their Textverified accounts.

How to Reuse a Number on Textverified

When you need to use the same number for several verifications at once, TextVerified gets it. The “Use Again” function was developed to meet this demand. To reuse a verification number within a minute or two after using it, just click the “Use again” button on the verification page. You can streamline your verification processes and save time with this tool.

In case you need to reach a number that you used a few hours ago and are unable to access it, Textverified provides the “Resurrect” option. To see if the number is still available on Textverified, go to your Verification History page and click the “Resurrect” option.

But once a number is removed from the platform, it can never be recovered. Textverified offers leasing alternatives for phone numbers if you need them for a longer period. Remember the website may charge you a credit of around 0.10 for each reuse or resurrect.

Textverified Card Declined, What to do?

If you face a situation where your card is declined while attempting to fund your Textverified account, don’t panic. If you want to figure out what’s wrong, try these steps:

  • Check card details: Verify that the card details you entered are correct, including the card number, expiry date, and CVV code. Even a small typo can result in a declined transaction.
  • Contact your bank: Reach out to your bank or card issuer to ensure that there are no issues or restrictions on your card. Sometimes, banks may impose security measures that prevent certain transactions.
  • Try an alternative payment method: If your card continues to be declined, consider using an alternative payment method. Textverified offers various funding options, such as cryptocurrencies and online payment gateways, which may work better for you.
  • Clear cache and cookies: Clearing your browser’s cache and cookies can help resolve any temporary issues that may be causing the card decline. Close the browser, clear the cache, and try the transaction again.
  • Contact Textverified support: If none of the above steps resolve the issue, reach out to Textverified’s customer support. They will be able to assist you further and provide guidance on how to proceed.

Remember that having your card denied is normal and can usually be fixed with a few easy steps. When you’re ready to fund your Textverified account, don’t worry. Just follow the debugging guide.

Also Read: Creative ways to collect customers’ phone numbers for future texting campaigns

In Summary

Textverified is a strong program that provides safe phone number verification services. You can get the most out of Textverified for your personal and business needs if you know how to use its features, look into other choices, pay for the service, reuse a number, and fix problems. Use this complete guide to make sure that the people you talk to online are real and that your conversations are safe.

How to Stop OneDrive from Syncing: Step-By-Step

Cloud storage is an important tool for both people and businesses in this digital age. OneDrive is Microsoft’s cloud storage service that lets users store files and keep them in sync on all of their devices. But there are times when you might want to turn off OneDrive sharing. This complete guide will show you different ways on how to stop OneDrive from syncing on different devices and operating systems, whether you’re having slow sync speeds, choosing the wrong files to sync, or just want to stop automatic syncing.

Why Should I Stop Syncing OneDrive?

OneDrive offers a convenient way to backup and sync your files, including photos, documents, videos, and more. However, there are several reasons why you may need to disable OneDrive syncing:

  • Slow Syncing Speeds: OneDrive may sometimes sync files at a sluggish pace, making it seem like the process will never finish.
  • Incorrect File Selection: You may have mistakenly chosen the wrong items to sync to OneDrive, and you want to rectify this.
  • Unwanted Automatic Syncing: OneDrive might automatically sync files that you do not want to be synced.
  • If you find yourself facing any of these situations, it’s crucial to know how to turn off OneDrive syncing to regain control over your files.

How to Stop OneDrive from Syncing

These steps will show you how to stop OneDrive from syncing. You can use these solutions on PCs, laptops, notebooks, tablets, cell phones, and other devices. They can also be used on different operating systems, such as Windows, Linux, Mac, Android, and iOS.

Method 1: Pause OneDrive Syncing

If you want to temporarily suspend OneDrive’s syncing process, you can utilize the built-in Pause feature. Follow these steps:

  • Click on the OneDrive taskbar icon.
  • In the pop-up window, click “More (three dots).”
  • Select “Pause syncing.”
  • Choose the duration for which you want to pause the process: 2 hours, 8 hours, or 24 hours.

Method 2: Quit OneDrive Syncing

If you want to stop OneDrive from syncing altogether, you can choose to quit the application. Here’s how:

  • Right-click on the OneDrive taskbar icon.
  • Select “Quit OneDrive” from the menu that appears.

Method 3: Unlink Your Computer from OneDrive

If you want to sever the connection between your computer and OneDrive, you can unlink your PC from your OneDrive account. Follow these steps:

  • Right-click on the OneDrive taskbar icon.
  • Click “Settings” in the pop-up window.
  • In the Account tab, click “Unlink this PC.”
  • Confirm the action and unlink the account from your computer.

Method 4: Disable Network Connection

To stop OneDrive from syncing in a roundabout way, turn off the network connection on your computer. Cutting off the network connection stops any jobs that need to be done to transfer files. In order to do this, you can:

  • Disconnecting your computer from the internet.
  • Disabling Wi-Fi and cellular data on your mobile device.
  • Enabling “Airplane Mode” on your phone or tablet.

Method 5: Change Auto Sync Settings

OneDrive’s automatic sync settings may be the cause of unwanted syncing. Adjusting these settings can help you regain control over the syncing process. Follow these steps:

  • Click on the OneDrive taskbar icon.
  • Click “Settings” in the pop-up window.

In the Auto Save tab, uncheck the options for automatically saving photos, videos, and screenshots to OneDrive.

Method 6: Remove Source Files in OneDrive Folder

To prevent specific files or folders from being synced to OneDrive, you can remove them from the local OneDrive folder. By doing so, you effectively block them from syncing. Here’s how:

  • Open Windows Explorer and locate the OneDrive folder.
  • Alternatively, click on the OneDrive taskbar icon and select “Open folder.”
  • Remove the files you do not want to sync from the OneDrive folder.

Method 7: Uninstall OneDrive

If none of the previous methods solve your syncing issues, you can uninstall OneDrive from your computer. Uninstalling OneDrive does not delete any files from your OneDrive cloud storage. To uninstall OneDrive:

  • Open the Control Panel from the Start menu.
  • Go to “Uninstall a program.”
  • Locate OneDrive and select “Uninstall.”

Method 8: Hide OneDrive

In cases where OneDrive is built into Windows and cannot be uninstalled, you can hide it to prevent syncing. Follow these steps:

  • Right-click on the OneDrive icon in the Windows file explorer.
  • Select “Properties.
  • In the General tab of the OneDrive Properties window, check the box for “Hidden.”
  • Click “OK” to save the changes.
  • Finally, quit OneDrive from the system tray icon to stop it from syncing.

Method 9: Disable OneDrive Auto Start

Prevent OneDrive from automatically starting when you sign in to Windows by following these steps:

  • Open the OneDrive settings window.
  • In the Settings tab, uncheck the option for starting OneDrive automatically.
  • Save the changes.

Method 10: Use the OneDrive Troubleshooter

If you’re experiencing persistent syncing issues, you can use the OneDrive Troubleshooter to diagnose and resolve the problem. Running the troubleshooter might provide solutions to common OneDrive syncing errors.

In Closing

If OneDrive is syncing slowly, choosing the wrong files, or automatically sharing things you don’t want it to, you need to stop it. You can get back control of your files and choose when and what to sync by following the steps in this guide. If you keep having problems with sync, you might want to use a reliable option like CBackup to make sure that your files are backed up and synchronized without any problems. With the tips and tricks in this complete guide, you can take care of your cloud storage experience and enjoy easy syncing and backup.

How to Insert Text Box in Google Docs (Full Guide)

Text boxes are a useful word processing tool because they allow you to arrange text in specified regions, making it easier to organize papers and create a professional look. Google Docs, a free alternative to other word-processing programs, offers several methods to insert and customize text boxes. This detailed guide will show you the best ways on how to insert text box in Google Docs, give you tips on how to use them correctly, and talk about how to make them fit your needs.

How Do I Use a Text Box in Word?

In Word, a “text box” is a tool or part that lets you put text in a certain spot in a document. This feature can be found in many word processors and office suites. A text box’s job is to give you options for organizing information by letting you put text in different parts of the paper while still keeping it looking clean and professional.

How to Insert Text Box in Google Docs (The Best Ways)

Now that we understand the benefits of using text boxes, let’s explore the best ways to insert them in Google Docs.

Method 1: Using the Drawing Tool

The drawing tool in Google Docs provides a simple and straightforward method to insert a text box. Follow these steps to add a text box using the drawing tool:

  • Select “Insert” from the top menu.
  • Hover over “Drawing” in the drop-down menu.
  • The drawing tool can be accessed by selecting “New” from the side menu.
  • In the drawing tool, click on the “Text Box” icon, which resembles a capital T inside a box.
  • Click and drag your cursor to create the desired size and shape of the text box.
  • Release the mouse button and start typing your text within the text box.
  • Customize the text box by using the toolbar options to change the font, size, color, and alignment.
  • Adjust the size of the text box by clicking and dragging the blue dots located on the corners.
  • Once you are satisfied with the text box, click the blue “Save and close” button to add it to your document.

Method 2: Using the Shapes Tool

Another way to insert a text box in Google Docs is by utilizing the shapes tool. This method allows you to choose from a variety of shapes to serve as your text box. Follow these steps to insert a text box using the shapes tool:

  • “Insert” is the first option on the menu bar.
  • Hover over “Drawing” in the drop-down menu.
  • Select “New” from the side menu to open the drawing tool.
  • In the drawing tool, click on the “Shapes” icon, which appears as a combination of a circle and a square.
  • Choose your desired shape category from the menu, such as rectangles, arrows, circles, or equation symbols.
  • Click and drag your cursor to create the shape you want for your text box.
  • Double-click the center of the shape to add and edit the text within the text box.
  • Customize the text box by using the toolbar options to change the font, size, color, and alignment.
  • Adjust the size of the text box by clicking and dragging the blue dots located on the corners.
  • Once you are satisfied with the text box, click the blue “Save and close” button to add it to your document.

Method 3: Creating a Single-Cell Table

An alternative way to create a text box in Google Docs is by using a single-cell table. Although tables are primarily used for organizing data, you can manipulate them to function as text boxes. Here’s how to create a text box using a single-cell table:

  • Click on “Insert” in the top menu.
  • Hover over “Table” in the drop-down menu.
  • Select the top left corner cell from the table menu, creating a one-by-one table on your document.
  • Type your desired text within the cell of the table.
  • Customize the font style and formatting of the text as needed.
  • Adjust the size of the text box by hovering your mouse over the lines of the table and dragging them to resize the cell.

With these methods in mind, you can choose the one that suits your needs and preferences when inserting text boxes in Google Docs.

Why Is Using Text Box in Google Docs a Good Idea?

Text box in Google Docs offer several advantages and can be used in various ways to improve your documents’ quality. Here are a few examples of text boxes in Google Docs:

  • Moving Text: Text boxes simplify the process of relocating information within a document, allowing you to easily move text or blocks of text to different areas.
  • Organizing Information: Text boxes provide a visual way to present and organize information, making it easier for readers to comprehend complex data, such as charts or diagrams.
  • Highlighting Information: Text boxes can be used to emphasize or draw attention to specific information within a document, making it stand out from the rest of the content.
  • Using Colors: Google Docs allows you to customize the background color of text boxes, enabling you to incorporate graphic design elements and visually enhance your documents.

How to Make the Most of Google Docs Text Box

Probably you want to be ahead of everyone and that’s why you should consider to make the most of text boxes in Google Docs. If so, here are some tips you might want to use:

  • Place Images in Text Boxes: To enhance the visual appeal of your document, insert images within text boxes. This allows for easier movement of both text and images within the document, creating a cohesive layout.
  • Try Different Arrangements: Experiment with arranging text boxes in various ways to achieve the desired visual hierarchy. Use commands like “Bring forward,” “Bring to back,” “Bring to front,” and “Send backward” to layer text boxes and organize them effectively.
  • Delete Unwanted Boxes: If you accidentally create too many text boxes or decide to remove a text box, simply click on the box and press the “Delete” key on your keyboard. If you delete a text box by mistake, you can use the “Undo” option in the “Edit” menu to retrieve it.

Also Read: Microsoft Excel Vs. Google Sheets: What You Need to Know?

In Summary

Text boxes in Google Docs are useful for organizing information, drawing attention to important details, and making your papers look better. If you follow the steps in this guide, it will be easy to add text boxes to Google Docs and change them to fit your needs. Now that you know these tips and tricks, you can use text boxes in Google Docs to their fullest and improve the process of making documents.

How to Delete Wallpaper on iPhone: iOS 16 and iOS 17 [The Complete Guide]

In recent years, Apple has introduced significant changes to the customization options available for iPhone wallpapers. With iOS 16 and iOS 17, users have more control over their lock screen aesthetics than ever before. It is important to know how to remove wallpapers on your iPhone, though, if your gallery is full of old designs that you don’t want anymore. In this complete guide, we will show you how to delete wallpaper on iPhone on both iOS 16 and iOS 17.

Is It Difficult to Remove the Wallpaper from iOS 16 and iOS 17?

Removing or changing wallpaper on iOS is typically a straightforward process that Apple has consistently maintained across several iterations of the operating system, including iOS 16 and iOS 17. To “remove” a wallpaper effectively means to replace it with another.

There’s no option to have a blank screen without any wallpaper, but you can always choose a wallpaper that’s a solid color that resembles a blank or clear background if you want a minimalistic look. However, that’s not the case, as we’ll talk about how to delete wallpaper on iPhone in the easiest way.

Also Read: “shared album not showing up

How to Delete Wallpaper on iPhone

If you’re seeking a means to remove the wallpaper off your iPhone, you’ve come to the correct spot. Continue reading to find out how to change and delete your iPhone’s wallpaper.

On iOS 16

To begin, it’s important to note that removing wallpapers works on iPhones running iOS 16 and newer versions. If your iPhone is on an older version, you won’t have the option to delete wallpapers. The best part is that you don’t need to install any third-party applications, as you can delete lock screen wallpaper setups directly from the lock screen gallery. Follow these simple steps:

  • Use Face ID or Touch ID to unlock your iPhone. Please note that you cannot access the wallpaper gallery by unlocking the iPhone with a passcode.
  • To access the lock screen, tap and hold an empty space.
  • Swipe left or right to find the wallpaper you want to remove from the lock screen gallery.
  • Once you’ve found the desired lock screen setup, swipe up on the wallpaper.
  • Tap the Remove icon to delete the lock screen wallpaper combination from your iPhone.
  • Choose “Delete this Wallpaper” to confirm the removal.

It’s important to keep in mind that deleting a lock screen wallpaper will also delete the associated home screen background, clock font, color, size, and any widgets you had on that lock screen. However, if you want to keep the widgets and clock customizations but change the image, there’s a simple workaround.

  • Press and hold the lock screen to unlock your iPhone.
  • Tap “Customize” and then “Lock Screen.”
  • Choose the “Photos” or “Emoji” icon to select a new photo for the background.
  • Select your new background and tap “Done.”

On iOS 17

It’s worth mentioning that the process of deleting wallpapers is the same. However, as of now, there is no option to select and delete multiple wallpapers at once. Therefore, you must manually go to each screen and remove them individually.

How Can I Make My Lock Screen Look Better?

Now that you know how to delete wallpapers on iOS 16 and iOS 17, let’s explore some additional tips for customizing your lock screen to create a personalized and visually appealing experience.

  • Choose the Right Wallpaper

Choosing the right picture is the first thing you should do to make your lock screen look unique. When picking an image, think about your own style, hobbies, and personal tastes. You can either use the pictures that Apple gives you or add your own. In addition, iOS 17 adds a depth effect to wallpapers, which gives your lock screen a new look.

  • Experiment with Widgets

Widgets are a fantastic way to personalize your lock screen and provide quick access to important information. iOS 16 and iOS 17 offer a wide range of widgets that you can add to your lock screen, such as weather, calendar, reminders, and more. Experiment with different widgets to find the ones that best suit your needs and enhance your lock screen’s functionality.

  • Customize the Clock Font, Color, and Size

One cool thing about iOS 16 and iOS 17 is that you can change the style, color, and size of the clock on your lock screen. This lets you add a personal touch and make the clock look like the picture you’ve chosen. Try out different styles, colors, and sizes until you find the best one to match the look of your lock screen.

  • Utilize Focus Mode

Focus Mode is a new feature in iOS 17 that lets you set which lock screens to show automatically based on your tastes. Like, you can set a lock screen that is related to work for when you are at work and one that is related to rest for when you are at home. Use this feature to make switching between different lock screen settings look smooth.

In Closing

With the customization choices in iOS 16 and iOS 17, you can make a lock screen that fits your personal style and tastes. By following the guide, you should be able to easily get rid of wallpapers you don’t want and add new ones. Try out a bunch of different wallpapers, apps, and clock settings to make your lock screen really stand out. Enjoy the process of making your iPhone unique, and let your personality shine through on your lock screen.

Ring Chime Vs Chime Pro: What Are Their Differences?

Ring Chime works with all of your Ring Video Doorbells and Cams, so you can hear alerts in real time from anywhere in your house. They are made to improve the performance of your Ring video doorbells and security cameras. These devices allow you to receive notifications longer, making sure you never miss a moment by playing alerts in your home. We’ll look at the Ring Chime vs Chime Pro and their main differences and help you to pick the one that fits your needs and works best with your Ring home security system.

Ring Chime Vs Chime Pro (The Differences)

The Ring Chime is a doorbell chime that works with Wi-Fi and can be easily linked to your Ring Doorbell with the Ring App. It has features like a “do not disturb” mode and ringtones that you can change. One problem with the Ring Chime is that the sound volume isn’t very loud, so it might be hard to hear in a big house.

Ring Chime Pro, on the other hand, is a better version of Ring Chime. In addition to having all the same features as the Ring Chime, it can also be used as a Wi-Fi extension and make alerts louder. As well as making the alerts from your Ring Doorbell louder, the Chime Pro can also increase the range of your Wi-Fi network, making sure that all of your Ring devices have a strong link. Here’s a comparison between Ring Chime and Chime Pro:

  • Wi-Fi Connectivity

One of the primary differences between the Ring Chime and Chime Pro is their Wi-Fi connectivity. While the Ring Chime supports a 2.4GHz Wi-Fi network, the Chime Pro supports both 2.4GHz and 5GHz networks. The advantage of the 5GHz network is its faster data transfer rate, but its range is slightly shorter compared to the 2.4GHz network. If your doorbell and chime are close enough, the Chime Pro’s 5GHz band can provide more effective short-distance connectivity.

  • Wi-Fi Improver

The Chime Pro has an additional feature that sets it apart from the Ring Chime – it can function as a Wi-Fi extender. If you have areas in your home where your Wi-Fi signal is weak or does not reach, you can use the Chime Pro to extend the range and improve the connection for your Ring devices. This feature is particularly useful if your Ring Doorbell is far from your Wi-Fi router.

  • Alert Amplification

Another exclusive feature of the Chime Pro is alert amplification. If you have difficulty hearing the sound of your doorbell chime from a distance, the Chime Pro can amplify the alerts produced by your Ring Doorbell and reproduce them through its built-in speaker. This ensures that you can hear the doorbell from any part of your home, even if you are far away from the chime.

  • Size

In terms of size, the Chime Pro is slightly larger than the Ring Chime. The Ring Chime measures 3.06 x 2.44 x 0.98 inches, while the Chime Pro measures 4.06 x 2.72 x 1.00 inches. However, the difference in size is minimal and should not be a significant factor in your decision-making process.

  • Nightlight

If you value additional convenience and functionality, the Chime Pro offers a built-in nightlight. This nightlight provides a soft and cozy glow, making it easier to navigate in the dark. This feature can be particularly useful if you need to move around your house at night but don’t want to turn on the main lights.

Similarities in Ring Chime and Chime Pro

While there are notable differences between the Ring Chime and Chime Pro, there are also several similarities. Both chimes support custom ringtones, allowing you to choose a sound that suits your preferences.

They also feature an LED indicator that lights up when they are connected to the internet, providing a visual confirmation of their status. Additionally, both chimes come with a one-year warranty, ensuring peace of mind and protection for your investment.

Ring Chime Vs Chime Pro: Full Features Comparison (All the Details)

To summarize the key differences between the Ring Chime and Chime Pro, here is a comparison table:

FeaturesRing ChimeChime Pro
Wi-Fi ConnectivitySupports 2.4GHz Wi-Fi networkSupports both 2.4GHz and 5GHz networks
Wi-Fi ExtenderNoYes
Alert AmplificationNoYes
Supported DevicesSupports all Ring devicesSupports all Ring devices
Custom RingtonesYesYes
LED IndicatorYesYes
WarrantyOne yearOne year
Size3.06 x 2.44 x 0.98 inches4.06 x 2.72 x 1.00 inches
NightlightNoYes

Also Read: Exploring Commercial Real Estate Loans: A Comprehensive Guide for Entrepreneurs

What Is the Purpose of the Ring Chime Pro?

The Ring Chime Pro is a doorbell chime that can be plugged into a power outlet and connected to your Ring doorbell or camera. Its main purpose is to notify you of alerts and provide audio feedback when someone presses your doorbell or motion is detected. In addition, the Chime Pro can extend the range of your Wi-Fi network, ensuring a strong connection for all your Ring devices.

In Summary

When choosing between the Ring Chime and Chime Pro, consider your needs. Wi-Fi extension and warning amplification make the Chime Pro a smart upgrade for larger households or areas with poor Wi-Fi reception. However, the Ring Chime may function if your house is small and your Wi-Fi is strong everywhere. Choose the sound that best suits your needs. Make your Ring Doorbell more helpful and convenient to make your house smarter and better connected.

FAQ

  • Is the Ring Chime Pro Worth It?

The Ring Chime Pro offers additional features such as Wi-Fi extension and alert amplification for a little more than $20 compared to the Ring Chime. However, the value of these additional features depends on your specific needs. If you have a large house or areas with poor Wi-Fi coverage, the Chime Pro may be a worthwhile investment to ensure a strong connection and the ability to hear alerts from any part of your home.

  • Does Ring Chime Have Different Sounds?

One problem with the Ring Chime is that the sound volume isn’t very loud, so it might be hard to hear in a big house. To sum up, Ring Chime Pro is the improved form of the Ring Chime. It is definitely better, even in terms of how it sounds. But if you’re not sure about how the Ring Chime sounds, you can ask for more information in the website’s sales section.

  • Where Should the Ring Chime Pro Be Installed?

The Ring Chime Pro should be installed in a location that allows it to extend the range of your Wi-Fi network effectively. Ideally, it should be placed between your Wi-Fi router and your Ring devices, ensuring a strong and stable connection. Experiment with different locations to find the best spot for optimal performance.

Exit mobile version